This method should work with any version of PS even Elements.
All you do is convert the image to B&W by any method you like. Just make sure the final image is in RGB color mode, and flattened so there is only the one background layer. Then with your layers pallet open hold down your "ctrl" key with your left hand. While holding down the "ctrl" key with your left hand type these letters with your right in this order "J,I,A,C,D," what this will do is duplicate your background into a new layer, invert it into a negative, select it, copy it to the clipboard, and then deselect it. When you have done that drag the layer to the trash can and get rid of it as it is no longer needed.
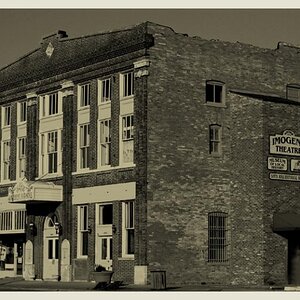
Then click on the half white/black circle and create a new layer. This time select "Color Fill". It will open up the color picker tool. Make sure the dot next to the letter H is checked (H stands for Hue) and type in 35 next to it. This will give you a nice brown hue to work with in the color picker window. Click in the far right hand side about 1/4 of the way down and you will pick a nice light brown color. Click OK. Your image will now be filled with that as a solid color. Go up to the top of the layers pallete where it says "normal" and click on that to open up the drop menu and select Multiply. You will now be able to see a little bit of your picture shining through.
Now hold down your “alt” key in Windows (“command” in Mac) and click on the little white rectangle on the color fill layer. Your image should turn white. What you are doing is looking at the “layer mask” for that layer.
(If you do not know what a layer mask is let me take a minute to explain. To put it simply a layer mask tells Photoshop what part of the layer to use and what part not to use. Photoshop uses white to display the part of the layer it will use, and black to display the part of the image it won’t use. Imagine if you shown a flash light through the layer the light would shine right through the white part, but get blocked by the black part. The cool thing is that Photoshop can also use grayscale values to let different amounts of the layer shine through. Which brings us to our next point)
Remember the very first thing we did was to place a negative copy of our image on the clipboard? We are going to use it now. With the plain white mask now covering your image hit the “ctrl” key again with your left hand and hit the “v” key with your right to paste the negative image as a mask.
What this will do is allow your sepia tone to shine through in the mid and shadow parts of your image, but leave the highlights untouched just like in a wet darkroom. Once you have pasted the mask, click on the background layer to view your creation.
If the toning is to dark for you just click on the little brown/tan square on your “color fill” layer and that will open up the color picker window again. Then click on a lighter color simply by clicking up higher on the right. If you want a darker tone just click down lower on the right. You can also click further over to the left which will desaturate your tone a bit, or to put it another way mix it with gray.
Once you do this once or twice you will be able to do it in about 5 seconds, and then go back and have full control over the amount toning you apply. You are also not limited to just Sepia tones. You can do this with any color!
All you do is convert the image to B&W by any method you like. Just make sure the final image is in RGB color mode, and flattened so there is only the one background layer. Then with your layers pallet open hold down your "ctrl" key with your left hand. While holding down the "ctrl" key with your left hand type these letters with your right in this order "J,I,A,C,D," what this will do is duplicate your background into a new layer, invert it into a negative, select it, copy it to the clipboard, and then deselect it. When you have done that drag the layer to the trash can and get rid of it as it is no longer needed.
Then click on the half white/black circle and create a new layer. This time select "Color Fill". It will open up the color picker tool. Make sure the dot next to the letter H is checked (H stands for Hue) and type in 35 next to it. This will give you a nice brown hue to work with in the color picker window. Click in the far right hand side about 1/4 of the way down and you will pick a nice light brown color. Click OK. Your image will now be filled with that as a solid color. Go up to the top of the layers pallete where it says "normal" and click on that to open up the drop menu and select Multiply. You will now be able to see a little bit of your picture shining through.
Now hold down your “alt” key in Windows (“command” in Mac) and click on the little white rectangle on the color fill layer. Your image should turn white. What you are doing is looking at the “layer mask” for that layer.
(If you do not know what a layer mask is let me take a minute to explain. To put it simply a layer mask tells Photoshop what part of the layer to use and what part not to use. Photoshop uses white to display the part of the layer it will use, and black to display the part of the image it won’t use. Imagine if you shown a flash light through the layer the light would shine right through the white part, but get blocked by the black part. The cool thing is that Photoshop can also use grayscale values to let different amounts of the layer shine through. Which brings us to our next point)
Remember the very first thing we did was to place a negative copy of our image on the clipboard? We are going to use it now. With the plain white mask now covering your image hit the “ctrl” key again with your left hand and hit the “v” key with your right to paste the negative image as a mask.
What this will do is allow your sepia tone to shine through in the mid and shadow parts of your image, but leave the highlights untouched just like in a wet darkroom. Once you have pasted the mask, click on the background layer to view your creation.
If the toning is to dark for you just click on the little brown/tan square on your “color fill” layer and that will open up the color picker window again. Then click on a lighter color simply by clicking up higher on the right. If you want a darker tone just click down lower on the right. You can also click further over to the left which will desaturate your tone a bit, or to put it another way mix it with gray.
Once you do this once or twice you will be able to do it in about 5 seconds, and then go back and have full control over the amount toning you apply. You are also not limited to just Sepia tones. You can do this with any color!
 thanks a lot for this
 but thanks Wally, good effect!
![[No title]](/data/xfmg/thumbnail/37/37603-739c5d9b541a083a12f2f30e45ca2b7b.jpg?1619738147)
![[No title]](/data/xfmg/thumbnail/32/32698-38e2346942223e17b43fb958f66064c1.jpg?1619735601)


![[No title]](/data/xfmg/thumbnail/32/32701-51bacbc6ea9d40683123c14f053d4742.jpg?1619735603)