a rusted tub...

brighteyesphotos

TPF Noob!
Joined
Aug 9, 2006
Messages
347
Reaction score
1
Location
Battle Creek, MI
Website
www.brighteyesphotos.net
Can others edit my Photos
Photos OK to edit
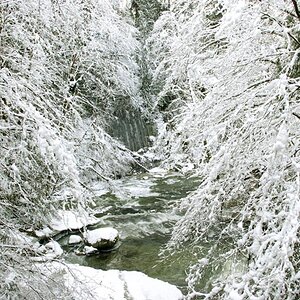
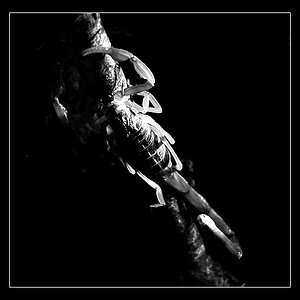
... in the middle of the woods.

So many possibilities with this location yet so limited because I have to go through someone else's yard to get to this spot.

DSC01469.jpg
 
Nice eye and capture.

I played a little with the composite curve in PS, to bring out the green and rust, darken and increase the contrast (excuse the slightly hot area in the tub, I'm sure on the original file and with more time that could be eliminated). I know people here are touchy about edits (especially from someone who prefers not to allow edits unless specifically requested), that includes me. So if you don't like it I apologise and I'll remove it.

tub.jpg
 
Thanks, that looks better. I'm still learning PS and all the little things. It seems like every time I play with curves, I end up with a rather fake looking picture. Levels and color balance I can do kinda (I wonder about my eyes sometimes though) but curves is still escaping me a little. Would you be able to do a screen shot of the curves you did?
 
Thanks, that looks better. I'm still learning PS and all the little things. It seems like every time I play with curves, I end up with a rather fake looking picture. Levels and color balance I can do kinda (I wonder about my eyes sometimes though) but curves is still escaping me a little. Would you be able to do a screen shot of the curves you did?

With curves, try just making very slight adjustments.
 
Thanks, that looks better. I'm still learning PS and all the little things. It seems like every time I play with curves, I end up with a rather fake looking picture. Levels and color balance I can do kinda (I wonder about my eyes sometimes though) but curves is still escaping me a little. Would you be able to do a screen shot of the curves you did?

If you learn curves right, you can probably stop using brightness/contrast/hue/saturation/colour balance for most pictures. Here's a quick intro. Think about what you want to bring out in your image, for example in this Image I thought the colour balance was accurate so I left the individual channels alone and used the composite RGB curve. While in adjust>curves I use the eyedropper tool. Now when you click on somewhere in your image with the eyedropper tool a small circle appears on your curve (non-permanent), now keep the mouse click depressed and move the dropper around, the circle will slide up and down on the line. Depending on what you want to accentuate in your image, a face a flower, move the eye dropper (mouse clicked and locked) over that particular area while in curves and take note of the extremes on the curve.

Now click on the curve (without moving it) to create two points at those extremes. Between those two points is what you want to accentuate or bring out in your image (that includes colour/contrast/brightness). Move incrementally both points (one at a time of course) closer to each other only in the horizontal plane to begin with. As mentioned, small steps and changes and watch the preview. You're goal is to make the line between your two points more steep. This of course does compromise other parts of the image but that's ok since you want ot bring your main subject or particular colour set into attention.

Finally use Fade Curves once happy with the result and immediately after finishing with the cures for a more natural transition. This command only appears immediately after using the curves command (can't remember which menu).

I'll post an example curve adjustment if you still need it later, since I don't have PS on the computer I'm using right now. Hope that helped.
 

Most reactions

Back
Top