Advices on Street photography attempts

Esprever

TPF Noob!
Joined
Nov 28, 2017
Messages
4
Reaction score
1
Can others edit my Photos
Photos OK to edit
Hello everyone.

I'm super new for that, and I would need a help from more experts eyes than mine.
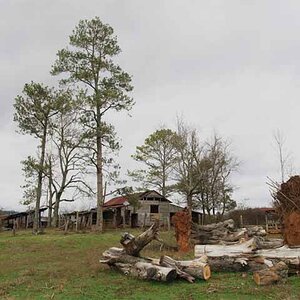
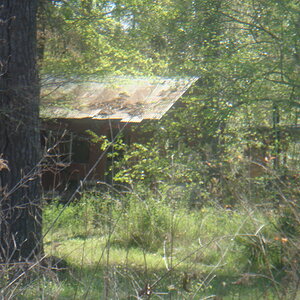
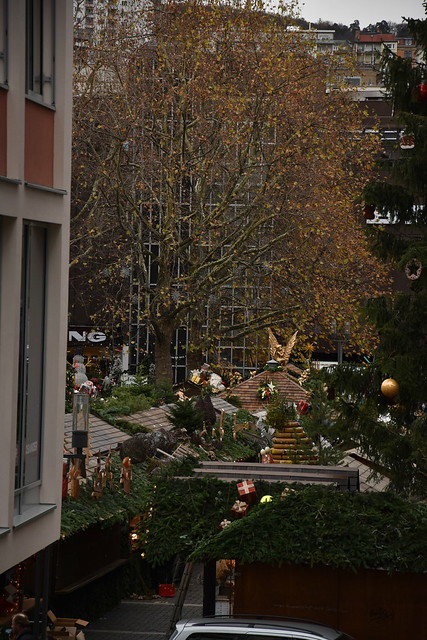
Today I roamed the street and took a look at Christmas market. I tried to take pictures, but I think I don't understand the settings of a good street/landscape pictures.


I took 4 pictures of the same places, trying to play with the ISO, exposure and white balance...
But the only thing I changed was the colour of the pictures. I really wanted a good focus, on the tree in background, or on the first plan, or idk, an interesting picture.
Anytime Im changing ISO, nothing changes. Why so? Shouldn't it be, paired with exposure, a main change in scenes ?
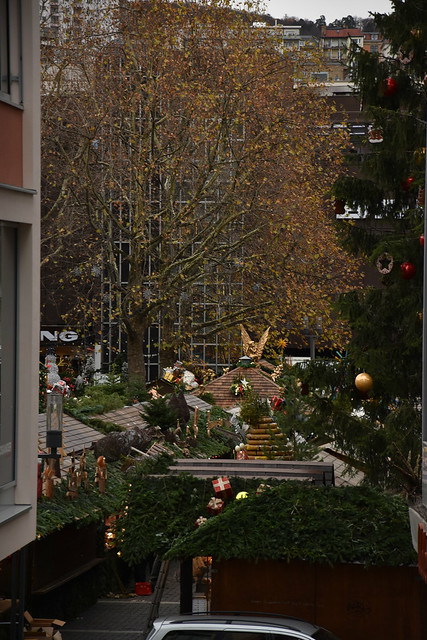
DSC_0143 by Adele Dunant, sur Flickr

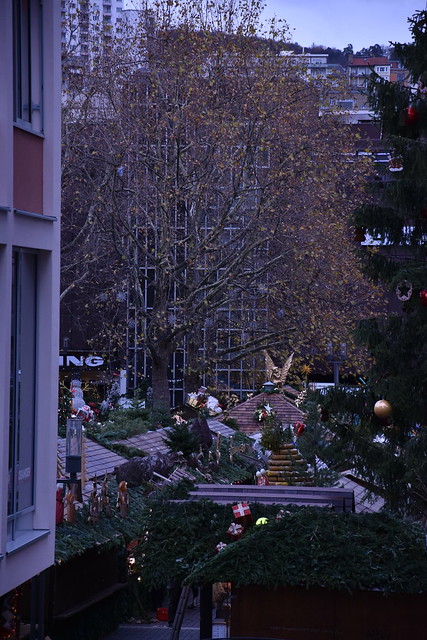
DSC_0142 by Adele Dunant, sur Flickr

DSC_0141 by Adele Dunant, sur Flickr

DSC_0140 by Adele Dunant, sur Flickr


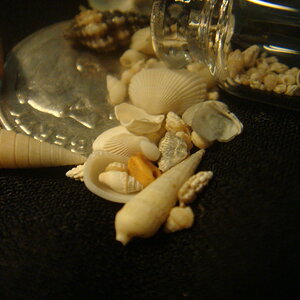
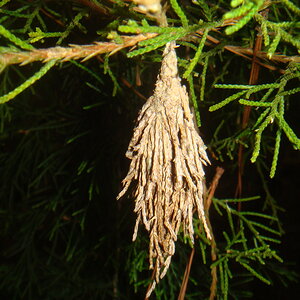
Also, I tried a nice picture on super kitch christmas decorations. I wanted to have the focus on the dolls in the first plan, but, I guess it went somewhere in the pine. I moved the focused place with the multi selector in my menu, it should have been done on the trompette of one doll.
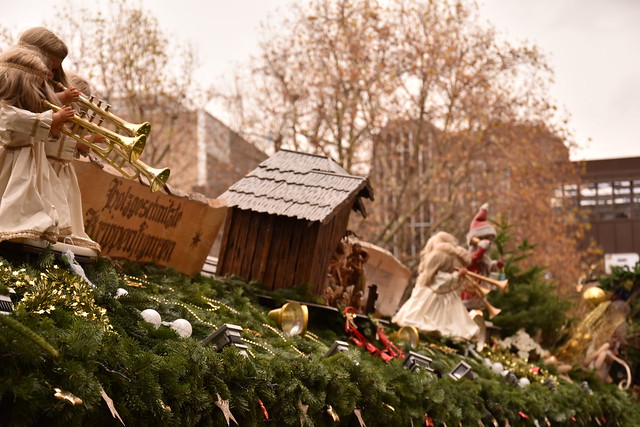

I have a Nikon D3400 and a 18-105mm lens.
I'm using P mode most of the time, playing a lot with white balance (it was cloudy/rainy day).
I only change time exposure, ISO and the place of focus. When it bothers me I focus manually, but it's not better :' )
 
First you should be shooting in Raw. If you do, you can change white balance later in post using software. No need to change white balance while taking pictures. Can just leave it in automatic or pic noramal settings like 5,000 for midday daylight.

I also think you will find it better to use Aperture priority or Shutter priority than Program. You don't need to go to manual to learn. Do a search for exposure triangle if you have not already done so already. It will explain the tie in between shutter, aperture, and ISO.
 
The bigger issue with the images is not the camera settings it is that none of them have a clear subject.

And I'm not sure i would call them street photography.
 
Hi,

I only call them "street photography" because of the settings i used from what i learnt.

For the firsts ones, yes they don't have a clear subject, but my question was more about, why the ISO and time exposure change nothing about it. For the second one, there is a "clear subject", or at least i tried.

I will try again this week end in A or S mode. Thanks.
For the exposure triangle, I did a search and thought i was ok with that, that was also a bit my question, like, "why the application doesn't work at all?" but i guess the answer is simply "newbie". :p
 
DSC_0143
  • ƒ/5.6
  • 106.8 mm
  • 1/320
  • 400
DSC_0142
  • ƒ/5.6
  • 106.8 mm
  • 1/320
  • 400
DSC_0141
  • ƒ/5.6
  • 106.8 mm
  • 1/320
  • 400

you wanna know why they look the same? Looks like you had the camera in Auto mode, so it was always going to produce the same image, regardless of the WB setting.

you also had Exposure Bias -5/3 EV dialed in, which is why the images look so dark.
 
Last edited:
Hi,

I only call them "street photography" because of the settings i used from what i learnt.
For the firsts ones, yes they don't have a clear subject, but my question was more about, why the ISO and time exposure change nothing about it. For the second one, there is a "clear subject", or at least i tried.

I will try again this week end in A or S mode. Thanks.
For the exposure triangle, I did a search and thought i was ok with that, that was also a bit my question, like, "why the application doesn't work at all?" but i guess the answer is simply "newbie". :p

I agree with the other posters, isolate the subject or get closer and shoot in RAW to adjust exposure problems
www.flickr.com/photos/mmirrorless
 
Anytime Im changing ISO, nothing changes. Why so? Shouldn't it be, paired with exposure, a main change in scenes ?
Hello, and welcome!

No, the ISO setting has no effect on exposure. None. The ISO setting is applied after the exposure is completed, and is used by the camera to generate a JPEG image that you can see on a display, either the LCD or a computer display.

You should not be changing the white balance so much. In the daytime, use "daylight" WB setting, and just leave it there until you quit/go inside/night lights come on. The WB tells the camera what color of light you have, so the camera can generate a photograph that is very close (maybe not perfect) to what you see with your eyes.

Also, if you wish to learn editing, begin capturing the Raw files (NEF). When you edit a JPEG, you are limited by the limited bit depth, but with a Raw file, you have much more latitude to change/correct colors in the final image.

All that aside, my suggestion for you is to put your camera in "auto" mode, and just concentrate on composition, framing, and focusing. That will improve your success much more than worrying about WB and ISO. Stop fooling with those settings until you fully understand them.

Now to my critique: You need to learn how to find and then capture something interesting. In the first set, if you can't zoom far enough with your telephoto lens, walk closer. With the second; just get some of the dolls, not all of them. You will find that by getting closer you will get better photographs.

Have fun!
 
First off, these are a very good start and you asked very good questions in order for us to help you.

I typically only increase ISO in order to gain a suitable shutter speed, based on the amount of available light, in conjunction with the focal length of the lens being used. A good rule of thumb (shutter speed 2x the focal length)... for example; if I am using a 60mm lens, my camera base ISO is 200, and my correct exposure for that scene is 1/30s, I will bump my ISO until I can achieve a useable shutter speed (hand held) which should be around 1/125s. Of course I have visualized the scene and in your example, using aperture priority, would have used f/8 in order to get that tree amply in focus, spot metered the tree, checked exposure, adjust ISO to get at desired shutter speed, lock focus, shoot. So ISO becomes a tool to gain proper shutter speed, with the available light, in order to circumvent camera shake, and to produce a sharp image. I try and use the lowest ISO I can to minimize noise frequency in the image (often confused as grain).

In the doll one. You got one of the dolls in focus and the rest fell out of focus areas. If you intended to get all the dolls sharp, you would have needed to close down the aperture more, to get more things in focus. It's a good idea to understand your lens depth of field scale. Not knowing your equipment makes it hard for me to offer a strong aperture setting and understanding since not all lenses have this clearly marked on it. My Fujifilm lens do, so I have a pretty good idea the distance I'm shooting the subject at as I have the distance scale turned on in viewfinder. Once you kind of get a feel for that, then you can adjust for creative or desired effect. There are depth of field phone apps you can use to help with that if your lens is not clearly marked. So, aperture will control what is in focus and at what distances.
 
Last edited:
That's a really confusing answer designer.

Because you and I both know that if a photographer takes a photos at ƒ/5.6, 1/320, iso 400 then takes another at ƒ/5.6, 1/320, iso 800 the second shot will be a stop brighter.

Getting into the technical aspects of what constitutes "exposure" to a beginner like that is only going to much confuse.
 
DSC_0143
  • ƒ/5.6
  • 106.8 mm
  • 1/320
  • 400
DSC_0142
  • ƒ/5.6
  • 106.8 mm
  • 1/320
  • 400
DSC_0141
  • ƒ/5.6
  • 106.8 mm
  • 1/320
  • 400

you wanna know why they look the same? Looks like you had the camera in Auto mode, so it was always going to produce the same image, regardless of the WB setting.

you also had Exposure Bias -5/3 EV dialed in, which is why the images look so dark.

There it is. Now get that EC to zero, read my answer, try it again. You can always tweak the exposure in post, more latitude if you shoot in RAW.
 
Getting into the technical aspects of what constitutes "exposure" to a beginner like that is only going to much confuse.
You're right about that, but you see what happened to this newb when she thought ISO had something to do with exposure.

I do apologize for making this thread confusing, but for anyone who might be willing to risk even more confusion, here, watch this:

 
ISO has 1/3 to do with making the final image. Don't care if it doesn't have anything to do with changing the amount of light/information collected.

it's confusing and pointless to bring up.


We should also warn the OP that if a monkey presses your shutter button, the monkey own the rights to the photo.
 
Anyway, I made an attempt to correct the color in the first shot:

38675127292_549d0e670a_z - Version 2.jpg
 
Very good points mentioned, try shooting in aperture priority mode and shoot in RAW or JPEG and RAW and play around with the pic in post processing and see the difference you have over the final image with the RAW file.
 
ISO has 1/3 to do with making the final image. Don't care if it doesn't have anything to do with changing the amount of light/information collected.

it's confusing and pointless to bring up.


We should also warn the OP that if a monkey presses your shutter button, the monkey own the rights to the photo.

I agree. It really confused me in the beginning of photography, thanks to reading an article(s) on line.
 

Most reactions

Back
Top