
By terri at Sat, 2007-02-24 10:54
<p> </p>
<p align="center" style="margin: 0in 0in 0pt;" class="MsoNormal"><strong>Black and White Film Photography - A Beginner's Primer.</strong></p><br />
<p align="center"><strong>Part VII: Filters</strong><br /></p>
<p align="center">by Jim Hannah</p>
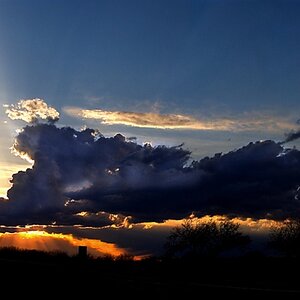
<p align="left"><em><u>Introduction.</u></em><br /><br />The black and white photographer can exercise considerable control over the shades of grey which make up the final print image. We covered overall exposure and contrast control in the section on enlarging. The techniques of burning in and dodging during the enlarging process can provide further darkening or lightening of specific areas of the print.<br /><br />There's another way to modify the grays in a print. That method is to change the way a particular color or range of colors will be recorded on the negative itself. It's done by placing a filter in front of the camera lens and making the exposure with the filtered light. The discussion below will cover the basic filters used in black and white photography. <br /><br /><strong>Discussion.</strong><br /><br /><em>What is a filter?<br /></em><br />A photographic filter is most often a piece of glass or plastic which will block out some of the light which tries to go through it. This article will assume that the round glass screw-in filter designed for modern 35mm and 120 film cameras will be used. See Appendix A for information on filters to use with older cameras.<br /><br />Two types of filters will be covered: polarizing and colored glass. A few specific colored glass filters will be discussed, but the general discussion will be useful for an understanding of other colors as well. <br /><br /><u><em>Polarizing filters.</em><br /></u><br />Under certain conditions, light coming to the camera can be polarized. The two most common situations are light reflections from glass or water and the light from a blue sky. A polarizing filter can block some of this light from reaching the camera lens. The result is that reflections are reduced or the blue sky is darkened in the final print. B&W photographers can get the best results from the older, or linear type of polarizing filter. The newer circular polarizing filters can be used, but the results will be somewhat different. Happily, the older linear polarizing filters are usually less expensive.<br /><br /><br />The rotation alignment of a linear polarizing filter is important. If the filter is rotated, it will block out the polarized light most strongly in one specific position. If it is rotated 90 degrees from that position, it will not block the polarized light at all. This is easy to control with a through-the-lens camera. You simply look through the viewfinder and rotate the polarizer until you get the effect you want. With a rangefinder or simple viewfinder camera, you must look at the scene through the filter before putting it on the camera. Rotate the filter to get the desired effect and note the filter orientation. Then put it on the camera and rotate it to the same orientation before making the exposure.<br /><br />While on the topic of orientation, remember that light from a blue sky is polarized most strongly from that portion of the sky 90 degrees from the position of the sun. If the sun is due south, the eastern and western skies will be most strongly polarized. The southern and northern sky will not be polarized to any noticeable extent.<br /><br /><u><em>Colored filters.<br /></em></u><br />These are made of solid glass or a sheet of colored material which is then sandwiched between two sheets of glass. The filters most often used by amateurs are round and metal-rimmed. The rim is usually threaded on both sides so that the filters can be screwed to the camera lens and a lens hood or second filter can be attached to the filter. The more expensive filters are also coated to improve light transmission.<br /><br />How colored filters work is relatively easy to understand if you remember the sequence of 'colors' of light in a rainbow or of white light 'split' by a prism. This 'rainbow' of colors runs in a sequence of red, orange, yellow, green, blue and violet. A colored filter lets light of its own color pass through easily but 'filters out' or reduces the amount of light of other colors. The effect of a specific color of filter on the other colors will be strongest on those colors furthest from the filter's color in the rainbow sequence.<br /><br />As an example, let's consider a red filter. It will let red light [light from red objects] pass through to the film at close to full strength. Light from orange objects will be reduced a bit, light from yellow objects will be reduced further, and so on. When we get to objects at the far end of the color sequence, blue and violet, the red filter will strongly reduce the amount of light it lets through.<br /><br />So far, so good. The final part of understanding how colored filters affect the final B&W print is a wee bit tricky, so we'll take it step-by-step.<br /><br />Light passing through a lens and hitting B&W film causes the film to darken when developed. More light results in darker film. Less light results in lighter film.<br /><br />If all the colors of light are allowed to reach the film in equal amounts, they will all produce about the same degree of darkening.<br /><br /><br />If the light of some of the colors is 'filtered out' or weakened, it will not darken the film as much as if it was at full strength.<br /><br />Light areas on B&W film will result in dark areas in the final print. Dark areas on B&W film will result in light areas in the final print.<br /><br />OK. Here we go! [Drumroll, please.] When we filter out a color of light, the result will <br />be that the color is shown as a darker than normal area in the final print.<br /><br />Going back to the red filter, the light it most strongly filters out [or reduces] is blue. If we were going to take a picture of white clouds in a blue sky and wanted the blue to be darker than 'normal', we could use a red filter. The blue light from the sky would be reduced. It would register as lighter than 'normal' on the film and therefore darker than 'normal' on the final print.<br /><br />Let's sum up what we've covered.<br /><br />- A colored filter will darken colors different from its own color.<br /><br />- The further away a color is on the color sequence from the filter's own color, the darker it will be on the print.<br /><br />If you're wondering about whether filtering out some of the light in a scene has an effect on the exposure, the answer is yes. How to deal with it is the next topic.<br /><br /><strong>Exposure.<br /></strong><br />Filters block out some of the light coming to the camera lens. As you might guess, the darker filters will block out more light than the lighter ones. A UV filter is almost completely colorless. It blocks out so little of the light that no exposure change is ever needed. On the other hand, a dark red filter blocks out lots of light. Accordingly, the exposure must be greatly increased to compensate.<br /><br />Happily for the photographer, each filter comes with specific exposure compensation information. This is stated as a filter factor and will generally range somewhere between 1 and 8. The filter factor tells you how many times an exposure must be increased above the normal exposure. To state it another way, it tells you how many times to multiply the normal, unfiltered exposure to get the correct filtered exposure.<br /><br /><em>Warning:</em> Do not confuse a filter factor with f stops!<br /><br />F-stops, you'll remember, double the exposure for each major f number change. In order to convert filter factors into f-stops, you need a little table. Here it is:<br /><br /><br />Filter factor f-stop change<br /><br />2 1<br />3 1 2/3<br />4 2<br />6 2 2/3<br />8 3<br />10 3 1/3<br />16 4<br /><br />You can use 1 1/2, 2 1/2 and 3 1/2 instead of 1 2/3, 2 2/3 and 3 1/3 f-stops without a problem.<br /><br />If you wish to use two filters together, you must multiply the two individual filter factors instead of adding them together. Then go to the table to find the f-stop change.<br /><br />In general, you'll get more accurate exposures if you first determine the exposure for the unfiltered scene and then apply the correction. In some instances, a filter can 'fool' an exposure meter if you try to determine the exposure based on reading the filtered light.<br /><br /><strong>Specific colored filters.<br /></strong><br /><em>UV.</em> This filter has little use in B&W photography. In a few instances, using it might reduce the effect of haze in a landscape scene, but the change is not great. The best reason to use a UV filter is to avoid having to clean the front element of the camera lens. It also serves to protect the lens from accidental scratches or fingerprints.<br /><br /><em>K2 (yellow).</em> Modern panchromatic films do not record all the colors in the same shades of grays as the intensities, as seen by the human eye, would suggest. In particular, we tend to see blues as being a bit darker than the films record them. The K2 filter adjusts the light to better agree with what we see in terms of gray density. Some B&W photographers simply keep a K2 filter on their lens all the time unless they have reason to select some other specific filter for a particular exposure.<br /><br /><em>Orange.</em> This filter will darken a blue sky to a greater degree than a K2. It is used in landscape photography to increase the drama of a scene. For portraits, an orange filter will reduce the darkness of freckles. <br /><br /><em>25A (red).</em> The red filter exaggerates the darkness of a blue sky. One of the side effects is that shadows, which are basically illuminated with blue light from the sky, deepen to black, with little detail. Foliage is also darkened. In portraits, a red filter lightens skin tones.<br /><br /><em>Green.</em> This filter, by darkening non-green colors, will make foliage appear lighter than normal. This can be used to good effect in certain landscapes. Reds and blues, at the ends of the color range, will darken quite a bit. In a still life with fruit reds, oranges and violet colors are darkened.<br /><br /><em>Blue.</em> Blue filter use is rare. Since it is at the opposite end of the color range from red, it will darken red and orange shades. This might be of importance in some still life work. It will also lighten a blue sky to the point where clouds will not be very noticeable. Haze in a landscape will be increased, adding to what painters call 'atmospheric perspective' - the reduction of the color intensity of distant objects. In portraits, a blue filter will lighten blue eyes. The effect can be quite interesting. <br /><br /><strong>Purchasing filters. <br /></strong><br />Mounted glass filters come in a wide variety of sizes. The sizes are stated as the diameters of the mounting threads in millimeters. When purchasing a filter, you'll need to know which diameter to buy. If you have only one camera with one lens, the task is easy. The filter size is often inscribed on the lens or given in the camera owner's manual. If you have more than one camera, or if your camera has interchangeable lenses, you can keep the total cost of filters down by buying the size which will fit your largest diameter lens and then using step-up adapters [sometimes called 'rings'] between your smaller diameter lenses and the filter. By using the adapters, you'll need just one filter of each type no matter which camera or lens you select for use. [See Appendix A for older non-standard cameras.]<br /><br /><em>Hint:</em> Buy a lens shade of the same size as the filter. It will work on all but the more extreme wide angle lenses.<br /><br />Filters come in a wide range of prices, depending on the manufacturer. Unless you are using photographic equipment of the finest quality and demand the very sharpest results, the mid-price range filters from one of the major manufacturers such as Tiffin or Hoya will serve nicely.<br /><br /><br /><strong>Appendix A.</strong> Non-standard cameras.<br /><br />There are two camera types which require something other than a simple screw-in filter. <br /><br />The first of these are the older 35mm cameras which do not have standard screw threads inside the lens barrel. The solution is to locate a slip-on adapter which will fit the outside of the lens barrel. Information on these can be obtained at the larger camera stores.<br /><br />The second type of non-standard cameras are the older twin lens reflex cameras such as Yashicas and Rolleiflexes. They use a bayonet adapter which fits into the taking lens. These come in at least three different sizes to fit different cameras. It is necessary to find out which size of bayonet adapter you'll need for your particular camera.<br /></p>
<p> </p>
<p> </p>
<p align="center" style="margin: 0in 0in 0pt;" class="MsoNormal"><strong>Black and White Film Photography - A Beginner's Primer.</strong></p><br />
<p align="center"><strong>Part VII: Filters</strong><br /></p>
<p align="center">by Jim Hannah</p>
<p align="left"><em><u>Introduction.</u></em><br /><br />The black and white photographer can exercise considerable control over the shades of grey which make up the final print image. We covered overall exposure and contrast control in the section on enlarging. The techniques of burning in and dodging during the enlarging process can provide further darkening or lightening of specific areas of the print.<br /><br />There's another way to modify the grays in a print. That method is to change the way a particular color or range of colors will be recorded on the negative itself. It's done by placing a filter in front of the camera lens and making the exposure with the filtered light. The discussion below will cover the basic filters used in black and white photography. <br /><br /><strong>Discussion.</strong><br /><br /><em>What is a filter?<br /></em><br />A photographic filter is most often a piece of glass or plastic which will block out some of the light which tries to go through it. This article will assume that the round glass screw-in filter designed for modern 35mm and 120 film cameras will be used. See Appendix A for information on filters to use with older cameras.<br /><br />Two types of filters will be covered: polarizing and colored glass. A few specific colored glass filters will be discussed, but the general discussion will be useful for an understanding of other colors as well. <br /><br /><u><em>Polarizing filters.</em><br /></u><br />Under certain conditions, light coming to the camera can be polarized. The two most common situations are light reflections from glass or water and the light from a blue sky. A polarizing filter can block some of this light from reaching the camera lens. The result is that reflections are reduced or the blue sky is darkened in the final print. B&W photographers can get the best results from the older, or linear type of polarizing filter. The newer circular polarizing filters can be used, but the results will be somewhat different. Happily, the older linear polarizing filters are usually less expensive.<br /><br /><br />The rotation alignment of a linear polarizing filter is important. If the filter is rotated, it will block out the polarized light most strongly in one specific position. If it is rotated 90 degrees from that position, it will not block the polarized light at all. This is easy to control with a through-the-lens camera. You simply look through the viewfinder and rotate the polarizer until you get the effect you want. With a rangefinder or simple viewfinder camera, you must look at the scene through the filter before putting it on the camera. Rotate the filter to get the desired effect and note the filter orientation. Then put it on the camera and rotate it to the same orientation before making the exposure.<br /><br />While on the topic of orientation, remember that light from a blue sky is polarized most strongly from that portion of the sky 90 degrees from the position of the sun. If the sun is due south, the eastern and western skies will be most strongly polarized. The southern and northern sky will not be polarized to any noticeable extent.<br /><br /><u><em>Colored filters.<br /></em></u><br />These are made of solid glass or a sheet of colored material which is then sandwiched between two sheets of glass. The filters most often used by amateurs are round and metal-rimmed. The rim is usually threaded on both sides so that the filters can be screwed to the camera lens and a lens hood or second filter can be attached to the filter. The more expensive filters are also coated to improve light transmission.<br /><br />How colored filters work is relatively easy to understand if you remember the sequence of 'colors' of light in a rainbow or of white light 'split' by a prism. This 'rainbow' of colors runs in a sequence of red, orange, yellow, green, blue and violet. A colored filter lets light of its own color pass through easily but 'filters out' or reduces the amount of light of other colors. The effect of a specific color of filter on the other colors will be strongest on those colors furthest from the filter's color in the rainbow sequence.<br /><br />As an example, let's consider a red filter. It will let red light [light from red objects] pass through to the film at close to full strength. Light from orange objects will be reduced a bit, light from yellow objects will be reduced further, and so on. When we get to objects at the far end of the color sequence, blue and violet, the red filter will strongly reduce the amount of light it lets through.<br /><br />So far, so good. The final part of understanding how colored filters affect the final B&W print is a wee bit tricky, so we'll take it step-by-step.<br /><br />Light passing through a lens and hitting B&W film causes the film to darken when developed. More light results in darker film. Less light results in lighter film.<br /><br />If all the colors of light are allowed to reach the film in equal amounts, they will all produce about the same degree of darkening.<br /><br /><br />If the light of some of the colors is 'filtered out' or weakened, it will not darken the film as much as if it was at full strength.<br /><br />Light areas on B&W film will result in dark areas in the final print. Dark areas on B&W film will result in light areas in the final print.<br /><br />OK. Here we go! [Drumroll, please.] When we filter out a color of light, the result will <br />be that the color is shown as a darker than normal area in the final print.<br /><br />Going back to the red filter, the light it most strongly filters out [or reduces] is blue. If we were going to take a picture of white clouds in a blue sky and wanted the blue to be darker than 'normal', we could use a red filter. The blue light from the sky would be reduced. It would register as lighter than 'normal' on the film and therefore darker than 'normal' on the final print.<br /><br />Let's sum up what we've covered.<br /><br />- A colored filter will darken colors different from its own color.<br /><br />- The further away a color is on the color sequence from the filter's own color, the darker it will be on the print.<br /><br />If you're wondering about whether filtering out some of the light in a scene has an effect on the exposure, the answer is yes. How to deal with it is the next topic.<br /><br /><strong>Exposure.<br /></strong><br />Filters block out some of the light coming to the camera lens. As you might guess, the darker filters will block out more light than the lighter ones. A UV filter is almost completely colorless. It blocks out so little of the light that no exposure change is ever needed. On the other hand, a dark red filter blocks out lots of light. Accordingly, the exposure must be greatly increased to compensate.<br /><br />Happily for the photographer, each filter comes with specific exposure compensation information. This is stated as a filter factor and will generally range somewhere between 1 and 8. The filter factor tells you how many times an exposure must be increased above the normal exposure. To state it another way, it tells you how many times to multiply the normal, unfiltered exposure to get the correct filtered exposure.<br /><br /><em>Warning:</em> Do not confuse a filter factor with f stops!<br /><br />F-stops, you'll remember, double the exposure for each major f number change. In order to convert filter factors into f-stops, you need a little table. Here it is:<br /><br /><br />Filter factor f-stop change<br /><br />2 1<br />3 1 2/3<br />4 2<br />6 2 2/3<br />8 3<br />10 3 1/3<br />16 4<br /><br />You can use 1 1/2, 2 1/2 and 3 1/2 instead of 1 2/3, 2 2/3 and 3 1/3 f-stops without a problem.<br /><br />If you wish to use two filters together, you must multiply the two individual filter factors instead of adding them together. Then go to the table to find the f-stop change.<br /><br />In general, you'll get more accurate exposures if you first determine the exposure for the unfiltered scene and then apply the correction. In some instances, a filter can 'fool' an exposure meter if you try to determine the exposure based on reading the filtered light.<br /><br /><strong>Specific colored filters.<br /></strong><br /><em>UV.</em> This filter has little use in B&W photography. In a few instances, using it might reduce the effect of haze in a landscape scene, but the change is not great. The best reason to use a UV filter is to avoid having to clean the front element of the camera lens. It also serves to protect the lens from accidental scratches or fingerprints.<br /><br /><em>K2 (yellow).</em> Modern panchromatic films do not record all the colors in the same shades of grays as the intensities, as seen by the human eye, would suggest. In particular, we tend to see blues as being a bit darker than the films record them. The K2 filter adjusts the light to better agree with what we see in terms of gray density. Some B&W photographers simply keep a K2 filter on their lens all the time unless they have reason to select some other specific filter for a particular exposure.<br /><br /><em>Orange.</em> This filter will darken a blue sky to a greater degree than a K2. It is used in landscape photography to increase the drama of a scene. For portraits, an orange filter will reduce the darkness of freckles. <br /><br /><em>25A (red).</em> The red filter exaggerates the darkness of a blue sky. One of the side effects is that shadows, which are basically illuminated with blue light from the sky, deepen to black, with little detail. Foliage is also darkened. In portraits, a red filter lightens skin tones.<br /><br /><em>Green.</em> This filter, by darkening non-green colors, will make foliage appear lighter than normal. This can be used to good effect in certain landscapes. Reds and blues, at the ends of the color range, will darken quite a bit. In a still life with fruit reds, oranges and violet colors are darkened.<br /><br /><em>Blue.</em> Blue filter use is rare. Since it is at the opposite end of the color range from red, it will darken red and orange shades. This might be of importance in some still life work. It will also lighten a blue sky to the point where clouds will not be very noticeable. Haze in a landscape will be increased, adding to what painters call 'atmospheric perspective' - the reduction of the color intensity of distant objects. In portraits, a blue filter will lighten blue eyes. The effect can be quite interesting. <br /><br /><strong>Purchasing filters. <br /></strong><br />Mounted glass filters come in a wide variety of sizes. The sizes are stated as the diameters of the mounting threads in millimeters. When purchasing a filter, you'll need to know which diameter to buy. If you have only one camera with one lens, the task is easy. The filter size is often inscribed on the lens or given in the camera owner's manual. If you have more than one camera, or if your camera has interchangeable lenses, you can keep the total cost of filters down by buying the size which will fit your largest diameter lens and then using step-up adapters [sometimes called 'rings'] between your smaller diameter lenses and the filter. By using the adapters, you'll need just one filter of each type no matter which camera or lens you select for use. [See Appendix A for older non-standard cameras.]<br /><br /><em>Hint:</em> Buy a lens shade of the same size as the filter. It will work on all but the more extreme wide angle lenses.<br /><br />Filters come in a wide range of prices, depending on the manufacturer. Unless you are using photographic equipment of the finest quality and demand the very sharpest results, the mid-price range filters from one of the major manufacturers such as Tiffin or Hoya will serve nicely.<br /><br /><br /><strong>Appendix A.</strong> Non-standard cameras.<br /><br />There are two camera types which require something other than a simple screw-in filter. <br /><br />The first of these are the older 35mm cameras which do not have standard screw threads inside the lens barrel. The solution is to locate a slip-on adapter which will fit the outside of the lens barrel. Information on these can be obtained at the larger camera stores.<br /><br />The second type of non-standard cameras are the older twin lens reflex cameras such as Yashicas and Rolleiflexes. They use a bayonet adapter which fits into the taking lens. These come in at least three different sizes to fit different cameras. It is necessary to find out which size of bayonet adapter you'll need for your particular camera.<br /></p>
<p> </p>

![[No title]](/data/xfmg/thumbnail/34/34346-f7996f51f0624620cfd54a488abeacf9.jpg?1619736382)