pursuer
TPF Noob!
- Joined
- Aug 8, 2004
- Messages
- 1,397
- Reaction score
- 40
- Location
- Canada
- Can others edit my Photos
- Photos NOT OK to edit
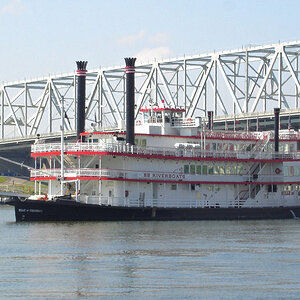
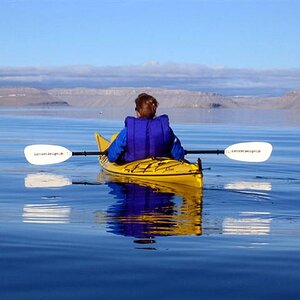
It rained steady all day where I live so I spent a lot of time inside playing with photoshop and I came up with something great. This might be a well known tecnique but It's new to me so I thought I would share it. This is a photo I posted last year.

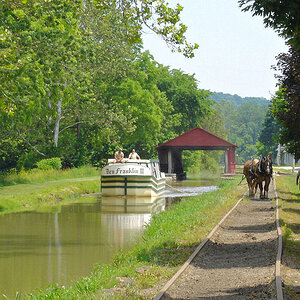
I used PS to darken the sky and lighten the foreground. I did this by selecting the sky and foreground seperatly and applying two seperate level adjustments. the problem with this is even after feathering the selection the area where the two sections meet never looks right. I had to use the blur tool to smooth things out a bit. Not only that getting an accurate selection is very time consuming. Here is the origonal:

What I came up with today dosen't require any selection at all. instead of doing a level adjustment I made a new level adjustment layer. I then adjusted it so the clouds looked right and ignored the forground. next I used the gradient tool to create a layer mask for the level adjustment layer. This was simply a vertical gradiant running from white to black. I did a normal level adjustment on the gradient so it would match the photo, white over the sky, black over the foreground and a smooth transition between the two. Next I duplicated the level adjustment layer and made the copy hidden. I merged the visiable layers then unhid the copy of the adjustment layer, inverted the layer mask and finally adjusted the level adjustment layer to lighten the forground. Here is the result:

This method is MUCH faster and also gives much better results. I hope someone finds this useful.
Edit: I forgot about the examples and tutorials section, maybe this should be there. If anyone feels this shouldn't be here feel free to move it.
I used PS to darken the sky and lighten the foreground. I did this by selecting the sky and foreground seperatly and applying two seperate level adjustments. the problem with this is even after feathering the selection the area where the two sections meet never looks right. I had to use the blur tool to smooth things out a bit. Not only that getting an accurate selection is very time consuming. Here is the origonal:
What I came up with today dosen't require any selection at all. instead of doing a level adjustment I made a new level adjustment layer. I then adjusted it so the clouds looked right and ignored the forground. next I used the gradient tool to create a layer mask for the level adjustment layer. This was simply a vertical gradiant running from white to black. I did a normal level adjustment on the gradient so it would match the photo, white over the sky, black over the foreground and a smooth transition between the two. Next I duplicated the level adjustment layer and made the copy hidden. I merged the visiable layers then unhid the copy of the adjustment layer, inverted the layer mask and finally adjusted the level adjustment layer to lighten the forground. Here is the result:
This method is MUCH faster and also gives much better results. I hope someone finds this useful.
Edit: I forgot about the examples and tutorials section, maybe this should be there. If anyone feels this shouldn't be here feel free to move it.

")