DIRT
TPF Noob!
- Joined
- Sep 27, 2004
- Messages
- 380
- Reaction score
- 5
- Location
- Long Beach CA.
- Website
- www.jfreeman.smugmug.com
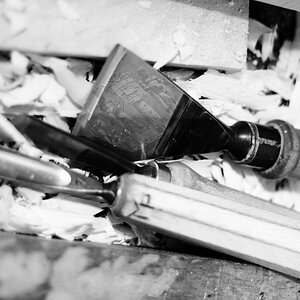
I made a small light table this week and thought I would post a DIY on it. It is really easy to make and doesn't take a lot of time (a bit longer if you dont have power tools).
here are a few pics of the box (disregard quality of photos please)


tools needed:
Power saw (hand saw will work)
screwdrivers
sandpaper (i used 80 grit screen)
Materials needed: (to make small box)
appropraite length of 1x6 wood
sheet of 1/4 in thick clear acrylic
round flourescent light bulb
light bulb fixture
lamp power cord (got mine from a trashed lamp)
light switch & cover (optional but looks good)
wood screws
sheet of plywood
Step 1- cut the 1x6 plank to make the long sides of the box (for me
this was 10 inches).
Step 2- cut short sides from 1x6 (for me it was 8in.)
Step 3- using the wood screws, attach the 4 sides of box together
Step 4- once the sides are all together, use it to trace the bottom
onto the plywood, cut out the bottom and attach it to the box.
Step 5- drill a hole to insert the power cord. insert power cord and hook
up the bulb base and screw it in the center of the box.
Step 6- cut a length of strip 1 inch wide from the 1x6 to make the lip on
which the glass sits.
Step 7- cut the strip into lengths and attach with small nails. the lip is
to be mounted 1/8 in. below lip of box.
Step 8- cut the acrylic sheet to the size of your box and then sand one
side (the inside) sand until it is frosted evenly. Place the bulb in
lamp and place acrylic on and turn it on and there it is.
here are a few pics of the box (disregard quality of photos please)
tools needed:
Power saw (hand saw will work)
screwdrivers
sandpaper (i used 80 grit screen)
Materials needed: (to make small box)
appropraite length of 1x6 wood
sheet of 1/4 in thick clear acrylic
round flourescent light bulb
light bulb fixture
lamp power cord (got mine from a trashed lamp)
light switch & cover (optional but looks good)
wood screws
sheet of plywood
Step 1- cut the 1x6 plank to make the long sides of the box (for me
this was 10 inches).
Step 2- cut short sides from 1x6 (for me it was 8in.)
Step 3- using the wood screws, attach the 4 sides of box together
Step 4- once the sides are all together, use it to trace the bottom
onto the plywood, cut out the bottom and attach it to the box.
Step 5- drill a hole to insert the power cord. insert power cord and hook
up the bulb base and screw it in the center of the box.
Step 6- cut a length of strip 1 inch wide from the 1x6 to make the lip on
which the glass sits.
Step 7- cut the strip into lengths and attach with small nails. the lip is
to be mounted 1/8 in. below lip of box.
Step 8- cut the acrylic sheet to the size of your box and then sand one
side (the inside) sand until it is frosted evenly. Place the bulb in
lamp and place acrylic on and turn it on and there it is.


![[No title]](/data/xfmg/thumbnail/37/37522-f67b10bc5ee534f9bc21ee94917445b9.jpg?1619738129)


![[No title]](/data/xfmg/thumbnail/30/30991-43abf4dfee0a54010692c71c43f40981.jpg?1619734555)
![[No title]](/data/xfmg/thumbnail/35/35966-4f59fb71a71adfe775ae568f8c534699.jpg?1619737283)