Dodging and Burning

aggiezach

Yup...
Joined
Feb 23, 2004
Messages
2,132
Reaction score
24
Location
TX
Website
jessandzach.com
Can others edit my Photos
Photos NOT OK to edit
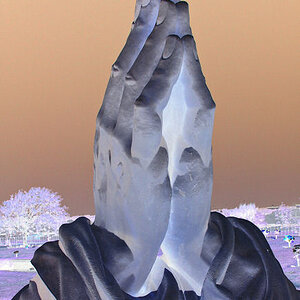
Ok so I have this negative of something I shot in pretty much the harshest light possible (noon!, I know, I didn't have a choice sorry!! :) ) So the half of the subject that was in the sun I need to burn a bit and the half that was in the shade I need to dodge. ( I think thats right) being that I'm new to this part of printing. how do you go about dodging or burning multiple spots on an image? Do you do it all at once by just moving from point to point? Or do you reduce your exposure time and just expose the image more than once and focus on certain areas during each exposure? I've printer 4 or 5 different photos trying different technique (all were just one long exposure) and a couple came out ok, but I can still improve them. (can always improve!! )

Thanks for the help in advance!!

Zach :D
 
You have to decide if it's easier to dodge while you are exposing, or burn after your normal exposure time. You can't really dodge multiple points at the same time, although you can move from one to the next area during the print exposure. It's easy to go back in and burn specific areas one by one. Often it requires a combination.

You can purchase expensive dodging tools, but it's easy and fun to make your own. Floral wire (for wrapping flower stems together) with an odd shaped bit of cardboard taped on the end is good. Usually you'll want to avoid using clear shapes such as squares and circles. I like to tear out my shapes; this makes them irregular, and you won't accidentally burn or dodge in a straight line.

For burning I've been using larger pieces of cardboard with various sized holes torn in them. But recently I saw this DIY tool at a darkroom workshop that I call a "burn pallet". I'll go over to Adobe PS, and fire up a sketch so you guys can see what I'm talking about.
 
aggiezach said:
Ok so I have this negative of something I shot in pretty much the harshest light possible (noon!, I know, I didn't have a choice sorry!! :) ) So the half of the subject that was in the sun I need to burn a bit and the half that was in the shade I need to dodge.

Of course the real solution here is to use fill flash, but since it's too late here's the "burn pallet".

Materials needed:
matboard that's black (or dark) on one side and white on the other
tape
knife

Take a rectangle of matboard approx 11" x 14" (adjust to the size you are comfortable with, and what you are printing) and cut 2 holes in it. One near the center, and another nearer to a corner or edge. Cut "doors" that can be taped (like a hinge) to cover these holes. Next take a circular piece of matboard, and cut various sized, irregular holes in it. Lay the circular piece over the rectangle with the white sides up. Now you can open whatever door you need, and rotate the circle for the hole size you need.

burnpallet.jpg
 
Thanks a lot matt!!!! These are great. The subject (a rather large statue) was kind of out of the range of my little on camera flash :) I'm working on getting a nicer flash unit though! (Gotta finish paying for school first though :wink:

Thanks again for your constantly great advice!

Zach :D
 
If you have a neg with a wide contrast range the problem you face is that if you print for the thin part of the neg (the shadows) then not enough light gets through the dense part to give any highlight detail. If you print for highlights you block out the shadows and loose detail there.
Most people try to dodge or burn their way out of this but it is a tricky art and can look pretty obvious - dodge lines on the print and such. This happens particularly if you hold the dodge/burn tool too close to the print so the edges are sharp (midway between lens and print is best).
But there is another way that I prefer. It's success depends upon how bad the neg is but it is always worth trying first and can be used in conjunction with dodging and burning.
If you print for the shadows the highlights don't register because not enough light can get through the dense part of the neg to overcome hysteresis. A certain amount of energy has to be put into the system before the latent image can form (I won't go into the Physics - just trust me). It's a bit like pushing a car. It's hard to get it moving (system hysteresis) but once it is it is quite easy to keep it moving.
This energy can be put in to the photographic system by means of 'pre-flashing'. In effect you are putting energy into the system and hypersensitising the emulsion.
Do a test strip to determine pre-flash exposure.
If you do not have two enlargers put some tracing paper or a piece of ground glass over the lens of the enlarger. This allows you to leave the neg in place. The trace will diffuse the image to give an even illumination. The easy way is to replace the red filter under the lens with some trace.
Do a step wedge test strip on a piece of paper and process. Do quite closely spaced steps.
Evaluate - you are looking to find the step that just starts to show a colour change (the slightest touch of grey). Then you choose the time for the step BEFORE that one. The exposure that - if given a little more - will result in an exposure but doesn't quite.
Then you give your sheet of paper this exposure under the diffused enlarger. Remove the trace and do the proper exposure.
You need to work quite quickly to avoid the energy you have put in to the system leaking away.
The paper is at hysteresis point so virtually all the light coming through the dense part is going to creating a latent image and not being lost.
You should now find that you are holding detail in the shadows and recording highlight detail - providing the contrast difference is not too extreme. In any event the image will appear a lot better and at worst will reduce the amount of dodging/burning.
Hope this is clear. If not let me know and I will clarify - but pre-flashing is a mainstay pro printer technique and you should be able to find info on it.
 
Thanks Hertz! That makes perfect sense to me! Physic is one of my stronger points :) I'll definitely do some research on that. Sounds very intersting. The contrast difference is pretty big, but there is still a lot of detail in both the hilites and the shadows. I probably will just go out and reshoot the subject. But I have this urge to see if I can fix it in the Dark room as well!

Thanks again guys!
Zach :D
 
Pre-flashing is a good technique, but if the neg has too much contrast for your paper grade, why not just print it on a low grade? Sure, it will give you a flat print, which you can then improve by split printing, ie, two exposures, one at a low grade and the other at a high grade. both exposures may have different times.

Here is a longer explanation:
http://www.photogs.com/bwworld/splitfilter.html

Also note that when dodging and burning you can change to a different grade, low grade if you want to give it more highlight detail and high grade if you want to get richer blacks.
 

Most reactions

New Topics

Back
Top