Dull images - Why and how to correct?

gtkelly

TPF Noob!
Joined
Apr 15, 2007
Messages
117
Reaction score
0
Location
North Carolina, USA
Can others edit my Photos
Photos OK to edit
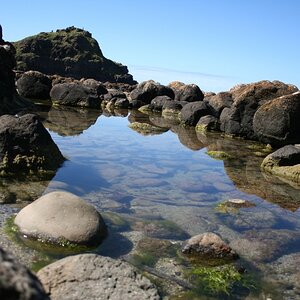
I'm dull. Or at least my images seem to be. I'm fighting this and not exactly sure where the problem lies or what to do about it.

This link has some of my latest which I think are better, but still somewhat dull. I did find that a majority of my images have a blue cast to them - in this set I went through and eliminated that but they're still dull. Is this a problem with light, subject matter, camera, or processing? What makes them dull?

http://www.thephotoforum.com/forum/showthread.php?t=87057

I'm shooting raw images on an XTI, processed in Lightroom. Color space is SRGB in camera, converted to Pro-Photo RGB in Lightroom and Photoshop. The only camera adjustment is a +2 to saturation. These images have had some Photoshopping done but only in levels, contrast and saturation. Last step is to run through Noise Ninja and sharpen.
 
What white balance are you using? they look a bit cold try using daylight or even cloudy which should warm the pics up a bit more and then a touch of levels or curves should make them pop
 
All the images have quite a lot of cloud cover which can make images seem flat and uninteresting.
Direct light from the sun can make textures much more interesting and give lots of good shadows and shapes but if the sun is too high in the sky, ie anytime round mid day then shots look too contrasty.
Bright lights and dark shadows confuse the camera and shots lok different but not all that good.
 
I think you just need to use levels and curves more. Use levels to widen the dynamic range by moving the triangles on each end of the levels histogram toward the beginning of the histogram to bring out the true blacks and whites. Use curves to give the photos contrast. The easiest way is to make a classic "s" curve by dragging the upper 3rd of the line up a bit and the lower 3rd down a bit. You can also use layer masks to do this selectively in the photo.
I actually like shooting architectural shots on overcast days and post processing like I said above.
 
Thank you all for the comments. I've taken some of them and went back to the image. Here I've warmed it up a bit and adjusted contrast using curves. I think it's an improvement. What do you think?

Nantucket-Edit-1.jpg
 
Did you try customizing your white balance off a pale blue? it gives more of a warm tint to the shot, more so than "sunny" or "cloudy" settings.

Also, if your camera has a Chrome setting (Chrome, Standard, B&W) use it as it gives a warmer, saturated shot where colours glow more.
 
easiest way to fix this is like matt said, shoot at the right time of day. all of the other stuff is just pretending to be good lighting.

all of the shots look like you needed to shoot in that 10-15 min window when the sun is right below the clouds, but above the horizon so there is direct light on your subjects. Direct light and not diffuse light (like what comes through the coulds) will give you more contrast, as well as more saturated colors.
 
How are you sharpening? I used a 20% 60 pixel unsharp mask on this and got a little more pop out of it. I didn't do anything else...

Nantucket-3a.jpg


It's there if you compare them side by side. To show a crisp fall day, you do need a crisp fall day though. ;)

mike
 
What white balance are you using? they look a bit cold try using daylight or even cloudy which should warm the pics up a bit more and then a touch of levels or curves should make them pop

I'm really wondering about your white balance settings also. I downloaded the pic and played around with it in Photoshop and the blue channel appears to really be overblown.

I'm not familiar with that camera, besides the WB, are there any custom settings that may be contributing to this?
 
Use levels to widen the dynamic range by moving the triangles on each end of the levels histogram toward the beginning of the histogram to bring out the true blacks and whites.
You're not actually widening the dynamic range at all by doing this. You're just adjusting the range that is already present in the photo.
I just wanted to throw that in because there's room for confusion there. Especially keeping in mind that levels and curves seems to be a tricky subject area for beginners.

I think that to make your photos better you need to broaden your own scope.
The photos here are basically available light photos taken of things available at the scene. I'm not saying that there's anything wrong with the images, just that your limited in your possibilities unless you want to do some drastic editing to them.
You can only do so much with them.
The subject matter is very general, and since they are complete scenes in themselves they have a somewhat fixed range compositionally.
It's not as if you can choose to manipulate elements within the scene too much.
You can manipulate values and maybe clone some things around or completely out. Possibly use the scene as a background for a more subjective image.
Or take it real far and completely change the lighting in the image to something more dramatic.
I prefer to take shots like yours when the sun is setting, facing away from the sun to capture all the shadows.
Since the light is changing so rapidly at that time I usually always use exposure bracketing.
My theory is to take LOTS of shots, then go through them later.
Don't be afraid to fill up your memory cards.

What I would suggest is to take things to another level.
Build a light box in your basement/garage and photograph some objects in various lighting setups then tweak the images in Photoshop.
Or find someone who's photogenic and will allow you to photograph them and do something creative with the shots.
Start experimenting with depth of field. If you don't own a DSLR you can do with what you have on camera, and then play with DOF in Photoshop. Take some close-ups of people or objects and play with DOF.

Then start using RAW to push those images further.
Set projects for yourself, and do everything to see them through.
 
You're not actually widening the dynamic range at all by doing this. You're just adjusting the range that is already present in the photo.

In a manner you are widening the range by re-eval'ing where the range starts and stops. You're certainly not ADDING to the range (like an composite HDR image might do), but you are in essence giving the image more "length" by spreading the values out (by compressing the range).

The only thing "wrong" I saw in some of the images is that their RGB-channels are a bit out of whack, and some lack information on the white-end of the scale. Adjusting that and tossing a conservative amount of sharpening really brings the images out.

As for the subject content, not everything needs to be a "Wow, this is a moment in photography history" photograph. Several of the pictures I have are just high-end snapshots, that I still have an interest in making sure they look good.
 
Nantucket-3_ed.jpg


Your problem is mainly lighting and colour. When shooting with bright skies you should be using either a polarizer or a graduated ND filter. Postprocessing helps too but it takes more work. I have just got you started with this quick edit. For a perfectionist, still more work needs to be done.

skieur
 
Thank you all for your comments on this one. I've taken several of the ideas and done what I can from a PP side. There are definitely problems with this from the time it was taken, and the flat light can't really be helped at this point.

However with some additional warming, the contrast mapping article (GREAT ARTICLE), and some brightening it's probably as good as it's going to get. Looks like the real solution is to learn a lot more about seeing light - and that isn't going quite so fast as reading an article.

Anyway - here's the best I can do with this one. And thanks again for all your help!

Nantucket3-1.jpg
 

Most reactions

Back
Top