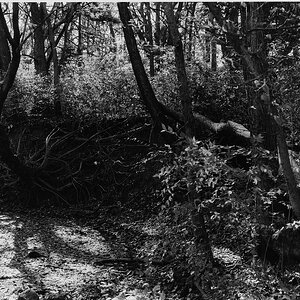
First Attempt At Low Key

doesn't have to have the same qualities

My wife has those white styrofoam heads, for wigs, but I thought they wouldn't work because the reflective nature of the white surface is far greater than typical skin. Wouldn't the same apply to other surfaces, or are you just saying use them to judge the position of the lights and shadow?
 
.. or are you just saying use them to judge the position of the lights and shadow?
Perfect! I even think the white styrofoam would assist you in analyzing the light.

Just position the dummy at the same position as your model will take, then you won't have to move the lights again. BTW; if you have the time, why not devise several possible lighting setups and shoot through them one at a time, and then you will have some really good choices for printing and framing.
 
Why not try other subjects, like a bowl of fruit, or a six-pack of soda or beer cans, or some loosely-grouped "stuff"....playing cards, some cigarettes, lighter, pens, pencils, poker chips, etc.,etc. You can get an idea of how the light units behave.

The on-line and free Strobist 101 "course" might be fun to try! There are a few things to learn about light and lighting. The CLOSER the light is placed in relation to the subject, the more radical the degree of light intensity fall-off there is, over SHORT distances! This is something to understand, in a practical sense: this can allow you to get a VERY dark backdrop, fairly easily.

Loving the light's distance to the 7- to 10-foot range dramatically moderates the degree of light fall-off in intensity; things are more-moderate, not such hair-trigger changes in exposure over mere inches of distance, but more like over several feet of different distances will there be signifiant fall-off (or increases!) in intensity.

The other big,big issue of Strobist 101 is how to use a simple speedlight, with a light stand, a swivel mount, and an inexpensive white umbrella.
 
IMG_5567.jpg
Strobist is a good starting point I agree. Been through it 3-4 times now. A few more times to go!

I use a large teddy bear to test quite often. The panda is my fav. I can see hot spots and dark too and check dof, color etc.
 
Gavin Hooey is awesome too:

Adorama tv;
 
light's distance to the 7- to 10-foot range dramatically moderates the degree of light fall-off in intensity;

First of all thank you to all that have commented and tried to help. My light (camera left) was about 7', but the one on the right was probably half that distance, reason being was the lack of floor space. I've been through Strobist 101 but went back and reviewed. I might drop back to one light to learn with then, add more as I learn. Sometimes a problem is best solved by eliminating the variables.

I've been so concentrated on my granddaughter with more emphasis on softening, that this is a 180 for me. I want to explore a harsh look, to be able to see the texture in the cap and shirt, the stubble on the chin and the weathered skin while fading into black. So if I understand what you've said, (and Strobist 101) adding a shoot through umbrella and maybe moving into about 6' at 45 deg. (camera left), then adjusting power and aperture should give me that harshness I'm looking for? Or should I stay bare flash an reduce power. I am assuming that the specularity Tirediron mentioned my be due to the bare flash.

Gavin Hooey is awesome too:

Yes he is. I had watched this awhile back, watching it again has given me some more ideas. Thank you.
 
a vertical striplight would also make a nice light for the effect you are looking for. No need to buy a softbox, if you are on a budget, you could cut a styrofoam board in half and use it to bounce the light back on your model flashing indirectly. A striplight softbox will be easiest for controlling the light though.
The second light could be used as a backlight, to create a rim. Avoid light spill into the camera.

When experiencing with the angle of light. Put the camera on a tripod (or table) and move the lights a few degrees after every shot. Then compare the image after every shot. That will help understand the effect of various angles pretty quick. Same with distance of light.
 
Specularity can be caused by the relative size of the light source, by the type of modifier, but also by the ANGLE of the light as it strikes the subject...light that "glances" onto a human can be very hot, and very specular if it hits the subject at a glancing angle.

On human skin: a light at 8,9,or 10 o'clock in relation to the skin is "soft" to "normal" in its degree of specularity.

The SAME light (and I mean the exact, same light, at the power,same distance,with the same modifier), glancing in from a steepish angle, such as with the light placed at 11,12,or 1 o'clock in relation to the subject, will be VERY hot; same with the light passed behind the subject and located at 2 or 3 o'clock.

This is an unusual effect: the readings from a light meter will be 'the same', but the actual angle a hair-light, or rim-light, or accent light is placed, will determine if the light is rendered in a normal way, or rendered as very "hot" or "harsh".

The typical hair-light, or accent-light, or rim-light can be placed behind a person, at say 11 o'clock on their left, or 1 o'clock on their right, and only a very tiny little squirt of light can create a pretty "hot" bit of light; but id the same,exact light amount comes in from say, directly left or right, at 9 o'clock or 3 o'clock, and hits them "square" on one side, the effect will NOT be "hot" to nearly the same degree. Odd, but true. This is one time when you can NOT really trust a light meter.
 
Last edited:

Most reactions

New Topics

Back
Top