First Attempt on Dynamic Range Increase ...

deveel

TPF Noob!
Joined
Mar 31, 2005
Messages
263
Reaction score
8
Location
Germany, Sachsen-Anhalt
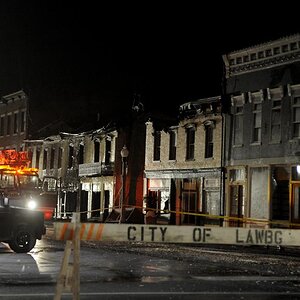
... I found this technique as a tutorial somewhere ... it's pretty cool. Basically you take a load of images from the same point with different shutter speeds, layer them in PS and do some magic with masking ... there we go. No blown out bright parts, still detail in the darker parts. I had to give it a try but didn't find the proper subjects and also the sky was completely overcast. But still, the windows in the church are not blown out, and the latern on the left of the church is not just one big bright chunk of pixels (this latern was really bright!).

kloster_hdr.jpg


... even the fluorescent tubes which are used to illuminate that bridge (it hurt the eyes if you looked at it long enough at that time (around 10.30 p.m.)) are recognizeable ...

dom_hdr.jpg


Need to say that I didn't do anything else to the images so with some more tweaking they might well turn out even better.
 
I have an architectural photographer who does a lot of work for me this way. Allows him to account for many different temperatures of lighting in a single location. Great work. Still have no real idea how to do it. :)
 
wow Deveel... and would you be so kind and post a link to the tutorial... how to do this... exactly :p
 
Hi,

@Mentos and dmccarty10, you gave me a reason to bump this thread :)
@thebeginning I might want to give it a try, though, different aperture values, one exposure time

Okay, the tutorial is in German and can be found here: http://www.penum.de/praxistipp/dri/nachtaufnahmedri.php. This is not written by myself, so I give full credit to the guy who wrote this!

I'll try to "translate" it but since I use a German PS version, the menu items might not be correctly translated.

  • Take a number of pictures (say, 8 ) with a tripod using the manual setting on the camera. Small ISO (100), always the same aperture (I used 13) and different exposure times, starting from very long (I used 30 seconds, but might be more) down to rather short (1 sec for my case).
  • Open all the images in PS. For the following I just number them 1 to 8 with #8 being the brightest (longest exposure) and #1 being the darkest (shortest exposure)
  • You will work on #8 (the brightest)
  • Copy #7 as new layer on top of #8 and make the #7 layer invisible and click on the #8 layer to make it the layer you'll be working with.
  • On the #8 layer do: Select->Color range (or how this menu is called). In the dialog choose "Lights" and say OK. Now the brightest image parts should be selected.
  • Now do: Select -> Feather ... (Alt+Ctrl+D) and choose the highest possible value (something around 130). If you get an error message saying that no pixels can be selected then lower the value until it works.
  • Select the #7 layer and do Layer->Add Layer Mask (or the second from left button on the bottom of the layer palette). Now the #7 layer should show the image and the mask grouped together in the layer palette.
  • Copy #6 on top of the two layers, make it invisible and select the #7 layer to work with.
  • Repeat the select Lights, Feather Selection, Add Layer Mask for this layer. For Feather Selection choose a value of about 30% less than before (or, if you get the error message, a lower value).
  • Copy #5 on top and so on until you have all images. Always use a 30% lesser value for Feather Selection than on the image before.
  • In the end, flatten the layers and do whatever is necessary for the image to look good (Contrast, Curves, Sharpen, ...)

I hope this was understandable. Look at the German tutorial page, there are step-by-step illustration that might clarify some more details.
 

Most reactions

New Topics

Back
Top