Navigation
Install the app
How to install the app on iOS
Follow along with the video below to see how to install our site as a web app on your home screen.

Note: This feature currently requires accessing the site using the built-in Safari browser.
More options
You are using an out of date browser. It may not display this or other websites correctly.
You should upgrade or use an alternative browser.
You should upgrade or use an alternative browser.
Hello, I am just starting...
- Thread starter bogdan.m
- Start date
photo1x1.com
No longer a newbie, moving up!
- Joined
- Sep 14, 2016
- Messages
- 923
- Reaction score
- 289
- Location
- Austria/Europe
- Website
- www.photo1x1.com
- Can others edit my Photos
- Photos NOT OK to edit
OK, here we go.
First of all: you should get familiar with what makes up the brightness of your image. ISO is the last value you want to rise, because that introduces noise and overall decreases the image quality. You need to learn the effects of shutter speed and aperture (shutterspeed can freeze or blur motion), aperture can create shallow focus or big depth of field. You need to know what you need in which situation.
Here are my edits and a few words:
Camera data: 1/160 | f18 | ISO800 | 18mm

Camera data: 1/400 | f22 | ISO400 | 18mm

Camera data: 1/400 | f5.6 | 400 | 55mm

Camera data: 1/400 | f22 | ISO400 | 200mm

Camera data: 1/125 | f18 | ISO400 | 200mm

And finally here are my lightroom edits: www.photo1x1.com/thePhotoForum/lightroomBogdanM.zip
Take a close look at the local adjustments gradients and brush. They are right on top below the histogram. Usually they are hidden. Click on one of them and press "H" to hide and show the anchor point of these. If you click on the anchor point you can see the settings or delete the adjustment all together.
First of all: you should get familiar with what makes up the brightness of your image. ISO is the last value you want to rise, because that introduces noise and overall decreases the image quality. You need to learn the effects of shutter speed and aperture (shutterspeed can freeze or blur motion), aperture can create shallow focus or big depth of field. You need to know what you need in which situation.
Here are my edits and a few words:
Camera data: 1/160 | f18 | ISO800 | 18mm
- you don´t need f18, I´d rather blur a little of the foreground and use f8 that would have reduced your ISO to 160.
- you don´t need a shutter speed of 1/160: 1/100th would have been enoug unless you were shaking because of the cold. That would have reduced your ISO to 100 - perfect
- The image doesn´t have a clear point of interest, so I didn´t really know what to emphasize while editing, so I gave it an overall retouch to give you an idea what is possible
Camera data: 1/400 | f22 | ISO400 | 18mm
- The star effect is created by closing the aperture - so f22 was a good choice, otherwise the sun would have merely created a blurry mass
- you don´t need to freeze any motion, so lowering your shutter speed to 1/100th would have given you ISO100 and therefore the best possible image quality. Especially when doing quite some brightening in the shadows, you introduce noise while editing. The lower the ISO, the lower that noise will be
- I might have gone a little overboard with this edit, but I wanted to show what is possible in Lightroom, without using photoshop
Camera data: 1/400 | f5.6 | 400 | 55mm
- Same as the first image: no action to freeze here, so 1/100th would have been fine to get the best possible ISO
- editing this one was similar to the first too. It doesn´t have a clear point of interest, so I gave it an overall retouch, trying to get back some information in the sky and give it a little pop.
Camera data: 1/400 | f22 | ISO400 | 200mm
- 1/400th is fine if you are afraid of blur due to camera shake at this long focal length (zoom)
- f22 is way over board, so not needed at all. f10 would have been more than enough and again would have given you the best possible image quality at ISO100
- This is something where I felt the editing was really worth it and changed the look pretty dramatically - again all in lightroom
- you can increase the effect of the big sun by placing somebody or something beside it i the far distance.
Camera data: 1/125 | f18 | ISO400 | 200mm
- 1/125 is pretty much the limit to not introduce camera shake even with better stabilized cameras/lenses. Did you use a tripod?
- it is difficult to judge on the f-stop f18 seems a little much, but since you probably wanted the foreground and the background as sharp as possible, I´d say it is OK.
- your edit was quite good on that one, I don´t think I could contribute anything, other than introduce noise
") but anyway here is my try.
but anyway here is my try.
And finally here are my lightroom edits: www.photo1x1.com/thePhotoForum/lightroomBogdanM.zip
Take a close look at the local adjustments gradients and brush. They are right on top below the histogram. Usually they are hidden. Click on one of them and press "H" to hide and show the anchor point of these. If you click on the anchor point you can see the settings or delete the adjustment all together.
OP
OP
bogdan.m
TPF Noob!
- Joined
- Nov 5, 2016
- Messages
- 61
- Reaction score
- 28
- Location
- Romania
- Can others edit my Photos
- Photos OK to edit
Thank you very much, i own my camera for a month now, this is very helpful for me. So the main thing i have to correct is getting low iso, think about my composition a bit better and to learn some more things about aperture, it seemed now that i missed some important info about it. I didn't use a tripod for the last one, i just kinda stop breathing when i am taking the shoots
photo1x1.com
No longer a newbie, moving up!
- Joined
- Sep 14, 2016
- Messages
- 923
- Reaction score
- 289
- Location
- Austria/Europe
- Website
- www.photo1x1.com
- Can others edit my Photos
- Photos NOT OK to edit
Thank you very much, i own my camera for a month now, this is very helpful for me. So the main thing i have to correct is getting low iso, think about my composition a bit better and to learn some more things about aperture, it seemed now that i missed some important info about it. I didn't use a tripod for the last one, i just kinda stop breathing when i am taking the shoots
Glad I could help. Don´t hold yor breath for too long
. In fact it is a mix. You can´t change the brightness of the scene unless you use flash (which doesn´t do much in landscape photography), so what you have to do is set aperture, shutter speed and ISO to get the best possible image quality. When you understand what aperture and shutter speed really do to your image, you can instinctively decide what is the best setting. Sounds complicated, but in fact it is not. Understanding is the key.
And as you say - composition is probably the most important part of photography because from a distance (or small in the web), even slightly blurred images or images with a lot of noise look great if they have good composition.
OP
OP
bogdan.m
TPF Noob!
- Joined
- Nov 5, 2016
- Messages
- 61
- Reaction score
- 28
- Location
- Romania
- Can others edit my Photos
- Photos OK to edit
I have just watched a video where they say the moon will be closest to the earth in 68 years on Monday, so i might redo the one with the moon It's going to appear 14%larger and 30% brighter, so i might get some good detail. I know it's just the moon, but i love astronomy so...
It's going to appear 14%larger and 30% brighter, so i might get some good detail. I know it's just the moon, but i love astronomy so... photo1x1.com
No longer a newbie, moving up!
- Joined
- Sep 14, 2016
- Messages
- 923
- Reaction score
- 289
- Location
- Austria/Europe
- Website
- www.photo1x1.com
- Can others edit my Photos
- Photos NOT OK to edit
I have just watched a video where they say the moon will be closest to the earth in 68 years on Monday, so i might redo the one with the moon
Funny, I just heard that too today. Let´s hope for some good weather - the moon is definitely something for everybodys portfolio
Four your reference:
this was shot 1/50 | f11 | ISO100
but the camera sat on a tripod, so if you want to shoot it handeld with your 200mm lens, I´d start with the follwing settings: 1/200 | f5.6 | ISO100 my image was taken in the desert (so very good visibility and clear skies), maybe you need to rise your ISO a bit if your sky isn´t as clear. But then again it should be 30% brighter these days so maybe you don´t need to.
The reason why I used f11 btw is because I had no other choice. I used a 2x extender that doubles your minimum aperture value, which was f5.6.
Play a little with the settings and check on your monitor - and later in lightroom what you like best. Use a wall, a table or something to rest your lens on and reduce the shutter speed a bit. Remember - when you reduce one of the three (aperture, shutter speed, ISO), you need to rise another one by the exact same number if you want to keep the brightness at the same level.
Shooting the moon is actually a pretty good way to practice manual (!!!) exposure settings. It hardly moves and as long as you don´t freeze, you have a lot of time.
OP
OP
bogdan.m
TPF Noob!
- Joined
- Nov 5, 2016
- Messages
- 61
- Reaction score
- 28
- Location
- Romania
- Can others edit my Photos
- Photos OK to edit
Well, i got myself a tripod, since that one was next on my wishlist, it arrived yesterday, i messed a bit with it and i got these effects from my keyboard, and i will definitely use it for the moon Monday i like this photography stuff, it's fun to do, very flexible and hoping to meet some nice people along the way


i like this photography stuff, it's fun to do, very flexible and hoping to meet some nice people along the way
photo1x1.com
No longer a newbie, moving up!
- Joined
- Sep 14, 2016
- Messages
- 923
- Reaction score
- 289
- Location
- Austria/Europe
- Website
- www.photo1x1.com
- Can others edit my Photos
- Photos NOT OK to edit
That looks very cool! Great idea! If anything I´d cover that glowing dragon and on the led that´s probably right beside the F15 key. They stand out a little too much.
Causapscal
No longer a newbie, moving up!
- Joined
- Oct 11, 2016
- Messages
- 225
- Reaction score
- 71
- Can others edit my Photos
- Photos NOT OK to edit
Very good beginning 
Just a little advice, begins by mastering the different aperture. You take a picture at each aperture and you will see what it gives. Then you do the same at different speeds and ISO. It is the basis, the rest, a cherry on sunday...

Just a little advice, begins by mastering the different aperture. You take a picture at each aperture and you will see what it gives. Then you do the same at different speeds and ISO. It is the basis, the rest, a cherry on sunday...
photo1x1.com
No longer a newbie, moving up!
- Joined
- Sep 14, 2016
- Messages
- 923
- Reaction score
- 289
- Location
- Austria/Europe
- Website
- www.photo1x1.com
- Can others edit my Photos
- Photos NOT OK to edit
Sorry to say that, my friend .
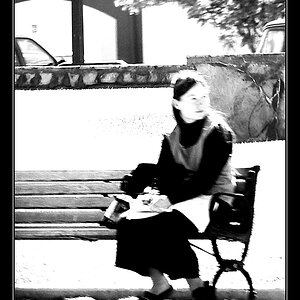
The bench seems to have some camera shake (don´t know why though, because 1/125th @55mm is usually fast enough - but things happen ). It´s also not really interesting to be honest.
While the first one is good in regard to sharpness, it is a little overexposed for my taste, and also not particularely interesting.
I like the third one best - it has the best out of focus effect, but you could have even increased that by zooming all the way in and stepping back a bit (still using the same framing). Try to compare these two shots for your next shooting day. Moss is a really nice photo motive, but it takes some time to find really great moss.
At the moment the northern hemisphere of the world isn´t too picturesque, it is much more difficult to find great things to shoot in nature, than in spring or summer - but don´t give up .
. The bench seems to have some camera shake (don´t know why though, because 1/125th @55mm is usually fast enough - but things happen
). It´s also not really interesting to be honest. While the first one is good in regard to sharpness, it is a little overexposed for my taste, and also not particularely interesting.
I like the third one best - it has the best out of focus effect, but you could have even increased that by zooming all the way in and stepping back a bit (still using the same framing). Try to compare these two shots for your next shooting day. Moss is a really nice photo motive, but it takes some time to find really great moss.
At the moment the northern hemisphere of the world isn´t too picturesque, it is much more difficult to find great things to shoot in nature, than in spring or summer - but don´t give up
.
OP
OP
bogdan.m
TPF Noob!
- Joined
- Nov 5, 2016
- Messages
- 61
- Reaction score
- 28
- Location
- Romania
- Can others edit my Photos
- Photos OK to edit
I'm not giving up. I am aware that not all of my photos will be great, although i will struggle to make them great. You are right about the weather tho, it is always misty and the clouds are always grey this time of the year, and i missed the super moon, nevertheless, i will always try again and come back with more
- Joined
- Apr 9, 2009
- Messages
- 41,401
- Reaction score
- 5,706
- Location
- Iowa
- Website
- kharrodphotography.blogspot.com
- Can others edit my Photos
- Photos OK to edit
A blurred background results from making exposure setting, point of focus and subject framing choices that control depth-of-field.
Bokeh is an inherent aesthetic property of each make/model lens that is not adjustable.
The more a background is blurred by controlling the depth-of-field, the more apparent the aesthetic quality of the blur, the bokeh, becomes.
But the bokeh is constant regardless how blurred the background is.
Understanding Depth of Field in Photography
photo1x1.com
No longer a newbie, moving up!
- Joined
- Sep 14, 2016
- Messages
- 923
- Reaction score
- 289
- Location
- Austria/Europe
- Website
- www.photo1x1.com
- Can others edit my Photos
- Photos NOT OK to edit
I had more luck with the moon yesterday, bright sky, but really, really coldI'm not giving up. I am aware that not all of my photos will be great, although i will struggle to make them great. You are right about the weather tho, it is always misty and the clouds are always grey this time of the year, and i missed the super moon, nevertheless, i will always try again and come back with more
. However, compared to the last example I´ve uploaded in a previous post, it was not really that spectacular. If you don´t see it side by side, you wouldn´t even realize the difference. BTW: I do like the moon more if it is not full, because then you see the shadows of the surface where it fades to dark. So as soon as your weather gets better, you can give it a next try without ever realizing that you missed the supermoon .
OP
OP
bogdan.m
TPF Noob!
- Joined
- Nov 5, 2016
- Messages
- 61
- Reaction score
- 28
- Location
- Romania
- Can others edit my Photos
- Photos OK to edit
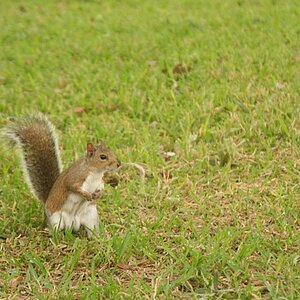
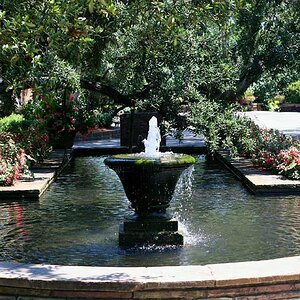
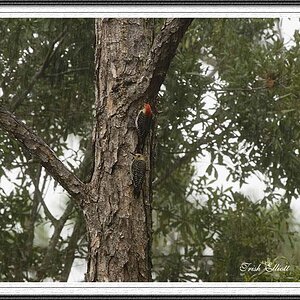
So, it's been a while now since i am watching lightroom tutorials, and i spent a lot of time fiddling with all the options and see what everything does, and since i had a little more spare time on my hands, i decided to redo all my photos and spend some time on editing, not changing the photo too much, but putting out what is nice in that photo. I honestly played with 5 options before xD. Here is my album in which i added one or two more photos. I know that some of them are not too great but i like how they turned out, everyone's opinion is welcomed.
Most reactions
-
 405
405 -
 311
311 -
 277
277 -
 271
271 -
 264
264 -
 223
223 -
 194
194 -
 181
181 -
 165
165 -
 152
152 -
 141
141 -
 139
139 -
 134
134 -
 122
122 -
 103
103
Similar threads
- Replies
- 13
- Views
- 308
- Replies
- 13
- Views
- 484
![[No title]](/data/xfmg/thumbnail/40/40284-f59f6230f0d5b9eacf977f8b0392f087.jpg?1619739407)