Help not sure why this is happening?

daveyboy

TPF Noob!
Joined
Nov 9, 2004
Messages
17
Reaction score
0
Hi ive luckily been given a Minnolta Dynax 600si camera. Ive never really taekn many pics before so just kinda want bit of advice as to why the foreground of these two shots are totally blacked out. It's quite annoying as theres a couple walking past in the 1st one and a train going by above in the 2nd one, but because its so dark you cant see that.
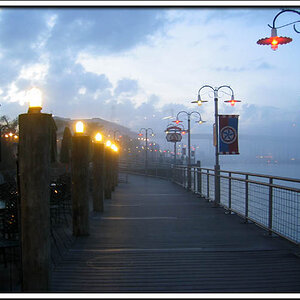
The 1st was taken on a 75-300mm lense on 100iso
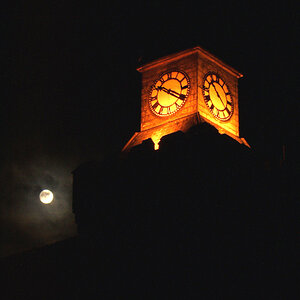
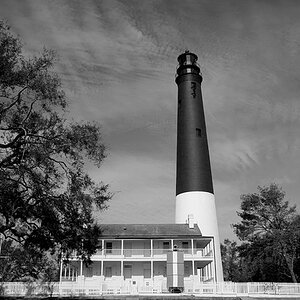
The 2nd shot was taken with a 35-70mm lense on 200iso
Both Films for Jessops own brand, not sure if that would make any difference.
I think the bridge is in darkness on the first one cause the sun is shining directly on camera therefore making foreground too dark. Im not sure though.Any help with why would be cool.
Also if there's any posts or if anyone wants to give me some cool tips to get some cool effects with the camera that would be very helpful as im trying to learn how to take half decent photos.
Thanks
UaF10825.jpg

vyd10850.jpg

Sorry my scanner is really rubbish and my computer crashes if i scan anything other than lowest res, hence dust etc etc.
 
Looks to me like the same problem in both pics.

You have a very bright area (the sun) in both images. The camera's meter will always try to give you an average (mid toned) exposure. So the average between the sun and whatever else...leaves you with very dark areas. If you had exposed for the train or the couple...the bright areas would be blown right out and be almost completely white.

Film (& digital etc.) have what is called latitude. That's the range of brightness and darkness that it can capture in a single exposure. Color negative film is pretty good for latitude but it's still not enough to get both the bright sky/sun and these dark areas.

What you have to do, as the photographer, is to figure out a way to trick the camera to getting what you want. If you want the train, get a meter reading of just the darker areas without the sunlight, then recompose and shoot with that setting. If you want to see the bright areas, meter for those areas.

You might still have to adjust the exposure from those reading because, remember, the camera's meter still wants to make everything mid toned. Knowing how much to adjust, comes with experimentation and experience.
 
I agree with BigMike. He pretty much summed it up for you. You are shooting into the sun, so it will create a "sillouette" of the items in front of it. I think the more you expreriment in these situations, you can figure out what type of settings to use. Everyone has trouble with these shots at one time or another, but just keep practising at it.
 
Just a quick question on the same subject.

You know how varying degrees of subject brightness or luminosity (or whatever!) are measured on the scale of

(light)I II III IV V VI VII VIII IX X(dark) and 18% grey is V.


If you initially meter so that your exposure will produce V (18% grey) then bracket one stop either side, will the over/under exposures be equivalant to IV and VI?

As you may have noticed by the way i've worded it, I dont really know what im on about so please dont respond with too harsh a reply!!!:lmao:
 
Dude, you are so thinking too much!

Essentially there are exposure values which are equal to one stop and are often described in numbers (I don't recall having used roman numerals before though). Aperture, ISO and speed have an effect on exposure. In your examples the pictures are exposed for a whole scene, but that scene contains bright glarey objects.

What you need to be thinking about is what good old BigMike was talking about - exposure, not exposure values.

If a scene contains a widely ranging set of lighting, then the camera as you correctly state will try and make the whole thing medium. Going steps either way will only affect the highlights and the shadows of the image - if you were to under or over expose those shots they would not improve drastically, they'd just get lighter or darker.

Rob
 

Most reactions

Back
Top