Help with Photoshop Haloing

Southtown57

TPF Noob!
Joined
Sep 11, 2010
Messages
33
Reaction score
0
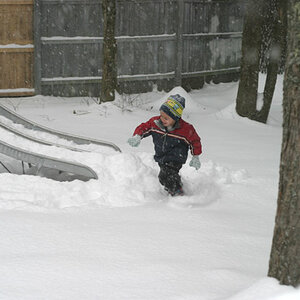
I'm trying to adjust the foreground separate from the sky in photoshop. However after doing so I noticed a strong halo effect around my son's head and even with feathering the selections it made lines where the layers were added. How can I make it so it doesn't do this?
 

Attachments

  • binkybropineapple5.jpg
    binkybropineapple5.jpg
    1.4 MB · Views: 143
First, very nice shot, (perhaps a bit cold).
You might try making the selection then shrinking it a bit then feathering so the very edge of the selected parts in the new layer is unaffected by the editing.
 
Echoing Traveler's comment nice family memory.

Getting back to your question, what exactly are you trying to adjust specifically???? Exposure, sharpness, blur, color, what????

I suspect you may be trying to darken the sky???? If so do this.
  • From your original Raw file as the background layer #1, and that layer highlighted. Press Ctl J (pc or Mac). That will put a copy of the background layer above the background.
  • Now press Shift-Ctrl-N that will open a dialog box for the new layer. Label it Burn, set the mode to soft light and check fill.
12.JPG

  • That will place a gray blank layer above your last copy.
  • Now go to your tools and select burn. At the first mark set the brush size you want (later you can use the bracket keys to adjust the size), set your hardness to about 15. The second mark is where you select what you want burn. You can burn Highlights, Midtone and Shadows all on this layer, you just have to change the range. I like to set the exposure to about 10% so I can control the effect better, but I have used 15-20 if I'm in a hurry. Make sure your foreground pallet color is set to white.
123.JPG

  • Make sure your gray layer is selected. Even though you can see your image, and it looks like you're burning it, you are actually editing the gray layer. Now brush over the area you want to darken. The more you brush the more you'll darken whatever you selected (Highlights, Midtone, Shadows). The advantage of this is that you can really work the edge without getting that halo effect.
  • If you mess up, either use the go back edit function, or you can change the foreground to 50% gray and paint over the area you messed up on. Or you can clean it up in a dodge layer.
  • Once you've burned the area, if you think it's to much, you can also adjust the opacity of the layer down.
  • Now when you're satisfied with the burn, with the gray layer selected, hit the shift key and click on that copy layer I told you to make at the start. That will highlight both of them. Now right click and select merge layers, it will merge the those two together, with the burn editing you did.
To dodge an area, you do the same thing, except chose the dodge tool. I'd like to say I figured this out all by myself but fellow TPF member Dan O, got me started on using this method and I've since found numerous other uses for it.

If this isn't what you're trying to adjust then get back to us, there's some other methods using masks.
 
Last edited:
Echoing Traveler's comment nice family memory.

Getting back to your question, what exactly are you trying to adjust specifically???? Exposure, sharpness, blur, color, what????

I suspect you may be trying to darken the sky???? If so do this..

Thank you so much! Yes I'm trying to lighten the foreground and darken the sky but photoshop is still new to me. I'm going to try what you said. Thanks again!
 

Most reactions

Back
Top