How do I get sky/landscape exposures correct?

DwainDibley

TPF Noob!
Joined
Jun 27, 2007
Messages
164
Reaction score
0
Location
Staffordshire, UK
Website
www.flickr.com
Can others edit my Photos
Photos OK to edit
I'm having a few problems getting the exposure right when taking pictures of landscape-type subjects when the sky is in the picture also. Take a look at the photos below to see what I mean. I've tried adjusting shutter speeds, different apertures, exposure locking and can't quite seem to get it right! :thumbdown:

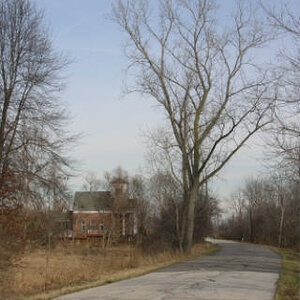
The first picture has the ground exposed OK but the sky is very washed out looking. The second picture has the sky much better exposed, whilst the ground part of the picture seems underexposed to me.

Details: Shutter: 1/200, F4 aperture, focal length 21mm, ISO 100

727956678_185974ef4b_b.jpg


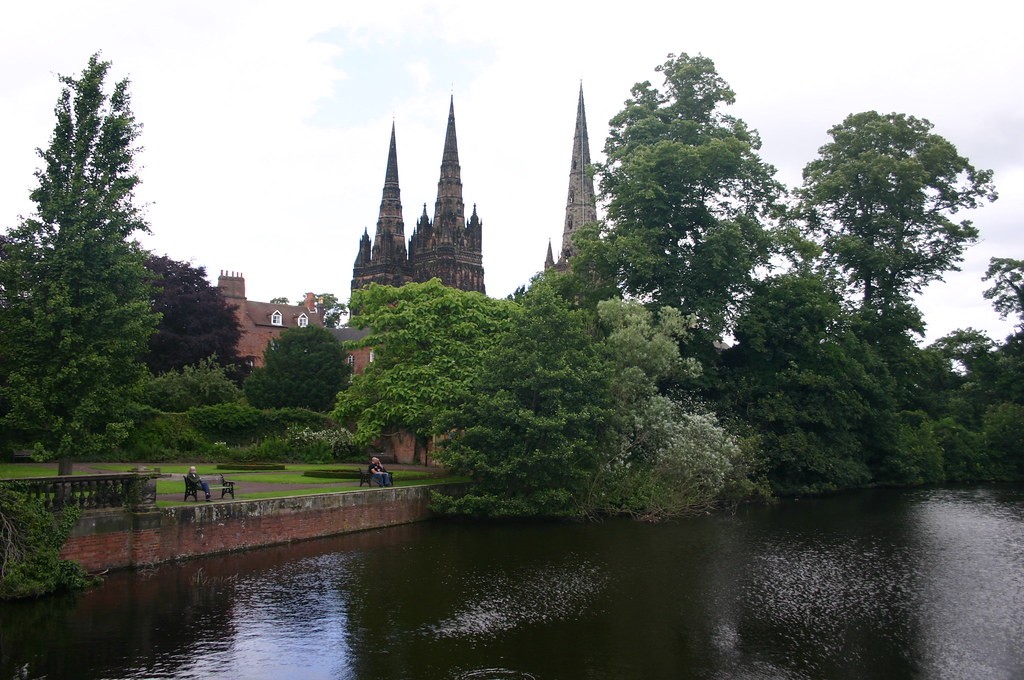
2nd picture details: 1/320, F5 aperture, Focal length 21mm, ISO 100.

727956718_d6e3182d78_b.jpg


Both taken with my Canon 300D. Please excuse the composition of the pictures, I think I still need to work on that! :greenpbl:
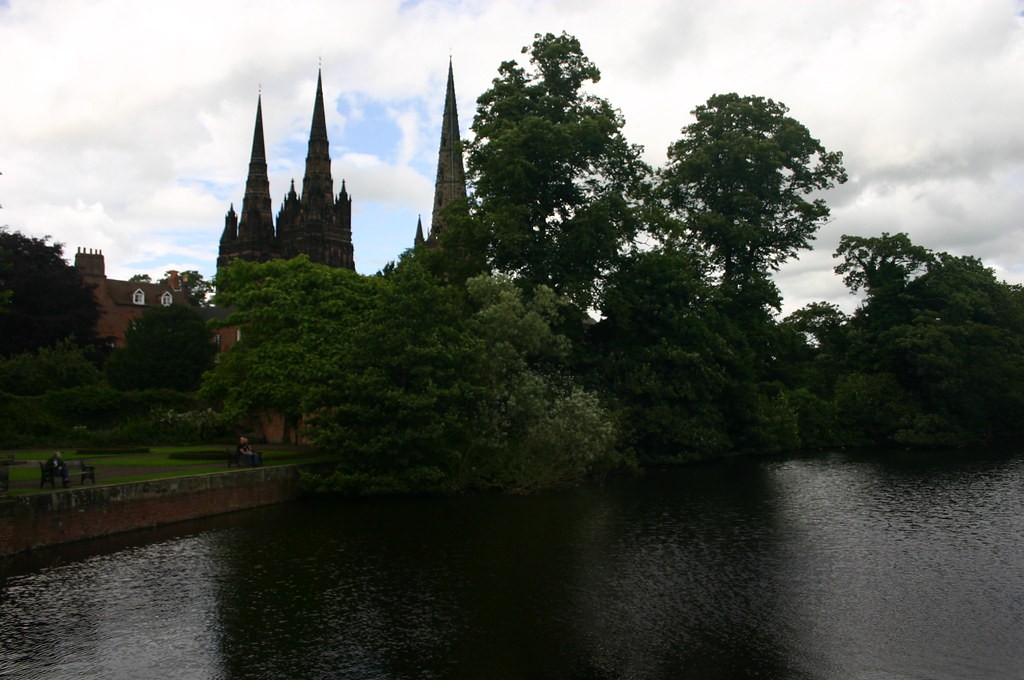
 
Ah...you are starting to realize the limitations and challenges of photography. Film and digital sensors can only capture a certain range of tones. I believe that, currently, digital sensors can capture around 5 stops (maybe more with post processing). In your scene, the difference between the sky and the foreground is maybe 7 to 10 stops difference...so there is no way that you can set an exposure value to capture it all with one exposure.

As a photographer, it's up to you to decide which is more important and expose for that. There isn't really a 'correct' exposure...just what you, as the artist, want it to be.

A common goal of many photographers is to capture a scene closer to the way the human eye sees it. When using film, a photographer might use a filter to cover the brighter part of the scene, thus bringing the whole scene into the range of the film. That may not work well for something like this...where the sky line isn't even.

Digital photographers (or film users with digital files) have a few more options. One would be selective editing. For example, in the first image you could select just the sky and edit that to be darker. Another option would be to combine different exposures. You would take two or more exposures at different values (tripod recommended) and then combine them with software...taking only the best parts from each.

There is even automatic process for this. Photoshop calls it HDR (High Dynamic Range)...do a search for more info.
 
Thanks for the reply Mike, very informative! :thumbup:

Looks like my best option then is post-processing in Photoshop, I do have a copy of Photoshop 7 but haven't used it much, think I'll have a bit of a play with it.
 
The best way to do fix such a problem is using ND grauated filters.
Graduated filters have a clear bottom half and have coating on the top half, the density of the coating changes depending on the filter strength, generally starting at ND 2 up to 110 and these will give you a stop difference of up to 10+ stops in half of the scene. The best thing about ND graduated filters is that they usually come to fit the cokin style filter holders (I would avoid the screw on graduated filters), these filter holders are square and fit on the front of your lens. Because the holder and filters are square, this mean you can place the line where the ND coating starts higher up than halfway.
ND is neutral density and it will not affect the colour of your image, but you can get coloured graduated filters that can add great effects.

But as Mike pointed out, in the digital age (and I actually do the same when darkroom processing) you can take multiple exposures and merge them together, or go further and try HDR.
 
I do have a few Cokin grad filters...but the problem with those, is that even though you can move the filter up or down...the line is still flat. In this image, for example...the line between the sky and trees/buildings is anything but straight. Using the filter would be an improvement but it's far from perfect.

I do have a copy of Photoshop 7 but haven't used it much, think I'll have a bit of a play with it
Digital Photographer's best friend.

Also, I forgot to mention that it will help if you shoot in RAW. RAW files have more flexibility for editing. You could even use one RAW image to make two or more different images to combine for increased dynamic range.
 
it looks ok, but the sky is still very blown. it also looks a little over processed to me, and the blue spot and cloud look out of place. use your histogram when you are shooting and make sure you didnt blow either the highlights or shadows. the histogram is a very powerful tool for digital photographers. for a more in depth guide just search for histogram guide.
 
This is a busy scene but in simpler cases you can use a #2 ND Grad filter which is basically a filter that is 2 stops darker at the top and gradually changes to clear.

This can be done in every version of photoshop by taking 2 photos putting them on top of each other. Adding a layer mask, and in that mask make a white to black gradient.
 
744439211_33eac422a6_o.jpg


thats my 5 minute pchop attempt. just did a linear burn to the sky and lightened up the rest of it
 
That looks much better Carniflex, I have to admit these photos are as they are straight out of the camera, I haven't done any post-processing (That's the next thing I need to learn!)

I guess that's another viable option, using PS to lighten any darker portions of the picture.
 
Ok, well you just dupilacte the layer. THen you double click on the duplicated layer in the layers tab and i set the opacity to around 60%. THen you click on blending mode and select linear burn. Then you can just erase out everything but the sky on that duplicated layer. THen i just selected the first layer and did some curves and levels
 
Ok, well you just dupilacte the layer. THen you double click on the duplicated layer in the layers tab and i set the opacity to around 60%. THen you click on blending mode and select linear burn. Then you can just erase out everything but the sky on that duplicated layer. THen i just selected the first layer and did some curves and levels

I'm not getting the sky to look anywhere near yours......
 

Most reactions

Back
Top