How to photograph transparency?

vvcarpio

No longer a newbie, moving up!
Joined
Aug 22, 2014
Messages
118
Reaction score
35
Location
New York, NY
Can others edit my Photos
Photos NOT OK to edit
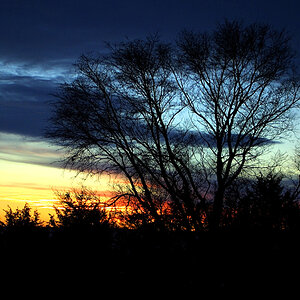
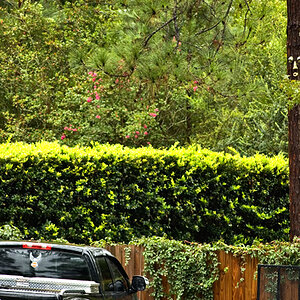
I was given this framed transparency (not sure what it's made of -- cel?) to convert into digital:

#1)
2qj5y.jpg


I took the picture above using my DSLR and a slave flash in the back.

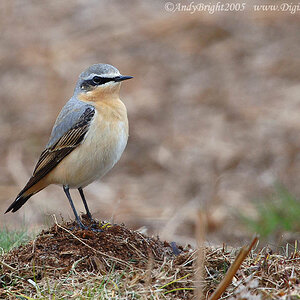
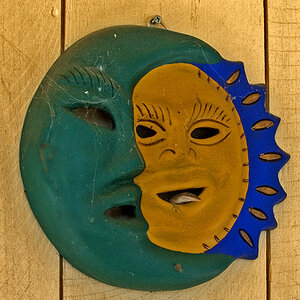
I then took the picture below of the framed transparency mounted on a spotlight stand with an Ottlite bulb behind:

#2)
dzgtjk.jpg


What kind of setup should I be looking into? Is there a DIY option? Following is a link to the full resolution version of #2:

http://i65.tinypic.com/25gudfo.jpg

Thanks a lot.
 
The light behind could do with some more diffusion IMO.
the bricks on the round tower are getting more light than those on the wall above.
Its very similar in practice to many old transparency copying systems, which had either bellows or solid extension to give 1:1 and a translucent sheet to diffuse the light evenly.
When I tried copying some of my Dads old slides I used daylight for the light source & moved the camera & slide (firmly linked wrt each other) to prevent hot spots. Moving your lights behind the subject during a longer exposure should have the same effect.
 
If the sun is an option, it's a cheap one that will work. Otherwise, I would use a light table which is easy enough to make. Get some translucent diffusion material such as white, rip-stop nylon, plastic, etc, and use several bulbs, spread out slightly to illuminate it. Ideally, make the source at least twice the size of the image. Just make sure you shoot in raw so that you can correct WB as necessary.
 
I have some good idea now. (I was clueless.) Thanks a lot, petrochemist, tirediron, for pointing me in the right direction.

Just ordered extension tubes. Been curious about them, now have an excuse to get them.

Sun is an option, yes, thx didn't think of that. I might get diffusion material, too, just in case, if I can't find one at home. I'm sure I'll find future uses for it.
 
Thank you gryponslair99. I have a projector for watching movies. So that may be an option, but I think my (wife's) Ott lite bulb in a spotlight stand would work. I also have 2 light stands so I'll rig it up to hang the framed transparency in front of the spot light. I also found that my old collapsible reflector kit comes with a collapsible diffuser so I'll use that.

My extension tubes will arrive today. I am intending to use the 36mm tube on my fast 35mm prime to hopefully get 1:1. I also just realized my wife has a 200mm fast prime lens so I may not need to get up close to fill the frame with the transparency.

I think I'm all good for now. I posted my question because I didn't know if a DSLR, a flatbed scanner, or some other device I haven't yet heard of is the way to go.

Thank you, all.
 
I think I'm all good for now. I posted my question because I didn't know if a DSLR, a flatbed scanner, or some other device I haven't yet heard of is the way to go.

Well the ideal way would be with a professional drum scanner, but they are somewhat expensive! Some flatbeds do a reasonable job of scanning negative & transparencies. There are also dedicated home scanners available for 35mm etc.

If you've only got a small number to do, your camera & a little effort will do just fine. :)
 
take it to a lab and get it professionally scanned
 
Thank you, petrochemist. There are 5 transparencies.

chuasam, can you show me samples that show the difference between professionally scanned and taken by camera? Thanks.
 
- Consider removing the film from the frames for taking the shots, but then you will need to mask off the area around the film.
- Do multiple shots to cover the area of the film and then stitch together in post.
- Set you WB so the camera does not change anything between shots.
 
Thank you, Dave. I've been doing panoramic photography of late so I already have a small rail/slider and PTGui software. I just tried it with the 13mm extension tube and PTGui stitched me a 12,758x9,231-pixel image. So I got great amount of detail to work with. (I'll just have to re-shoot as it was a quick "try" and PTGui had trouble stitching my not-so-perfectly-aligned 3x3 images.)

I also realized I didn't need a fast lens -- if I shoot wide open depth-of-field is mostly at the center of the image. So I shot at f/9.

I also turned off AWB and set focus to manual.

I'm now mostly concerned that the original transparencies don't have enough color to begin with as to make it appealing. I think that's why my client sent me the transparencies. He liked the way I processed in post. So it might still be a challenge.
 
Last edited:
Thanks for the feedback on what you have done. Yes, I expect if the customer had the transparencies framed and on display that the colors will have faded.

One issue is to check if these are actually the customers images or that they have the right to be making copies of the images. If they are the customers images then they should have made a copy of the original for their display and kept the original in storage more properly suited to film. I would hate to see what might happen if the customer later went back to the original photographer showing that person how well you fixed up their old images.
 
Thank you, Dave. I think the transparencies belong to my client's client. Hopefully, if what you say happens, it will mean good business for me :).

Below is my processed version after stitching the 3x3 photos. I bracketed my shots from -2ev to +2ev then created an HDR using Photomatix. I tried other HDR softwares but Photomatix seemed best at pushing colors to the extreme.

Comments and critiques welcome.
2ikt7qc.jpg
 
Looks good. The yellows seem a bit strong for me and the van reflection in the window above the entryway makes it look like it is on the second floor. I would probably darken the upper half of the image and lighten the lower left so the entryway and its architecture was more of the focus and not the window AC units.
 
Thank you, Dave. Just dialed down the yellow and darkened the back. The "van reflection" on close inspection of my full res stitch turns out to be the glass roof of an exterior elevator, I think. I showed it to the client -- he liked it. I'll continue with the rest. Thank you, too, for the tip on stitching. Plenty of detail captured and probably even more if I used higher magnification extension tube. PTGui makes easy work of stitching. I haven't seen the quality of drum scanned images but I'm beginning to think stitching can match or exceed the quality of detail captured.

opxpig.jpg


24pi26v.jpg
 
Last edited:

Most reactions

Back
Top