- Joined
- Mar 29, 2016
- Messages
- 14,856
- Reaction score
- 8,310
- Can others edit my Photos
- Photos NOT OK to edit
Does that answer your questions, or is it too vague?
No I understand the approach now. Thank you.
Follow along with the video below to see how to install our site as a web app on your home screen.

Note: This feature currently requires accessing the site using the built-in Safari browser.
Does that answer your questions, or is it too vague?
") .
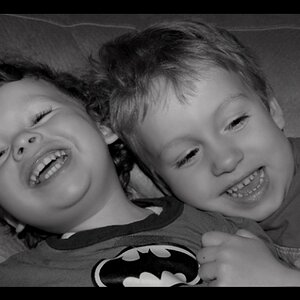
.we´re gonna get you there together, don´t worryThanks a lot guys. Spent the last few days driving the wife and the kids insane. Will post some photos in a little while for you to pick apart. I'm getting there but still having difficulty with highlights on one side of the face and shadow on the other. Definitely something that can be smoothed out with light room but far from that clean even look. I'm trying to get to the point where I can blow some of that stuff up to hang on the wall, I know ambitious of me


Thanks a lot guys. Spent the last few days driving the wife and the kids insane. Will post some photos in a little while for you to pick apart. I'm getting there but still having difficulty with highlights on one side of the face and shadow on the other. Definitely something that can be smoothed out with light room but far from that clean even look. I'm trying to get to the point where I can blow some of that stuff up to hang on the wall, I know ambitious of me


![[No title]](/data/xfmg/thumbnail/38/38739-1ad36a46750bafbe805f009b4453e8be.jpg?1619738703)