- Joined
- Sep 2, 2005
- Messages
- 14,455
- Reaction score
- 3,328
- Can others edit my Photos
- Photos OK to edit
In an act of ultimate concession, I post this here... (if you don't know what that means, don't ask) 
I have mentioned a number of times about how I tend to shoot and re-shoot images until I feel I have gotten them right. What's more is I have mentioned I tend to be a bit of a night photography addict. I thought it might be interesting to share my experiences here, and perhaps even make it a bit of a night photography guide.
NOTE: This is an evolutionary lesson process. In other words, you are not only going to get the tips, but you're going to see my utter failures as I personally went through this process of learning. The only photo I really consider acceptable in this whole thread is the last one. The rest are painful.
Now the main subject of this particular disseration will be my quest to obtain a good Boston skyline... however, I have taken a great many night photography images leading up to even the first skyline picture I took, and with each of these came a different special lesson.
Lesson 0 : A Word (or more) on Composition
Keep in mind that the rest of this article focuses entirely on technical aspects of getting a night shot, but there is one key element which you must keep in mind all the time... it's still a photograph, it's still art, and therefore composition is still the most important thing. People often times get so excited that they nailed the technical parts that they consider a poorly composed shot a masterpiece. Don't fall into this trap.
Keep in mind the elements you have to play with in night photography. Obviously, dramatic light is a big part of it, but try to think about how to stitch the elements of a scene together in a way that works artistically. Sometimes thinking of the picture as more of an abstract painters canvas is a good way to approach it.
Beyond that, consider that some subjects simply don't work at all artistically for night photography. Accepting that a subject is poor is an important step when growing as a night photographer.
Ok, onto the easier stuff.
Lesson 1 : Get a Tripod
Night photography tends to be about taking longer than usual exposures (often 30 seconds and sometimes up to hours), and that means you are going to need a tripod. It is possible to use other stabilization methods, like setting your camera on a railing, or even on a sturdy unmoving bag of some kind, but a tripod is going to be relatively key. Fortunately I figured this one out before I tried to take any pictures so I don't have any examples of real boner shots with no tripod, but if you'd like to see the effect, go outside at night near a traffic light and take a 2 second exposure while moving the camera, and you'll see what I mean.
Lesson 2 : I Can't seeeee you!!
When you are taking a relatively long exposure, you can actually step directly into the line of the camera's view, and even move around with relatively no chance of the camera actually "seeing" you... just so long as no part of you happens to be close to as bright as the object that is illuminated enough for the camera to see and/or you don't stand in the same source of light for as long as the camera would need to expose it.
For example, we traced this Audi S4 using cycalume light sticks and an LED keychain light by walking in front of the car and moving the light around with our hand. I probably crossed in front of this car no less than 5 times.

This gives you all kinds of fun possibilities, light creating floating heads behind tombstones and such. Good times, good times.")
Here is an example where a PART of me was visible when taking the shot, because the sparkler was so bright and beautifully illuminated my pasty white legs.

Lesson 3 : Flash
For the most part, flash is not worth your time. Many of your subjects will be too far off for the flash to do any good. That being said, there may be times when you want to spot illuminate a particular part of the frame or give a bit of a fill light to the foreground with a dark city skyline in the background or something. Just understand that the flash is going to be very powerful and can easily screw up a shot, so be careful with it.
Sometimes the results can be disastrous:

Which brings us to our next lesson, which is...
Lesson 4 : Don't Make Embarrassing Poses and Faces if You're Not Totally sure the Flash is Off
Need I say more?

Eh? Eh?
Lesson 5 : Shoot RAW, Shoot RAW, Shoot RAW
I cannot stress this enough. Did I mention shoot RAW? Shoot RAW.
When you are shooting in the night the colors of the light sources that will be in your shot will tend to vary significantly. If you happen to be shooting with an incandescant street lamp nearby, guess what? You're going to have one heck of a yellow shot on your hands.

This is a non-issue if you happen to be shooting RAW as you can simply swing the color balance the other way with no loss of image quality. HOWEVER... if you shoot a JPEG, the camera is going to decide (upon recording) that "Hey! He didn't need all those extra colors and stuff, so I'm just going to toss all that detailed information (and detail) into the trash!" If the information isn't there, you will never be able to recover it.
Shoot RAW, shoot RAW, shoot RAW!
Lesson 6 : Manual Focus
Your camera needs light to be able to focus properly, and more of it than you would generally expect. What's more is that focusing aids light bulbs and laser grids will only be useful within a certain range. This will leave your camera blind and guessing in a lot of situations. If you look again at the shot above, you will see it is kind of out of focus (in addition to being hideously yellow)... this is because at the time I tried to focus on something my camera COULD see and then move the camera and take the shot. Needless to say, it didn't work. I don't know why it didn't occur to me to simply try to manually focus the thing, but... oops.
Lesson 7 : Use a Remote Shutter Release
Most cameras will support the use of a remote method of releasing the shutter. This is to say that you will be able to take the picture without physically touching the camera. Why? Because when you touch a camera (even on a tripod) it will shake. Now one alternative to this is to set a self-timer for 10-20 seconds before it releases the shutter, but this is *really* annoying, significantly slows down your process, *and* still runs the risk of causing your camera to shake. It really doesn't take much. By and large the remote release is the way to go.
Lesson 8 : Expose to the Right
(keeping in mind that we know you are shooting RAW, shooting RAW, shooting RAW)...
When shooting night photography it is very very imporant to expose to the right... what this means is to slightly over-expose your image (thus shifting the resulting histogram "to the right"). This is critical because it will be sure to capture the details of all elements in your frame including those elements that are in shadow. You can then back the exposure down slightly to give the desired visual effect.
If you do not do this, you will actually wind up with very dark portions of your frame that will look strange and dead in a picture. When you try to bring the picture up, you will find that you simply didn't capture the detail at all... in other words, that part of the image simply wasn't there. And you will wind up with a result very similar to my first attempt at a skyline:

Ouch. (And the scary thing was I thought this was amazing at the time.) Horrid.
Lesson 9: Manual Focus... to Infinity
If you are shooting anything of any distance away, not only will you need to focus, but you will also need to manually focus to Infinity on your lens. Note that most lenses have a focus point of infinity actually marked on the lens and this is generally where you will expect the lens to be when you take your shot. The idea here is that if your lens focused properly, it would likely select this anyway... however, since your lens is fighting against the dark it may fail to focus and will wind up coming just short of where it needs to be.
Be aware, however, that some lenses are mismarked, or may have sloppy focusing rings. You want to check AHEAD to be sure you have a true infinity marked on your lens and re-mark it if necessary. This brings us to our next lesson...
Lesson 10 : Bring a Flashlight!
You seriously need to make sure you have at least one flashlight and some spare batteries on hand. First of all, you'll be crawling around in the dark and this will be a safety element for you. Second of all, this will help you when you need to manually focus to infinity in the dark or make other changes to your camera settings.
Lesson 11 : Check Your Pictures in the Field
Be sure to check your image upon capture. Look at your histogram. Do you think you have it pushed to the right without going too far? How about that focus? Zoom in to 100% and examine the edges to make sure they're straight and true.
Lesson 12 : Creating that Star Effect
Ever noticed how some night pictures have a beautiful star around the bright light sources? Ever wonder how? Well, there are a few ways. One is to use a star filter, which is a nice trick since it allows you to select any aperture you like and take advantage of your lenses sweet spot. Another is to use a Photoshop filters (cheater!), and the last (and my preferred method) is to let your lens do the work for you.
Most lenses will create a star around bright light sources right around F8-F11. This is where the blades of the lens "pinch" down on the light, causing the light to refract and bend around the blades, creating the desired effect. Note that different lenses will have different results. The Sigma 10-20mm does a very admirable job as shown here:

Also notice that in this shot we have quite a bit more detail in the buildings because we exposed to the right. Still could be better though. This was trial 2 for this shot.
Here's 100% crop:

If you want absolutely insane star formations the typical 50mm 1.8 is the mac-daddy, and also happens to be crazy sharp, as seen here:

Keep in mind the cost of stopping down. Light refraction around the blades of the lens will happen everywhere, and your lens may not be at peak sharpness at F8-11. This is a matter of compromises. If you opt for this route, try to balance the strengths of your lens with the need for this effect.
Ok, so now using all of these methods, we come to my trial 3 for this skyline:

Hoo boy are we getting close. More detail in those buildings, the focus is looking pretty crisp, the stars are pretty good, etc. Still, though, I feel like I could do more.
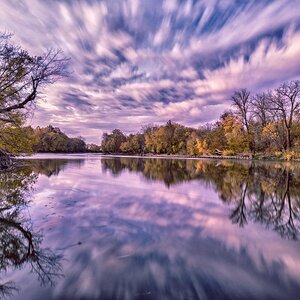
Lesson 14 : The Twillight Hour
Every day for somewhere around 30-60 minutes is twillight. Twillight can be the most spectacular time of the day to take pictures because you get such dramatic lighting. What's more is that you can get what appear to be "true nighttime" pictures with wonderful amounts of detail because the subjects are still partially illuminated. All you need to do is back the light down a bit in post processing and away you go.
This particular shot (my most recent) was in the very last 10 minutes or so before it became TRULY dark. It is my trial 4 and my current "best".

Now is where we start to get into the hard-core stuff...
Do you have to do this stuff? Well... no... but every extra thing you do adds a couple points of technical value to your shot. If you want to really kill it... do these.
Lesson 15 : Mirror Lock-Up
Most cameras have the ability to lock the shutter in the "out of the way" position before taking the shot. This will marginally reduce camera shake to help you have an even steadier camera and thus a clearer sharper picture. (I did this in Trial 4)
Lesson 16 : Avoid Windy Days
While tripods are generally sturdy and heavy enough to not be overly affected by wind, certainly a total absence of wind is best. Also removing your camera strap is sometimes a good idea since the sucker will act as a bit of a sail in extreme conditions. This was (I believe) one problem with my Trial 4.
Lesson 17 : Sandbag It!
While truly truly extreme, you can place sandbags on the legs of your tripod to help steady it. Many tripods also have rings so you can attach a sandbag to them. I haven't tried this trick yet.
Lesson 18 : Multi-Shot Stitch
This actually applies to more than night photography... but if you have a particular lens you want to use which is not wide enough to get your shot, or your particular lens is stronger when more zoomed in (and therefore would not get your shot), take multiple overlapping shots of the same subject (turning the camera on the tripod as you do) and then use Photoshop or other tools to stitch them together.
Ummm... Ok, I think that's it. Did I miss anything?
Hope this is helpful.
I have mentioned a number of times about how I tend to shoot and re-shoot images until I feel I have gotten them right. What's more is I have mentioned I tend to be a bit of a night photography addict. I thought it might be interesting to share my experiences here, and perhaps even make it a bit of a night photography guide.
NOTE: This is an evolutionary lesson process. In other words, you are not only going to get the tips, but you're going to see my utter failures as I personally went through this process of learning. The only photo I really consider acceptable in this whole thread is the last one. The rest are painful.
Now the main subject of this particular disseration will be my quest to obtain a good Boston skyline... however, I have taken a great many night photography images leading up to even the first skyline picture I took, and with each of these came a different special lesson.
Lesson 0 : A Word (or more) on Composition
Keep in mind that the rest of this article focuses entirely on technical aspects of getting a night shot, but there is one key element which you must keep in mind all the time... it's still a photograph, it's still art, and therefore composition is still the most important thing. People often times get so excited that they nailed the technical parts that they consider a poorly composed shot a masterpiece. Don't fall into this trap.
Keep in mind the elements you have to play with in night photography. Obviously, dramatic light is a big part of it, but try to think about how to stitch the elements of a scene together in a way that works artistically. Sometimes thinking of the picture as more of an abstract painters canvas is a good way to approach it.
Beyond that, consider that some subjects simply don't work at all artistically for night photography. Accepting that a subject is poor is an important step when growing as a night photographer.
Ok, onto the easier stuff.
Lesson 1 : Get a Tripod
Night photography tends to be about taking longer than usual exposures (often 30 seconds and sometimes up to hours), and that means you are going to need a tripod. It is possible to use other stabilization methods, like setting your camera on a railing, or even on a sturdy unmoving bag of some kind, but a tripod is going to be relatively key. Fortunately I figured this one out before I tried to take any pictures so I don't have any examples of real boner shots with no tripod, but if you'd like to see the effect, go outside at night near a traffic light and take a 2 second exposure while moving the camera, and you'll see what I mean.
Lesson 2 : I Can't seeeee you!!
When you are taking a relatively long exposure, you can actually step directly into the line of the camera's view, and even move around with relatively no chance of the camera actually "seeing" you... just so long as no part of you happens to be close to as bright as the object that is illuminated enough for the camera to see and/or you don't stand in the same source of light for as long as the camera would need to expose it.
For example, we traced this Audi S4 using cycalume light sticks and an LED keychain light by walking in front of the car and moving the light around with our hand. I probably crossed in front of this car no less than 5 times.
This gives you all kinds of fun possibilities, light creating floating heads behind tombstones and such. Good times, good times.
Here is an example where a PART of me was visible when taking the shot, because the sparkler was so bright and beautifully illuminated my pasty white legs.
Lesson 3 : Flash
For the most part, flash is not worth your time. Many of your subjects will be too far off for the flash to do any good. That being said, there may be times when you want to spot illuminate a particular part of the frame or give a bit of a fill light to the foreground with a dark city skyline in the background or something. Just understand that the flash is going to be very powerful and can easily screw up a shot, so be careful with it.
Sometimes the results can be disastrous:
Which brings us to our next lesson, which is...
Lesson 4 : Don't Make Embarrassing Poses and Faces if You're Not Totally sure the Flash is Off
Need I say more?
Eh? Eh?
Lesson 5 : Shoot RAW, Shoot RAW, Shoot RAW
I cannot stress this enough. Did I mention shoot RAW? Shoot RAW.
When you are shooting in the night the colors of the light sources that will be in your shot will tend to vary significantly. If you happen to be shooting with an incandescant street lamp nearby, guess what? You're going to have one heck of a yellow shot on your hands.
This is a non-issue if you happen to be shooting RAW as you can simply swing the color balance the other way with no loss of image quality. HOWEVER... if you shoot a JPEG, the camera is going to decide (upon recording) that "Hey! He didn't need all those extra colors and stuff, so I'm just going to toss all that detailed information (and detail) into the trash!" If the information isn't there, you will never be able to recover it.
Shoot RAW, shoot RAW, shoot RAW!
Lesson 6 : Manual Focus
Your camera needs light to be able to focus properly, and more of it than you would generally expect. What's more is that focusing aids light bulbs and laser grids will only be useful within a certain range. This will leave your camera blind and guessing in a lot of situations. If you look again at the shot above, you will see it is kind of out of focus (in addition to being hideously yellow)... this is because at the time I tried to focus on something my camera COULD see and then move the camera and take the shot. Needless to say, it didn't work. I don't know why it didn't occur to me to simply try to manually focus the thing, but... oops.
Lesson 7 : Use a Remote Shutter Release
Most cameras will support the use of a remote method of releasing the shutter. This is to say that you will be able to take the picture without physically touching the camera. Why? Because when you touch a camera (even on a tripod) it will shake. Now one alternative to this is to set a self-timer for 10-20 seconds before it releases the shutter, but this is *really* annoying, significantly slows down your process, *and* still runs the risk of causing your camera to shake. It really doesn't take much. By and large the remote release is the way to go.
Lesson 8 : Expose to the Right
(keeping in mind that we know you are shooting RAW, shooting RAW, shooting RAW)...
When shooting night photography it is very very imporant to expose to the right... what this means is to slightly over-expose your image (thus shifting the resulting histogram "to the right"). This is critical because it will be sure to capture the details of all elements in your frame including those elements that are in shadow. You can then back the exposure down slightly to give the desired visual effect.
If you do not do this, you will actually wind up with very dark portions of your frame that will look strange and dead in a picture. When you try to bring the picture up, you will find that you simply didn't capture the detail at all... in other words, that part of the image simply wasn't there. And you will wind up with a result very similar to my first attempt at a skyline:
Ouch. (And the scary thing was I thought this was amazing at the time.)
Horrid.Lesson 9: Manual Focus... to Infinity
If you are shooting anything of any distance away, not only will you need to focus, but you will also need to manually focus to Infinity on your lens. Note that most lenses have a focus point of infinity actually marked on the lens and this is generally where you will expect the lens to be when you take your shot. The idea here is that if your lens focused properly, it would likely select this anyway... however, since your lens is fighting against the dark it may fail to focus and will wind up coming just short of where it needs to be.
Be aware, however, that some lenses are mismarked, or may have sloppy focusing rings. You want to check AHEAD to be sure you have a true infinity marked on your lens and re-mark it if necessary. This brings us to our next lesson...
Lesson 10 : Bring a Flashlight!
You seriously need to make sure you have at least one flashlight and some spare batteries on hand. First of all, you'll be crawling around in the dark and this will be a safety element for you. Second of all, this will help you when you need to manually focus to infinity in the dark or make other changes to your camera settings.
Lesson 11 : Check Your Pictures in the Field
Be sure to check your image upon capture. Look at your histogram. Do you think you have it pushed to the right without going too far? How about that focus? Zoom in to 100% and examine the edges to make sure they're straight and true.
Lesson 12 : Creating that Star Effect
Ever noticed how some night pictures have a beautiful star around the bright light sources? Ever wonder how? Well, there are a few ways. One is to use a star filter, which is a nice trick since it allows you to select any aperture you like and take advantage of your lenses sweet spot. Another is to use a Photoshop filters (cheater!), and the last (and my preferred method) is to let your lens do the work for you.
Most lenses will create a star around bright light sources right around F8-F11. This is where the blades of the lens "pinch" down on the light, causing the light to refract and bend around the blades, creating the desired effect. Note that different lenses will have different results. The Sigma 10-20mm does a very admirable job as shown here:
Also notice that in this shot we have quite a bit more detail in the buildings because we exposed to the right. Still could be better though. This was trial 2 for this shot.
Here's 100% crop:
If you want absolutely insane star formations the typical 50mm 1.8 is the mac-daddy, and also happens to be crazy sharp, as seen here:
Keep in mind the cost of stopping down. Light refraction around the blades of the lens will happen everywhere, and your lens may not be at peak sharpness at F8-11. This is a matter of compromises. If you opt for this route, try to balance the strengths of your lens with the need for this effect.
Ok, so now using all of these methods, we come to my trial 3 for this skyline:
Hoo boy are we getting close. More detail in those buildings, the focus is looking pretty crisp, the stars are pretty good, etc. Still, though, I feel like I could do more.
Lesson 14 : The Twillight Hour
Every day for somewhere around 30-60 minutes is twillight. Twillight can be the most spectacular time of the day to take pictures because you get such dramatic lighting. What's more is that you can get what appear to be "true nighttime" pictures with wonderful amounts of detail because the subjects are still partially illuminated. All you need to do is back the light down a bit in post processing and away you go.
This particular shot (my most recent) was in the very last 10 minutes or so before it became TRULY dark. It is my trial 4 and my current "best".
Now is where we start to get into the hard-core stuff...
Do you have to do this stuff? Well... no... but every extra thing you do adds a couple points of technical value to your shot. If you want to really kill it... do these.
Lesson 15 : Mirror Lock-Up
Most cameras have the ability to lock the shutter in the "out of the way" position before taking the shot. This will marginally reduce camera shake to help you have an even steadier camera and thus a clearer sharper picture. (I did this in Trial 4)
Lesson 16 : Avoid Windy Days
While tripods are generally sturdy and heavy enough to not be overly affected by wind, certainly a total absence of wind is best. Also removing your camera strap is sometimes a good idea since the sucker will act as a bit of a sail in extreme conditions. This was (I believe) one problem with my Trial 4.
Lesson 17 : Sandbag It!
While truly truly extreme, you can place sandbags on the legs of your tripod to help steady it. Many tripods also have rings so you can attach a sandbag to them. I haven't tried this trick yet.
Lesson 18 : Multi-Shot Stitch
This actually applies to more than night photography... but if you have a particular lens you want to use which is not wide enough to get your shot, or your particular lens is stronger when more zoomed in (and therefore would not get your shot), take multiple overlapping shots of the same subject (turning the camera on the tripod as you do) and then use Photoshop or other tools to stitch them together.
Ummm... Ok, I think that's it. Did I miss anything?
Hope this is helpful.
Last edited:
![[No title]](/data/xfmg/thumbnail/42/42280-60cc6d4893a2f440eac7dd2248e733a9.jpg?1619740088)
![[No title]](/data/xfmg/thumbnail/42/42277-63576745f84be96df79b94ca0f49e00b.jpg?1619740085)