Need help for processing night sky

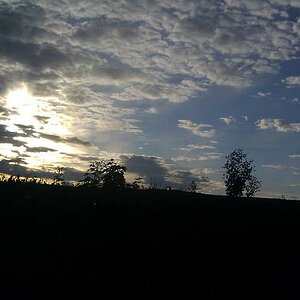
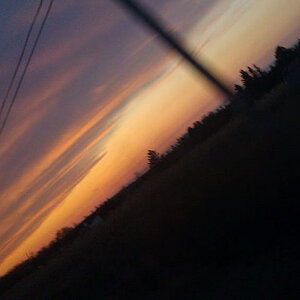
None of your pictures linked in your first post are focused. When you say the 50mm produced only bokeh, it's just completely not even remotely close to anything resembling being in focus. Are you sure you focused at infinity, or did it get cranked to minimum distance?

Whacking the lens over to infinity is not necessarily actually infinity focus. For manufacturing tolerances most lenses can move past that point. Finding the actual infinity focus point means actually looking through the lens and focusing. As stated above, Live View works well because you can zoom the electronic image and see the point of focus as you adjust back and forth.

Anything over 15 seconds is going to show streaking. If the lens is long enough, streaking shows at 5 seconds!

Overly high ISO will turn the black sky to noise.

White balance should be extremely well over to the cool side. Probably not as far as it can go, but pretty far down the K scale.

Also, while it may seem that you want the largest aperture you can get, be aware that most lenses perform at their worst when wide open. Treat a 1.4 lens like it was a 2 or 2.8. Maybe even a 4. Sharpness usually suffers wide open, especially at the edges.

Yes I was setting the focus to infinity on the lens without actually checking if it's focusing properly. I always thought setting it directly to infinity might fix all the problems by itself.

My shutter speed was also a problem there, didn't realize that I have to reduce shutter speed because of my crop sensor camera.

I have a question for white balance. Isn't it ok to take photo in auto white balance and fix the balance in lightroom? Does it make a difference if I set white balance at the time of shooting.
 
I agree with previuos posters all I can add about technic don't forget to turn off IS when using tripod and long exposures. I don't know whether you made such error or not but sometimes I did and it ruined many images.
It's about technic but my point that the most importan thing is composition. As fjrabon said wide angle is what you want and the image you shown as exapmle was made with wide angle lens. First of all choose right place and time there are lot of sites or aplications that can help you to determine stars disposition is certain time and place. Second - choose foreground. Just stars alone won't give you picture I'll be satisfied with in most of cases it just my opinion but interesting foreground is good strating point for getting good night pictures. I'm not familiar with the area you live in but I guess you can find rocks or trees or maybe old ruins in the desert wich can serve you as a foregound.

Yes I had turned off the IS when on tripod. I took these photos in the Drakensberg mountains in South Africa. I'll give it another shot tonight near Johannesberg before I head back home to Dubai, lets see what I can come up with it this time.
 
Just out of curiosity, where are you setting your f/stop?
 
Try moving that up to about an f/16 to f/22. Using such a high (open) aperture will give you unwanted bokeh (blur) in astrophotography. Closing it up with give you sharper images, corner to corner.
 
Try moving that up to about an f/16 to f/22. Using such a high (open) aperture will give you unwanted bokeh (blur) in astrophotography. Closing it up with give you sharper images, corner to corner.
wait what? Where are you getting this info from?

F/22 would cause BOTH an absurdly high ISO and long shutter speed, the latter of which would be useful for star trails, but not the type of shot the OP is looking for (static star photography). You'd also have a lot of diffraction, which would make things less sharp, not more sharp.

Also, depth of field is not a concern for star photography, if you've correctly focused at infinity. Stars are, um, really far away, and at such distances aperture has no effect whatsoever on depth of field.
 
I'd shoot two or three stops off the maximum aperture of the lens. On a 1.4, use 2.8 or 4. On a 2.8, use 5.6 or 8. That gets you closer to the sharpest image the lens will produce, as wide open apertures are the worst for sharpness. You're thinking you want the maximum light-gathering ability, but what you want is maximum sharpness. A long exposure that's a little fuzzy...... well we don't have to explain that, so we??? :)
 
I'd shoot two or three stops off the maximum aperture of the lens. On a 1.4, use 2.8 or 4. On a 2.8, use 5.6 or 8. That gets you closer to the sharpest image the lens will produce, as wide open apertures are the worst for sharpness. You're thinking you want the maximum light-gathering ability, but what you want is maximum sharpness. A long exposure that's a little fuzzy...... well we don't have to explain that, so we??? :)

Spoken like somebody who has never shot any astro photos. Shoot at f8 and have completely underexposed images...like completely black
 
I'd shoot two or three stops off the maximum aperture of the lens. On a 1.4, use 2.8 or 4. On a 2.8, use 5.6 or 8. That gets you closer to the sharpest image the lens will produce, as wide open apertures are the worst for sharpness. You're thinking you want the maximum light-gathering ability, but what you want is maximum sharpness. A long exposure that's a little fuzzy...... well we don't have to explain that, so we??? :)
Disagree here. The aperture producing a very infinitesimal better sharpness is much outweighed by either earth rotation (longer exposure) or noise (higher ISO) which are both noticeable differences, unlike aperture which is mostly only noticeable in a lab type setting.
 
Well, OK, then! Yeah, three stops is probably too far. And I'm going on my experience with my own 1.4 lens, which was awful wide open. I had MUCH better results stopping it down and raising the ISO.
 
Well, OK, then! Yeah, three stops is probably too far. And I'm going on my experience with my own 1.4 lens, which was awful wide open. I had MUCH better results stopping it down and raising the ISO.
What f/1.4 was that?
 
I actually tested a F8 when I took those photos and it came out underexposed. Couldn't see much in the photos. And after all the readings I've done on astrophotography, I'm quite convinced that F should be lowest (or slightly above lowest depending on lens' sweet spot).
 
I actually tested a F8 when I took those photos and it came out underexposed. Couldn't see much in the photos. And after all the readings I've done on astrophotography, I'm quite convinced that F should be lowest (or slightly above lowest depending on lens' sweet spot).
Yeah, the only way I wouldn't shoot at the most open aperture is if it was comically bad wide open or had major vignetting. But even then I'd never stop down slower than f/2.8.
 
Faraz, you'll want to patiently work on focus and get that refined before you begin shooting the images you plan to keep. You can shoot at f/1.4, but the lower focal ratio, the fussier the camera will be if you miss perfect focus (it's harder to nail it.) Very wide-angle lenses tend to be a bit more forgiving on focus. I have a 14mm f/2.8 lens -- but even still, I do have to be careful to refine my focus (Take lots of test shots. If you can tether to a computer so you can truly inspect the focus accuracy first, that really helps.)

Generally speaking, do not trust the "infinity" mark on your lens' focus ring.

The good news is... if "anything" in space is accurately focused... then "everything" in space is accurately focused. When we want to shoot "faint fuzzies" (deep space objects that barely show up against the background and are often diffuse so there's nothing with high-contrast to use to nail the focus) what we really do is point the telescope (or camera) at at a bright pin-point star (even though that's not the object we plan to image), and use that to refine focus. Once we know it's focused... we point back to the object we really plan to shoot and begin collecting our images. Those images will be accurately focused (that's just the nature of astrophotography... it doesn't matter if the object is 250,000 miles away... or 25 million light years away... it'll all be in focus even at very low focal ratios.)

When shooting images from a stationary tripod, time is not your friend. You want to keep the exposures short enough to so that the motion of the sky doesn't cause stars to elongate and form "star trails". There's a guideline for this.

That guideline was designed for 35mm film cameras and is called the "Rule of 600". It suggests that if you use 600 as a base value and then divide that by the focal length of your lens, then the result is the number of seconds you can leave the shutter open without stars elongating to form star trails. With a 50mm lens, that'd be 600 ÷ 50 = 12 (12 seconds). BUT... that's for a 35mm camera and you have an APS-C camera. So you actually have to divide 600 by the crop factor for you camera sensor (for your camera that's 1.6). 600 ÷ 1.6 = 375. That means you'd use 375 as your base. 375 ÷ 50 = 7.5 (seconds). That means you'd want to limit exposure times to 7.5 seconds or less. It turns out many accomplished imagers think that 600 is too generous and they prefer a more conservative base... such as 500 or even 450. When you divide that by your crop factor, your adjusted base is nearer to 300 (which would put you at a 6 second exposure when using a 50mm lens).

To saturate the milky way and nebulae, it's nice to go longer. But to go longer you would want the camera on a tracking head. I have a number of computer-guided "equatorial" mounts designed for telescopes (I almost never just use a camera and camera lens. I have at time, but usually I'm using a telescope.) These things range in price from about $800 (for a low-end mount) and can exceed $10k (just for the mount -- no telescope, no camera in that price tag.)

You can also get "tracker" heads that can be attached to a solid camera tripod (emphasis on "solid"). The tracking head has a rotational axis (motorized) and this is pointed at the pole (Northern hemisphere observers use the star "Polaris" to align it -- though Polaris is technically about 2/3rds of a degree away from the true pole, there are alignment aids that help you refine the pointing accuracy.) You can attach a ball-head to the rotation axis so that you can point the camera to any section of sky you want. As the Earth rotates from west to east (creating the illusion that stars move from east to west) the tracking motor rotates in the opposite direction and at the same speed as the Earth's rotation. This cancels out the rotation of the Earth and holds everything in place so you can take very long images. Just "how long" depends on how well you aligned the mount.

The models I know of are (from cheapest to most expensive)

1) iOptron SkyTracker (normally $399, but appears to be on special right now for $299)
2) Vixen Polarie ($399)
3) AstroTrac ($619)
4) Losmandy StarLapse ($695)

Here's a link to OPT -- probably the largest dealer of astronomy equipment in the country.

Shop at OPT - Tracking Mounts Camera Mounts Tripod Heads for Sale at OPT Telescopes - OPT Telescopes

Naturally the most expensive one turns out to be the best and most versatile. Their mount is designed to allow you to neutrally balance the camera (so weight won't throw off tracking accuracy), it can be pointed anywhere, and it can track as long as you want (it also has multiple tracking rates.) Losmandy is all precision machined components with exceptionally good quality. The iOptron and Vixen are the least expensive (I don't know how well they handle the weight -- they don't have the ability to neutral balance the camera load.)

You will probably want to invest in a gadget called an "intervalometer". This is a "wired" remote shutter release ... except it has a programable timer in it.

Here's a link to one: Shop at OPT - Tracking Mounts Camera Mounts Tripod Heads for Sale at OPT Telescopes - OPT Telescopes

You program the number of images you want to collect, the duration of each image (and you can specify any duration ... not just the ones the camera allows because the device works with the camera in "bulb" mode) and lastly you program the time interval to wait between images.

IMPORTANT: You probably want to make sure you turn off "Long Exposure Noise Reduction" in the camera. Otherwise the camera takes TWO images for every image... the first with the shutter OPEN, the second with the shutter CLOSED. The second image is used to gather noise (it's called a "dark frame") and the dark frame is subtracted from the "light" frame when shooting JPEG to produce a lower-noise (but not noise-free) image. I had a friend that accidentally left this on while shooting multi-minute exposures. The camera would finish the exposure (what we refer to as the "light" exposure because the shutter is open) and the camera would remain "busy" for several minutes -- he was locked out of doing anything and thought his camera was defective. He later figured it out... the camera had long-exposure noise-reduction enabled and it was actually taking the "dark" (shutter closed) image.

Everything I've written up to this point is all part of what we call "image acquisition". There is more.

You can shoot multiple images of the same object to reduce noise. The ability to reduce noise is based on a Poisson distribution. The extent to which you can reduced noise is based on the square root of the total number of images you shoot. If I shoot 9 images of the same object and then use computer software to integrate them, I can reduce the noise by a factor of 3x (square root of 9 is 3). If I shoot 16 images, I can reduce noise by a factor of 4x. Most astro-imagers I know think that beyond 20 images you start hitting diminishing returns... you spend time collecting vastly increasing numbers of images for just marginal gains in noise reduction.

But IF you do collect multiple images, then the next step is to learn how to combine those images ("registration and integration") and this is another learning process. You ultimately end up with a "master" image (the result of all the image data after it has been combined.)

This master image now needs to be processed ("adjusted") artistically.

There are a number of video tutorials on how to do this, but typically we "stretch" the data in the image to bring out details. Imagers will sometimes work in "zones" similar to the Ansel Adams "Zone System" -- but a bit more simplified. Instead of 10 zones, they use 4. The darkest "zone" usually doesn't contain any interesting data and tends to mostly be just "noise" and can safely be discarded... so we send that to "black" and make it all background. The next zone up contains a lot of noise, but it also contains faint nebulosity that we don't want to lose. The nebulosity usually doesn't have good detail though -- so we don't try for detail. Instead we apply noise-reduction to that zone (which softens the data in that zone as a side-effect.). The next zone usually has less noise and more detail... that zone usually can stand "as is" (doesn't need noise-reduction (which has the side-effect of softening) but also doesn't need sharpening. The final zone -- the bright zone -- has very little noise and it also offers the best detail. This zone can stand sharpening to refine the detail. All of this is also "stretched" (meaning if you were to use a "levels" adjustment tool, you'd get rid of the empty space on the left and right to boost contrast.

Every imager I know spends years learning and refining their techniques to artistically adjust the images.
 
Wow that is a mighty detailed information. You've pointed out some things I never realized before, like focusing one thing and everything is in focus. I've recently learnt the 500 rule, I'll definitely give it a shot. Makes absolute sense to me since my sensor is APS-C. However getting all that motorised equipment is overkill for me since I'm just starting off in astrophotography. :) But thanks for all the immense information, I know I will need to look up this again when I get more and more into night skies.
 

Most reactions

New Topics

Back
Top