OP
OP
- Joined
- Jun 9, 2013
- Messages
- 20,580
- Reaction score
- 12,709
- Website
- moderndinosaur.wordpress.com
- Can others edit my Photos
- Photos NOT OK to edit
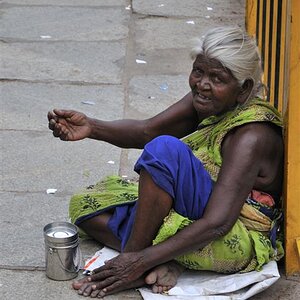
It'll give me a good excuse to practice my burningI've used the tools to some success in some other pictures but still need practice to use them seamlessly in larger, prominent areas.
For me, "burning in" in software (i.e., darkening) is useful only for small areas. For something like this a brightness adjustment layer with a layer mask is much better, allowing more options for small adjustments later. Basically, you start with a black layer mask (blocks effect of adjustment, at least that's the convention in PS) and paint white (allows full effect) with a "fuzzy" brush on the area you want to darken. If the effect is still evident around the edges, you can paint shades of gray around it to create a sort of gradient. If you want to adjust later, you can change the degree of brightness adjustment in the layer or change the painting on the mask.
I tried to explain this relatively briefly, so apologies if it's not clear, but if you have questions, send me a message and I'll try to clarify.
Oooh, layers! Definitely pushing my boundaries
Oddly excited, though. I'll try to do some reading up to learn how to follow those steps in Corel (I'm using Paint Shop Pro 5).wow, amazing
Love them all
I wonder if my AE-1 still works?
Only one way to find out...

(and thank you!!)


 ) .
) . ) Complete tank I got second hand to. For $12 plus own pick up. Look around, NY is much bigger than Toronto.
![[No title]](/data/xfmg/thumbnail/41/41906-b9041eb5a3fa48eb5d5084ac2198a75c.jpg?1619739940)
![[No title]](/data/xfmg/thumbnail/32/32176-48b4ba2fc0e35afa267c5882154e7620.jpg?1619735235)
![[No title]](/data/xfmg/thumbnail/37/37612-989c0c475619355f32a5941a187cfa74.jpg?1619738150)