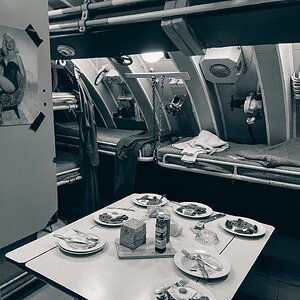
Photoshop lesson. Fixing flat images and Colorcasts.

Taylor510ce

TPF Noob!
Joined
Jul 20, 2010
Messages
702
Reaction score
1
Location
United States
Can others edit my Photos
Photos NOT OK to edit
I think that this is a very useful lesson to add to your photoshop workflows so I figured I would share. You can do much of this by "eyeballin" it, but as a beginner I found this to be a more systematic approach. It is two part but you have to read the first part to understand the second part. Try it out and post a before and after shot if you like. Part 1: How To: Fixing Low-Contrast Photos | Photography - PopPhoto.com Offers Camera Reviews and Exclusive Photo Tips Part 2: How To: Remove Color Cast With Photoshop | Photography - PopPhoto.com Offers Camera Reviews and Exclusive Photo Tips
 
Even better, is to learn how to make it happen in the camera, so you don't have to 'fix it' in post processing.
 
I agree wholeheartedly with the article's premise. In fact, the very FIRST thing I do to an image is to open the levels command, and manually adjust the black point in the red,green,and blue channels. Adjusting the image's black point has long been the first step that Nikon suggests when handling digital images in Nikon Capture. For those who are preparing images for printing, either on inkjet, or for newspaper or magazine submission, setting the black point is a very important step. Even when an image has been properly exposed in the camera, manually setting the black point in the three color channels can help at all the additional,subsequent steps of the editing process.

You need to establish how black the black point really is, so that the rest of the tones can be mapped against a known, defined,proper black point.
 
I have to admit: I didn't even look at the article, let alone read it. :blushing:

Edit....Ok I've read the "Fixing Low Contrast Photo's" article, and I do that with pretty much every image of mine I edit.

I noticed this line on the last page of the tut' "If you can find a neutral gray in your image.....".


Dave Cross taught me an easy way to find any neutral gray, if any, in your image:
  • Create a new blank layer
  • Fill the layer with 50% gray using the "Fill" dialog box.
  • In the Layers Pallet set the blending mode for the new layer to "Difference" (don't worry about what it does to your photo, it's only temporary)
  • choose "Threshold" from the Adjustment Layer popup menu.
  • Drag the slider all the way to the left and it turns completely, or nearly completely white.
  • If it's not completely white, the black bits are going to be pretty close to neutral gray.
  • If it is completely white, slowly move the slider to the right until some black appears. The black is neutral gray
Just like the tut mentions you can zoom in and use the "Color Checker" tool to mark the spot with a target.

once you have the spot marked you cam delete bothe the threshold adjustment layer and the new blank layer you created.

Now you can use all 3 of the Levels eyedroppers.
 
Last edited:
I have to admit: I didn't even look at the article, let alone read it. :blushing:

Edit....Ok I've read the "Fixing Low Contrast Photo's" article, and I do that with pretty much every image of mine I edit.

I noticed this line on the last page of the tut' "If you can find a neutral gray in your image.....".


Dave Cross taught me an easy way to find any neutral gray, if any, in your image:
  • Create a new blank layer
  • Fill the layer with 50% gray using the "Fill" dialog box.
  • In the Layers Pallet set the blending mode for the new layer to "Difference" (don't worry about what it does to your photo, it's only temporary)
  • choose "Threshold" from the Adjustment Layer popup menu.
  • Drag the slider all the way to the left and it turns completely, or nearly completely white.
  • If it's not completely white, the black bits are going to be pretty close to neutral gray.
  • If it is completely white, slowly move the slider to the right until some black appears. The black is neutral gray
Just like the tut mentions you can zoom in and use the "Color Checker" tool to mark the spot with a target.

once you have the spot marked you cam delete bothe the threshold adjustment layer and the new blank layer you created.

Now you can use all 3 of the Levels eyedroppers.


HAHA, next time read the articles.....you just practically recited the second tutorial. :lmao:

So atleast you now understand the usefulness. Its probably one of the best tutorials I have read in the past year that I have had photoshop. Once you commit it to memory its easy to do quickly. The only sometimes problematic part is when you get an image with no gray, but a midtone brown or something. Sometimes it will actually GIVE a colorcast more, so you have to be really careful on your selection of points.
Also on the method you mentioned ( which is what removes the colorcast ) its best to use all 4 color dropper spots that is the max, so you have several points to choose from.
I usually open a new levels layer specifically for the gray point so its quick and easy to toggle on off, and delete if need be, or you can try several points on several layers and then switch between while zoomed out to get a better look.
 
I agree wholeheartedly with the article's premise. In fact, the very FIRST thing I do to an image is to open the levels command, and manually adjust the black point in the red,green,and blue channels. Adjusting the image's black point has long been the first step that Nikon suggests when handling digital images in Nikon Capture. For those who are preparing images for printing, either on inkjet, or for newspaper or magazine submission, setting the black point is a very important step. Even when an image has been properly exposed in the camera, manually setting the black point in the three color channels can help at all the additional,subsequent steps of the editing process.

You need to establish how black the black point really is, so that the rest of the tones can be mapped against a known, defined,proper black point.

Yeah I pretty much eyeball the white and black now, but still almost always use the graypoint method from tutorial 2 to ensure that I get no colorcast. Sometimes if I am not getting good results or worred I am over doing it, I can always go back to this method and be much more methodical about it.
 

Most reactions

Back
Top