Portrait Contouring Light Challenge

DanOstergren

TPF Supporters
Supporting Member
Joined
Jun 2, 2013
Messages
4,493
Reaction score
4,141
I didn't see many new technical challenges recently, so I figured it wouldn't hurt to make a challenge of my own. I think this is a useful one. To clarify, this is a LIGHTING technical challenge, not a retouching challenge. The point of this lighting style is to reduce retouching; you're essentially starting the retouching process at the moment of exposure.

I'm often asked for lighting advice from other portrait photographers, and every time I give the same advice: educate yourself on the concept behind the makeup technique called "Contouring and Highlighting", and apply it to your lighting. It's a fairly basic idea once you understand it's purpose, which is to highlight, enhance and sculpt (contour) certain features of the face and bring focus to the most beautiful features on the human face. The entire concept for the makeup technique is to mimic flattering light, so why not reverse that idea and just use flattering light? Coincidentally, applying this concept to your lighting will considerably reduce the amount of retouching needed on the face, saving you lot's of time. Isn't that neat? :biggrin-93:

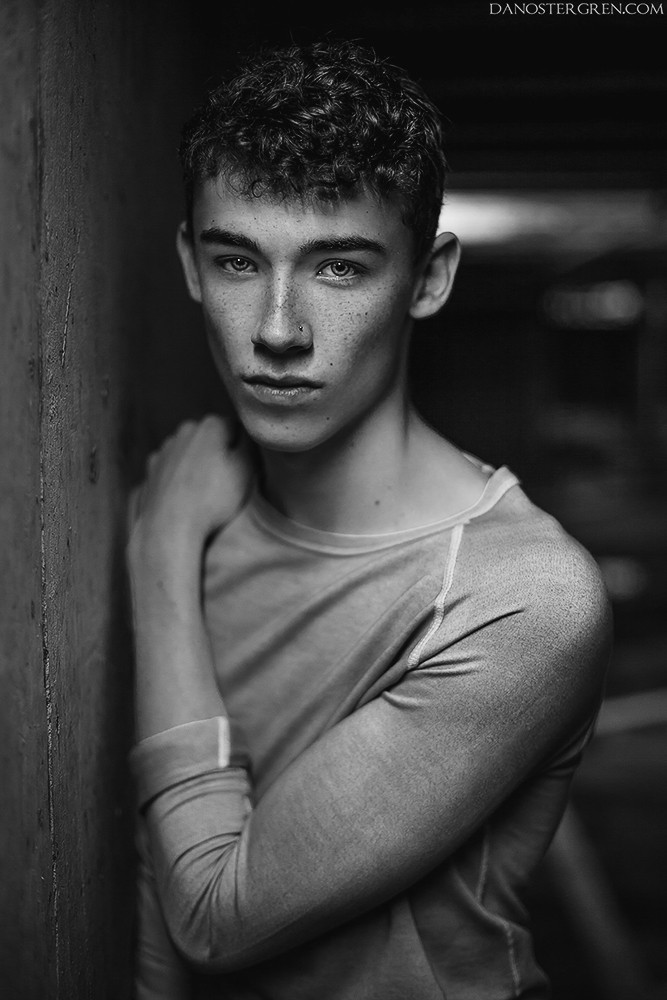
This diagram gives you a basic idea of what the lighting pattern should be based off of. You can always deviate for more dramatic enhancements or an entirely different look. What's important though is that you are sculpting the facial features.
tyd54f8_by_danostergren-dauzkxw.png


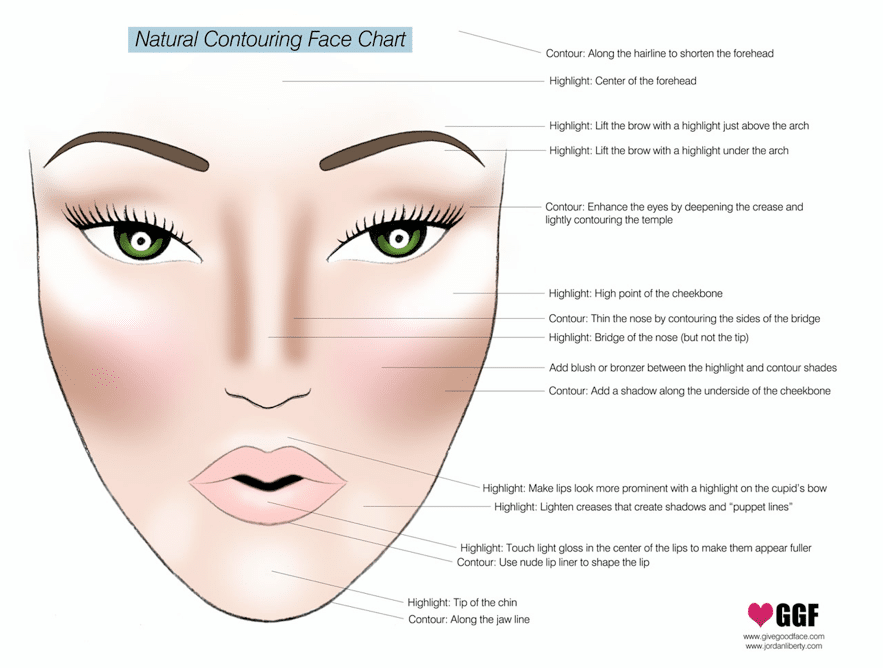
A light source that is positioned at an angle that shines down on the model is needed, as this will create shadows under certain features such as the cheekbones that will sculpt the person's face. You decide just how high above the subject you angle the light; the higher the angle, the more dramatic your contour will become. Some images call for more dramatic sculpting, while a soft and subtle contour may be best for others. You don't have to follow the diagram exactly, but the general idea is to use light that sculpts your subject's features. This is possible and applicable to both available light and studio light.

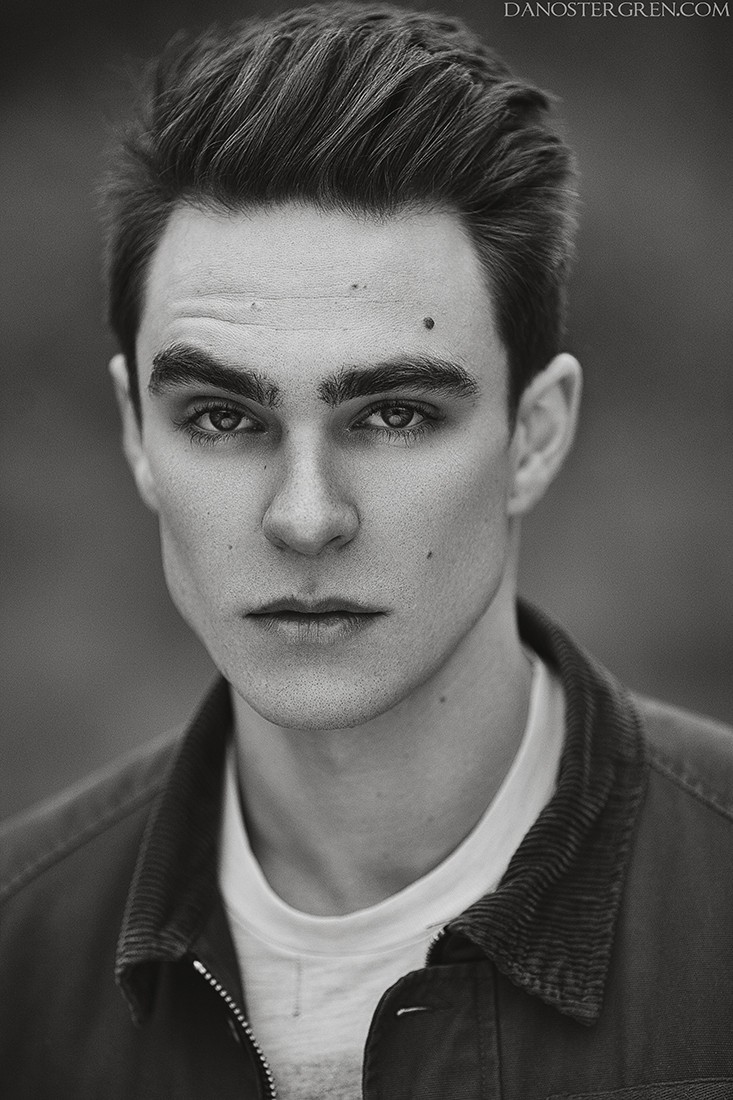
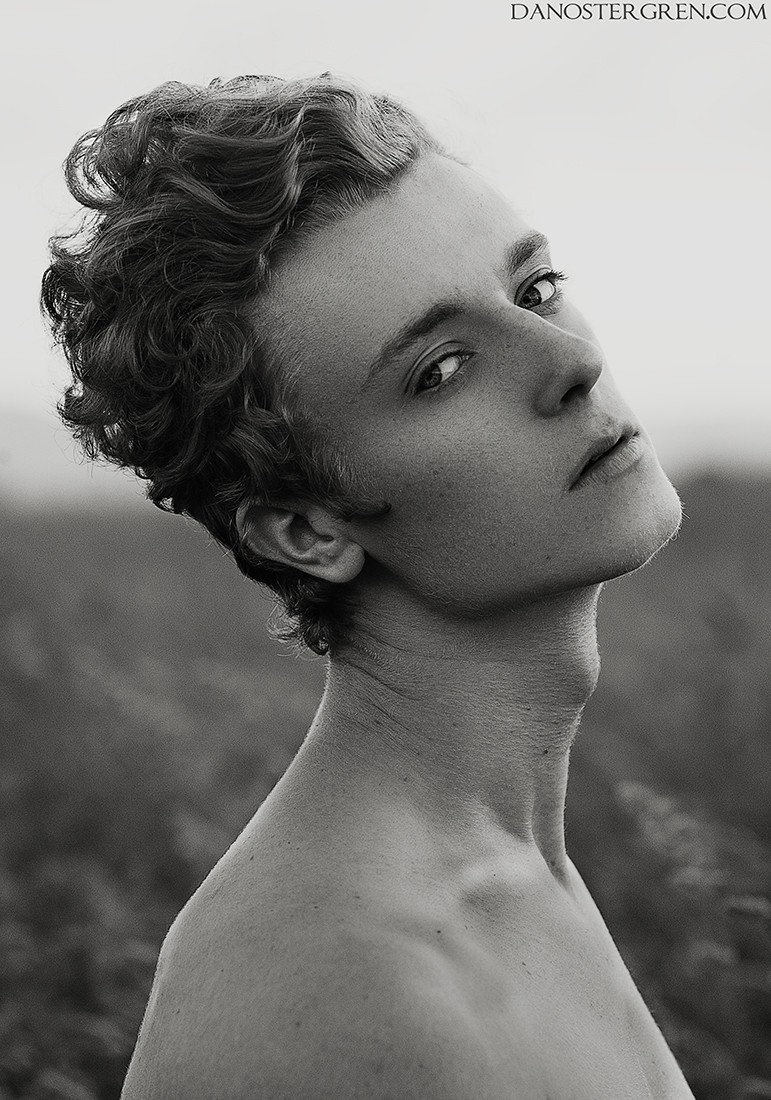
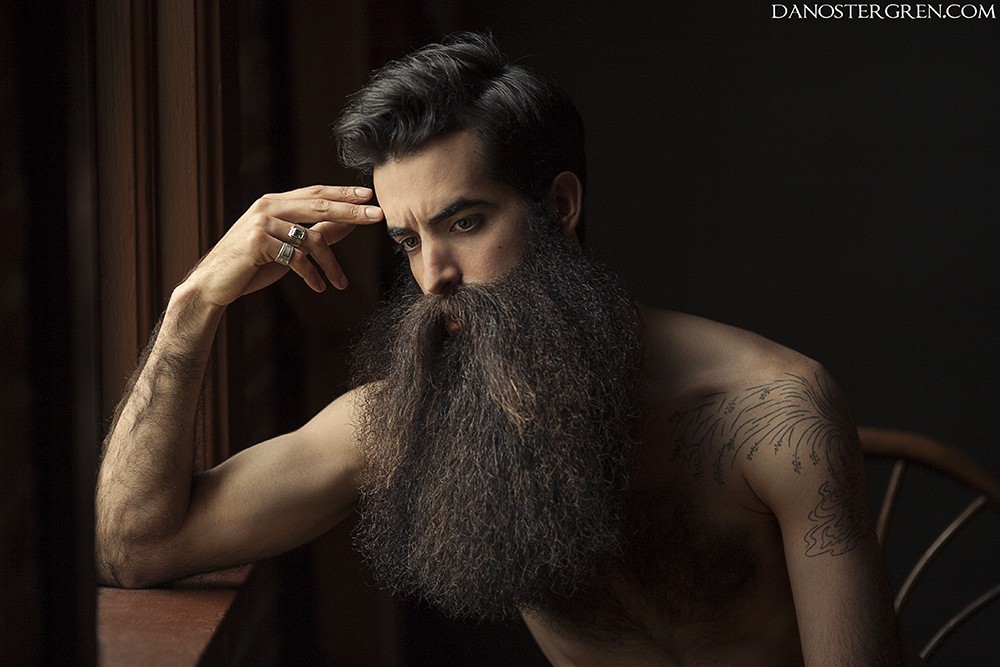
Your challenge is to apply this idea to your lighting the next time you do photos that feature a person or people, and share them here. You're welcome to share photos that you've already taken that have this lighting pattern as well, but I highly recommend that you make a conscious effort to apply the idea to your people photos because I believe it will enhance the beauty of your subject by a lot, male or female.

There's no prize and this isn't a contest, it's meant to just be a challenge to help improve on portrait lighting.
 
Last edited:
Unfortunately I really suck at retouching and can't figure out what I can't figure out there
 
Since studio lights are something new to me. Maybe a little more detail on an actual lighting layout (number/type of lights/modifiers, locations, drawing/picture of an example) would be helpful???
 
Since studio lights are something new to me. Maybe a little more detail on an actual lighting layout (number/type of lights/modifiers, locations, drawing/picture of an example) would be helpful???
This style of lighting is applicable to all light sources. All of the examples I shared were shot in natural light usually with a white reflector from below for fill, except the last one which I used available fluorescent lighting inside of a parking garage with a reflector from below for fill. Modifiers and light source don't matter; what matters is that you're using the light from an angle that sculpts your model's facial features.
 
all righty guys...heres the deal.
I understand copyrighted photos as much as the next person, and we do try to keep people from posting others work as their own..
however, this is not always a black and white issue, and certain exceptions are made.
now, before I get the inevitable complaints of how TPF doesnt care about copyrights or some other nonsense...the mods and admins have debated this pretty much ad nauseam.
so this is the word.

we here at TPF do make the occasional exception to images being posted that arent specifically owned/taken by the poster.
this often applies to internet memes, screenshots, pictures covered under public domain, transformative work, and certain instructional pictures where credit is given. (see: fair use)

Dan is clearly not trying to pass that diagram off as his own work, and the crediting watermark not edited out.
this falls under the commentary and criticism portion of "fair use".

I hope this clears up any confusion.
carry on.
 
This style of lighting is applicable to all light sources. All of the examples I shared were shot in natural light usually with a white reflector from below for fill, except the last one which I used available fluorescent lighting inside of a parking garage with a reflector from below for fill. Modifiers and light source don't matter; what matters is that you're using the light from an angle that sculpts your model's facial features.

Last night as an experiment I was using a head outside in the dark, with an LED flashlight. Moving the light in and out, up/down, and around. Doing so enabled me to easily study the highlights and shadows from the various positions and the effect of fall off. If I read your comment right, you seem to be placing all the emphasis on the angle, but it seemed like other factors, such as hard/soft lighting and the position of the light relative to the subject also contributed to the sculpting? I'm hoping your video covers some this as well, really interested in learning more on how you achieve your images.
I'm really happy that this inspired you to experiment (if I'm not being presumptuous). I really hope this inspires others to do the same!
Hard and soft light are factors that you want to think about in all lighting situations. What's most important is that you're sculpting the features with the light. It's really up to you on how you want the outcome to be. Sometimes hard light is good for a dramatic contour with deep shadows, whereas soft light would have a less dramatic and more subtle look. The difference can be seen in these two photos:

One is lit with sunlight that was diffused by some overcast cloud cover with a white reflector from below for fill, while the other was lit with un-diffused fluorescent lighting from a dramatically high angle, with a silver reflector for fill from below. As you can see, the contouring effect is still there, but the effect is a bit different.
_mg_1857_by_danostergren-day9xl3.jpg
img_4721blackandwhite_by_danostergren-dat97ot.jpg
 
Last edited:
This style of lighting is applicable to all light sources. All of the examples I shared were shot in natural light usually with a white reflector from below for fill, except the last one which I used available fluorescent lighting inside of a parking garage with a reflector from below for fill. Modifiers and light source don't matter; what matters is that you're using the light from an angle that sculpts your model's facial features.

Last night as an experiment I was using a head outside in the dark, with an LED flashlight. Moving the light in and out, up/down, and around. Doing so enabled me to easily study the highlights and shadows from the various positions and the effect of fall off. If I read your comment right, you seem to be placing all the emphasis on the angle, but it seemed like other factors, such as hard/soft lighting and the position of the light relative to the subject also contributed to the sculpting? I'm hoping your video covers some this as well, really interested in learning more on how you achieve your images.

@smoke665 - All of those things you mention work together to produce the look you are going for. I got this from a photographer/teacher here in OKC. He says "Don't think of light as hard and soft. Light is harder or softer depending on the use. The same light can be used to produce hard"er" light or it can be used to produce soft"er" light. It depends on the intensity, direction, size (relative to the subject) and modifiers used."

Using a wig head and light is a great way to learn about lighting. As you said, it allows you to look at how each of these things will impact the image and "shape" the face.

@DanOstergren is using all of this together to get the look that he is wanting.

(I'm no expert and am still learning to see these results myself, but I hope maybe this helps.)
 
(if I'm not being presumptuous).

Not at all, I've been following your posts, and appreciate your explanations. I think the graphic earlier cleared up a lot for me, and your following posts answered my remaining questions. Even though I've seen her do it everyday I've never paid attention to "how or why" my wife applied her makeup (it wasn't on my interest radar). The graphic explained the science behind the application, and how it relates to lighting, in a way I now understand. Understanding is the beginning of learning, I just need to practice it now to know how to use what is second nature for you.

@ronlane your teacher's comments are more in line with how I think of light in terms of the amount of fall off. I used the term because it's an easy way of describing different light. The wig head was enlightening, though a mannequin head would be better if I can lay my hands on one, as there's no facial sculpting on the wig head to highlight.
 
Added to my project list, great stuff DanO! Appreciate simplifying it. I used to kind of intuitively do it when I did a portrait painting, well intuitively based on studying the old master painters. Excellent thread.
 
I wish I were more interested in doing portraiture so I could try this. It's clearly a technique that works well and I'd be thrilled at the chance to learn how to get portraits to be as good as yours, Dan. You think I could try it on my cats? ;)

I dunno, maybe I'll step out of my comfort zone and actually try to shoot a portrait one of these days. When I do, I'll come back and post!
 

Most reactions

Back
Top