Preparing photo for canvas print

For a canvas print, you need a HUGE degree MORE sharpening! Canvas is fairly low-rezz...the file needs to be aggressively sharpened, to the point of looking "crunchy" when viewed on-screen at 100% pixel size. As I did in this edit-sharpened for canvas. I left the backdrop alone as far as blurring, but burned down her dress a bit, and the edges were also burned down a bit. Cloned out some skin imperfections, did tooth whitening on uppers, touched the eyes a bit, and lightened the overall gamma, to make it appear less-dark, and more "happy". I am in the re-shoot camp, however. But, hey, this is still a cute shot, nothing wrong with spending a few dollars getting a canvas print made. Kids are only little once.
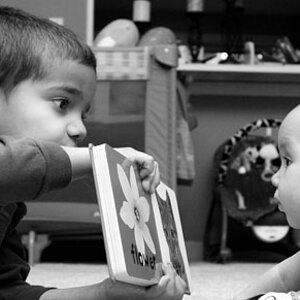
I hardly ever disagree with what Derrel says, but for me canvas is still something that has to do with painting - not that I can paint, but I love the soft look of canvas. And one big advantage of canvas also is: you can make much larger prints without obviously losing quality than with any other surface.
 
Don't bother, reshoot.
photo1x1 and tirediron are right on target.
The overhead light had made bright spots on the top surfaces and deep shadows underneat that will take an awful lot of editing to make better - and it won't look great.
It's not a good pose, the lighting is terrible and the photo is incredibly cold.
I suggest you start over and consider this a lesson.

View attachment 130389

Very nice edit though, thumbs up!

Oh, amazing. Thank you all so much for your efforts. I /am/ very interested in improving. I'm also always reshooting. Maybe not the same scene, but trying to constantly take a better picture. These are the reasons I got into photography - mostly to take pictures of the family.

I also really appreciate any comments on how the composition could be improved. I've always known the lighting wasn't the best, and reshooting would be the best way to improve that, but it's not always practical.

I never expected to see such an improvement like what you've done in photoshop. I have photoshop and lightroom, but I don't think I'll ever have the level of understanding that you appear to have. I just don't have the time to learn.

I understand about 40% of the changes you've described in your list. Can you send the modified PSD after the changes you've made? I'm not sure the 350k JPG will be enough to produce a 16x20 canvas, and would also like to evaluate the changes you've made.

If you wanted to create a new video that shows the steps that you followed, I would *love* to see that and learn.

You´re most welcome ;). Here is the psd file: www.photo1x1.com/thePhotoForum/_DSC6424.zip . Unfortunately I don´ have the time to create another movie, even though I enjoyed it - it took longer than expected and was more a try for the future ;) . I think if you see the layered file, you will understand what I did - at least up to step Nr. 14 - the final layer is flat, otherwise the file would have had quite some layers nobody would really need.
Awesome, thanks very much. I'm especially curious about the changes you've made in lightroom, as that's the one I have the least experience with.

In general though, I´ prefer The_Travelers edit. He kept all the details in her face and still managed to get all the shadows out.
I would love to see the full picture and how those changes were made as well.

In regard to composition, I´d usually avoid the roses. They attract the viewers attention, that should really be with the girl - it would be different if there were really very many roses and you wanted to show your garden. Also: I´ position your daughter further away from the background - that would blur the background more. I´m the type of guy who likes really shallow focus and blurred backgrounds.
Yes, I thought that as well. The rose detracts the eye from the subject unnecessarily. I had her stand some feet away from the bush, but I agree it wasn't enough. There's a steep hill behind me, which makes it all the more difficult to create space between me and the subject. Of course I could travel to somewhere else, but again, the time issue.

I may be pushing my luck with the free advice these days, but I'm really interested in how I can avoid these shadows in the future. Perhaps this should be done as separate post, but how could I have avoided the shadows under the eyes and chin in this picture?

# jpg
Dropbox - DSC0527_Family.jpg
# NEF
Dropbox - DSC_0527.NEF

Reshooting isn't really an option, as it was an hour and a half drive to get to this spot, with a five year old and a short time window. It was also about 11am with bright sun, so as you see it created some unavoidable shadows. Another problem is there was a road/driveway between the subjects and the camera, so my efforts to use the flash weren't successful because of the distance.

If only I could go to the other side of the dam, where the sun was not directly in our eyes...

I was using TTL, and as you said in a previous post, that perhaps wasn't the best approach on a day with full sun. After seeing how ineffective it was, I believe I stopped using the flash altogether.

Is this possible to fix in photoshop?
This one isn´t as bad, because the people are rather small. I´d definitely prefer strong sun in these kind of settings, rather than an overcast sky that would be good for your models, but bad for the background. But you could use your flash. In these conditions, I think you can say: pump it up as much as you can, and see what it does come up with. If it is too much, dial it back a bit.
Do some reading on TTL metering if you want to understand how your flash works in this automatic mode. I do prefer manual mode for flash. Sounds complicated, but it is not. In bright sun, pump it up all the way, and if you don´ like what you see, dial it back a little and reshoot - that´s it. If you are no pro, that´s the best way in my opinion.
A foam board or another reflector sure is nice, but it´s not really practical for family shots (you would need a tripod or something to bring it in place), plus it is really bright and if you are not used to it, people tend to squeeze their eyes even more. So I´d say flash is the way to go.
Here is my try (btw: this is lightroom only, no photoshop - missing the people? ;) - this program is way more powerful than people think, sure it´ not a perfect edit, but most people could live with the cloning done by lightroom):
DSC_0527-2.jpg


And here is something to compare it to - unlike many others, I usually like to shoot at noon, with strong sun. Push the flash to its limits and you´ll get something like this without using the power of lightroom for the shadows (no retouching done on this one ;) ):
VH2G0439.jpg


And talking about lightroom, here are the files for your images. As always, take a close look at local adjustments:
http://www.photo1x1.com/thePhotoForum/lightroomGossamer2.zip
 
The attempted edits all are very poor. You will be a lot happier with a new picture and changing a few elements when you take it.

Hi there, I really appreciate your input. Can you recommend what I could have done differently, and what the specific problems are with this picture, so that I may learn and avoid them in the future?

Out of curiosity, do you believe you could make this existing picture look better, or are you saying there is no way to make this picture look good?

I suggest you be cautious taking advice/opinions from the random person on the internet unless they have demonstrable knowledge or achievement beyond just words, particularly in areas where skills are concerned.

On the Internet everyone can be an expert skier, martial artist, chef or even photographer if words are the only medium of exchange.

Their taste - and even their abilities - as evinced by their demonstrables are what you should measure them by.
 
For a canvas print, you need a HUGE degree MORE sharpening! Canvas is fairly low-rezz...the file needs to be aggressively sharpened, to the point of looking "crunchy" when viewed on-screen at 100% pixel size. As I did in this edit-sharpened for canvas. I left the backdrop alone as far as blurring, but burned down her dress a bit, and the edges were also burned down a bit. Cloned out some skin imperfections, did tooth whitening on uppers, touched the eyes a bit, and lightened the overall gamma, to make it appear less-dark, and more "happy". I am in the re-shoot camp, however. But, hey, this is still a cute shot, nothing wrong with spending a few dollars getting a canvas print made. Kids are only little once.
Derel, thanks very much. Is this photo with the changes you've made available on your recent_tpf_downloads page? I've looked, and don't see it there.

We have about six 16x20 canvases, mostly of our daughter, on our living walls. There's one for each season over the past year or so, plus a few others that we especially like.
 
The pictures from Photo1x1 are great examples of the subject sharing the space with the environment and the environment being very important to the picture.
Most of the time the background is just that, background, and you need to suppress it's drawing power.

I discarded the original effort so I did this at link quite quickly using a nondestructive dodge and burn technique -( Non-Destructive Dodge and Burn in Photoshop)

Here is a smaller image as a smart object so you can play with the layers.

Dropbox - example_DSC6424 (1).psd

This is what the overlay layer looks like; you'll understand when you read the tutorial
upload_2016-11-17_12-31-27.png


I don't use a flash much because of the kind of shooting I do but it is crucial to be aware of the light and its effect on what will be the image.

I don't mind editing, in fact I like it because I can show what's in my mind's eye but working with deep dark eye sockets or shadows under nose, combined with highlights on cheeks and forehead - all on a light skinned face is difficult and rarely comes out good enough.

upload_2016-11-17_12-41-21.png


upload_2016-11-17_12-42-14.png


If I have the time and leisure I choose a spot where the light is soft and controlled and I can make the subject large in the frame and where the shadows aren't critical.

upload_2016-11-17_12-47-55.png


upload_2016-11-17_12-48-20.png
 
The attempted edits all are very poor. You will be a lot happier with a new picture and changing a few elements when you take it.
Hi there, I really appreciate your input. Can you recommend what I could have done differently, and what the specific problems are with this picture, so that I may learn and avoid them in the future?

Out of curiosity, do you believe you could make this existing picture look better, or are you saying there is no way to make this picture look good?
No worries, I am happy to help people with anything I can.
I hope you get this sorted out on your own. Good luck. Remember to use google or bing to find help topics for you to read more about things you need help with.
 
Hello,
I make canvas printing as my avocation and my hobby. I don't understand why in fact 90% of photos are wrong, photographers like you, can't use their photo camera and also can't use Photoshop and don't have calibrated monitor. 1) Let's play more with your camera before you will take a photo for ordering canvas. 2) Calibrate your monitor at least with Windows calibration utility 3) Find right canvas producer 4) Canvas print usually looks little bit darker than on monitor because almost everybody have monitor adjusted to shine as much as possible. But right canvas producer adjust photo and print parameters to be best specially for your photo. Unfortunately this make about 5% of canvas producers. So find any producer which has good customers references or order a A4 print sample with your photo and you will se how it looks. Or ask producer for his canvas ICC profile and adjust it as proofing profile in Photoshop and you can see result if you have calibrated monitor. Good producer can also offer you any size of frame, not only one of several exact sizes. I writed some informations on my web www.dantek.cz but it is in czech language. Regards.
 

Most reactions

New Topics

Back
Top