Product Work | Hair Pomade | Station Grooming Co | Critiques Please!

D-B-J

Been spending a lot of time on here!
Joined
Apr 13, 2010
Messages
9,027
Reaction score
2,175
Can others edit my Photos
Photos OK to edit
Had my first proper studio shoot for a client last night--he needed some product shots for his website, so I grabbed his products last week and setup to shoot only to find that my PW broke. Well it came in last night, so I setup (using all DIY light modifiers to boot!) and was able to get some pretty solid photos I think. What do you think?!

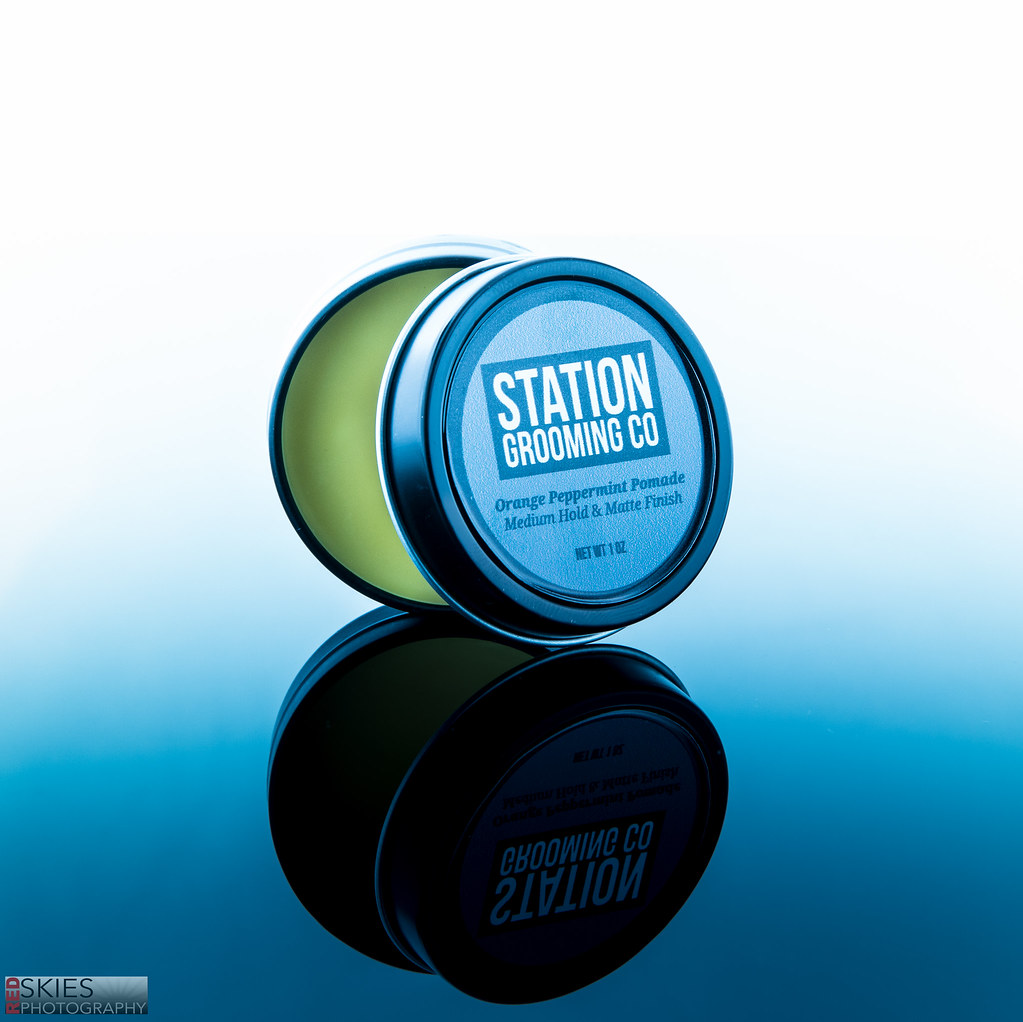
Pomade by f_one_eight, on Flickr


And one of all three--a possible for his website (he really wanted all white BG's, so I sent those along too, but prefer the looks of these with the drop in blue BG.

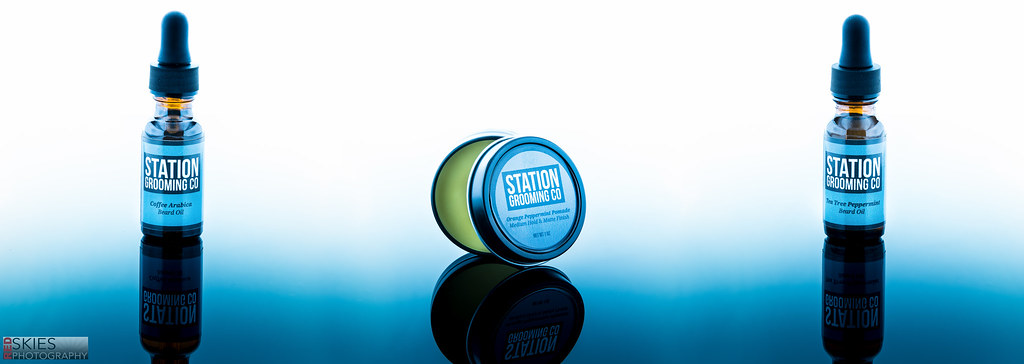
SGC Full by f_one_eight, on Flickr

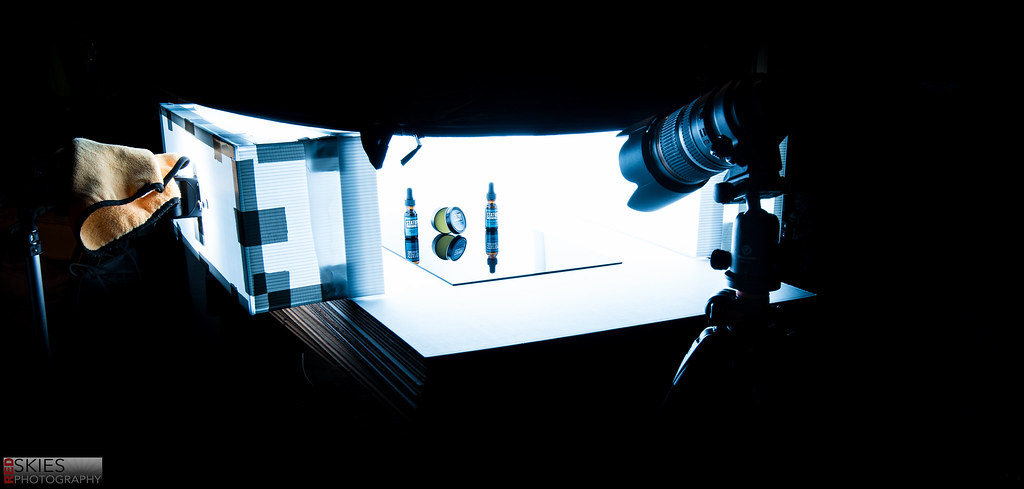
Behind the Scenes by f_one_eight, on Flickr


Cheers!
Jake
 
Last edited:
ec822b0708771f3a8eb17ac093efe266.jpg


And this is the inside of the backlight. I had one 18x24 backlight "softbox," and 2 9x24 strip lights on the side, and a silver reflector laid over the top. The reflectors inside are just drip pans made for a stove but covered in aluminum foil. They work incredibly well and cost maybe $15 each to make. The front is just a piece of white rip stop nylon. [emoji106][emoji106]
 
Great DIY! I really like the first one, but given the fact that the product is green, I wonder if a red hue might not have been more appropriate? The second looks a little off; I think I would have preferred to see both the dropper bottles together and and everything closer. Still, nice work.
 
Great DIY! I really like the first one, but given the fact that the product is green, I wonder if a red hue might not have been more appropriate? The second looks a little off; I think I would have preferred to see both the dropper bottles together and and everything closer. Still, nice work.

Thanks! And actually the labels are blue and the pomade a orange-ish yellow [emoji5]️

And yeah, the triple shot was composited for his website. I wanted all three products in the same image. He'll probably end up using the versions on all white BG's anyway [emoji16][emoji16]

And right? I'm amazed at how well the DIY boxes work!
 
Great DIY! I really like the first one, but given the fact that the product is green, I wonder if a red hue might not have been more appropriate? The second looks a little off; I think I would have preferred to see both the dropper bottles together and and everything closer. Still, nice work.

I do see what you mean about their proximity though... Could be closer. I'll work on it!
 
Bumps... I'd love some more critique!
 
Saw this just a minute ago on IG and they look way better larger! I know nothing of product shoots, I just like these, very clean looking. I'd buy it and I have no idea what it it! :D
 
Saw this just a minute ago on IG and they look way better larger! I know nothing of product shoots, I just like these, very clean looking. I'd buy it and I have no idea what it it! :D

Thanks man! It's a pomade, which is like a wavy hair styling product. Used for shine and strong hold. And the two small bottles are beard oils, basically to soften/style your beard. A buddy of mine is a barber and recently launched these products, so he asked me to shoot them for the website.

Cheers!
Jake
 
Hi D-B,
I'm new here, but those photos look super clean and nice, the highlights are perfect. The only thing I would have did different is change the composition when shooting the three together. Maybe a little closer together, you rock it though nice work.
Tim
 
Hi D-B,
I'm new here, but those photos look super clean and nice, the highlights are perfect. The only thing I would have did different is change the composition when shooting the three together. Maybe a little closer together, you rock it though nice work.
Tim

Thanks for the kind words!
 
One issue with wrapping your product with light the way you have is that you lose edge definition. Personally I like a crisp edge to a product that's on a white background. As far as the shot with all three products in it, I think it would be better compositionally if they were all together, likely with the bottles and the puck forming an uneven triangle (think one bottle beside and just a touch behind the puck camera left, with the other properly behind the puck camera right). It is possible to get a clean, unbroken highlight all the way up the sides of the bottle. You just need a much taller diffusion sheet next to the bottle. ;) Just my thoughts.
 
One issue with wrapping your product with light the way you have is that you lose edge definition. Personally I like a crisp edge to a product that's on a white background. As far as the shot with all three products in it, I think it would be better compositionally if they were all together, likely with the bottles and the puck forming an uneven triangle (think one bottle beside and just a touch behind the puck camera left, with the other properly behind the puck camera right). It is possible to get a clean, unbroken highlight all the way up the sides of the bottle. You just need a much taller diffusion sheet next to the bottle. ;) Just my thoughts.


You nailed it. I like it, but the lost rim on the pomade kills me. And yeah, those strips are pretty small, so you think a wider/longer panel would help? He said he'll have more products soon, so I think it'll be an excellent learning experience! Thanks for the help man [emoji106]

Jake
 
When you're shooting a subject against a white background, it's important to flag the background anywhere that won't be in the image frame. Use a good, long lens if you've got one (for something that small I'd use my 205mm). If you're still not getting the solid edge you like you can put black cards behind the subject (to either side) and start moving them forward until you get the edge definition you want. Long vertical diffusion panels (I use vellum paper but you can get rip-stop nylon from a craft store for cheap) that extend in front of the subject will give you a clean, smooth highlight up the side of the bottle. You shouldn't need anything above the subjects. Don't forget your lens hood and french flag too. Move around in front of the camera and look for lighting from the set reflecting in the lens. When you find reflections in the lens you'll need to flag the lens to block the reflections. Otherwise you'll be fighting with glare across the front element that will at the least reduce contrast, and at the most create a visible flare in the image.
 
When you're shooting a subject against a white background, it's important to flag the background anywhere that won't be in the image frame. Use a good, long lens if you've got one (for something that small I'd use my 205mm). If you're still not getting the solid edge you like you can put black cards behind the subject (to either side) and start moving them forward until you get the edge definition you want. Long vertical diffusion panels (I use vellum paper but you can get rip-stop nylon from a craft store for cheap) that extend in front of the subject will give you a clean, smooth highlight up the side of the bottle. You shouldn't need anything above the subjects. Don't forget your lens hood and french flag too. Move around in front of the camera and look for lighting from the set reflecting in the lens. When you find reflections in the lens you'll need to flag the lens to block the reflections. Otherwise you'll be fighting with glare across the front element that will at the least reduce contrast, and at the most create a visible flare in the image.

I have a roll of vellum, didn't even think of using it! And to think, I even read light science and magic.

What's a french flag?
 

Most reactions

New Topics

Back
Top