
Sharkbait
TPF Noob!
- Joined
- Nov 4, 2003
- Messages
- 2,403
- Reaction score
- 18
- Location
- Indianapolis, IN
- Website
- www.whitesharkphoto.com
Found this technique in one of my PS books, and it works like a charm!
Here's the step-by-step:
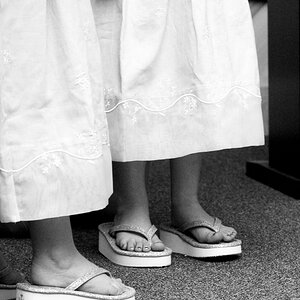
Here's a sample image done with this technique (My wife's pregnant, not just nursing a beer-belly.") ) :
) :

Here's the step-by-step:
1. Make 2 duplicate copies of your background image.
2. Hide the top copy, select the middle copy.
3. Switch blend mode of the middle layer to Darken.
4. Apply a 40px gausian blur to that middle layer.
5. Hide the middle layer, select the top layer.
6. Switch blend mode of top layer to Lighten.
7. Apply a 60px gausian blur to that top layer.
8. Select the middle layer and reduce its opacity to ~40%
9. Hide background layer.
10. Create new blank layer, drag it to the top of the layers list, then hold down ALT key and choose Merge Visible from the layers pop-down menu.
11. Make the background layer visible again, hide the 2 duplicate layers.
12. Select the top layer in your list (the one that you created blank, then merged visible to) and reduce its opacity to ~40%.
13. If you want some areas (eyes, etc.) still in sharp detail, create a layer mask on that topmost layer, and use the brush tool with a black foreground to 'paint' those areas back into detail.
Here's a sample image done with this technique (My wife's pregnant, not just nursing a beer-belly.
) :


![[No title]](/data/xfmg/thumbnail/34/34134-d2249816e46b705693bfc543c9b1f481.jpg?1619736306)


![[No title]](/data/xfmg/thumbnail/34/34138-0ecadfd41de9ae178e53528e0eb1a32c.jpg?1619736310)