Unimaxium
TPF Noob!
- Joined
- Nov 13, 2004
- Messages
- 2,689
- Reaction score
- 22
- Website
- www.flickr.com
- Can others edit my Photos
- Photos OK to edit
Here's my first attempt at producing an effect that I read about in a book the other day. For those who haven't heard of it, it's called a Sabattier effect. Basically it's like solarization. To make the effect, you expose an image onto printing paper normally, develop it normally, but before putting it though stop bath or fixer, you take the print and expose it again but to plain light (just the light, no negative in the enlarger). Then you go ahead and develop it again, and this time you stop and fix to make the print final. This technique creates sorta-kinda negative effects in some of the parts of the image that weren't developed the first time (since only non-developed parts are still light-sensitive after development). You can find more info on this effect here:
http://members.tripod.com/~pworkshop/sabattier.htm
You can notice the effect in almost everything except the guy's hat, which is kind of interesting. The effect is especially visible in the overhead rack (this image was taken on a train).
Admittedly, this print was done pretty recklessly, hence all the chemical spots and streaks and such. It's actually tricky to get it out of developer, skip stop and fixer, wash it, dry it, put it back onto the print easel, expose it again, and back into developer, without making it spot or streak. I made two prints, and while the second came out a little less spotty, it was darker and had less contrast so I decided to scan this one to post. It's a pretty cool effect, and I hope to do better prints in the future. Critique is welcome, but remember I didn't put a lot of thought into the print this time so yeah there are a lot of things I could have done better if I were being more careful.
If anyone else has prints with this kind of effect, I would love to see some.
 I've read about it too. I have another idea about two to try it, but it involves using Polaroid positive/negative film. Different approach for potentially a similar result.
  Supposedly you have a hand-held flash at the ready, and that's your light source for the additional exposure. Sounds like it could be cool, once you get the exposure correct!! Ahh, the downside of working with Polaroid film: every time you blow something, it's another three bucks down the drain!
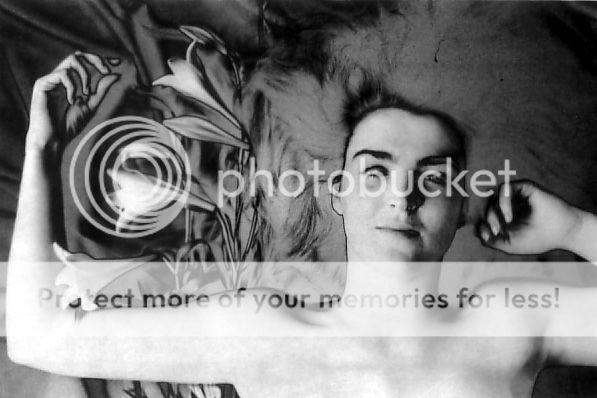


![[No title]](/data/xfmg/thumbnail/39/39185-29433e4f46e4b0bd394d10962886594c.jpg?1619738904)
![[No title]](/data/xfmg/thumbnail/34/34116-b81991a4a8a532509a981cadbacd573c.jpg?1619736286)