School Assignment

white

TPF Noob!
Joined
Mar 7, 2010
Messages
1,131
Reaction score
7
Can others edit my Photos
Photos OK to edit
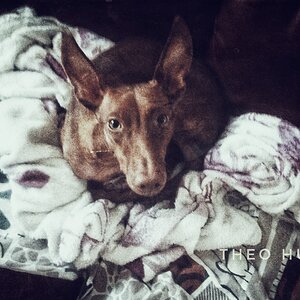
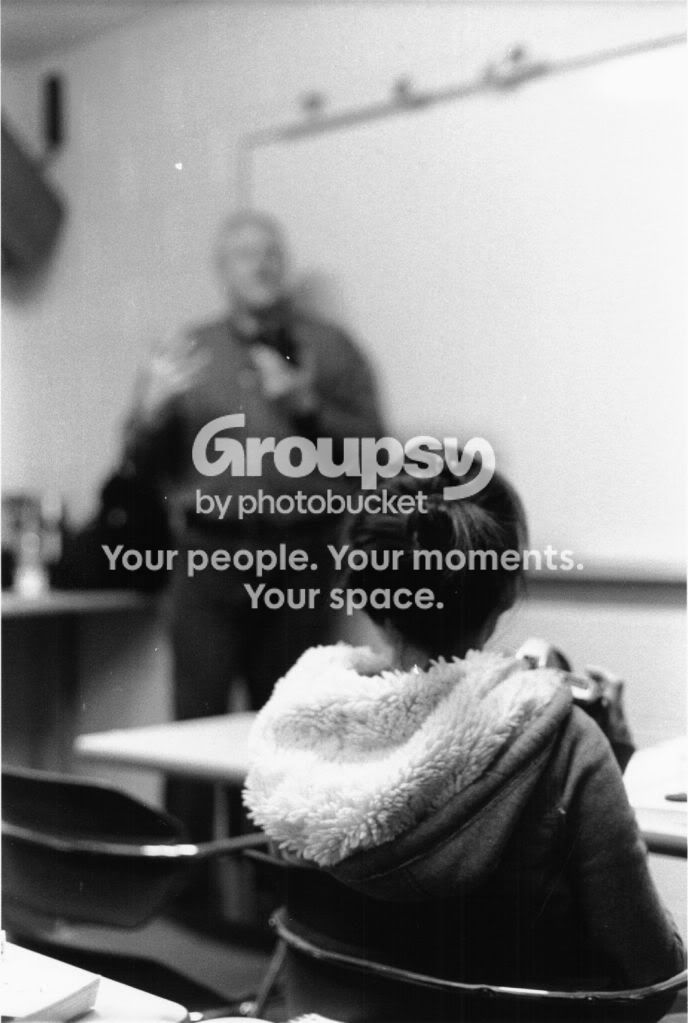
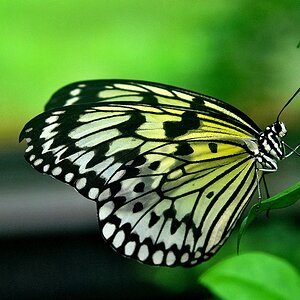
I just started taking photography classes at college and one of our first assignments was depth of field. I have a Minolta SRT-202 with a 50 mm prime lens, f/1.4 - /16. I shot this picture at f/1.4 with ilford Hp5 400. I think it turned out okay. I kinda wish I shot it at f/2 or /2.8, though, to make sure the cat was in full focus. Curious what you guys think.


'
 
Last edited:
Needs better focus on the cat's face, especially the eyes. Other than that a good start.
 
definitely should have had the cat in focus
 
Right.

I shot wide open (f/1.4) and the focusing distance was rather small, so there was an extremely narrow depth of field. I figure I could've done better at f/2.8 or even 3.5. Also, manual focus is a ***** sometimes, especially with things that move and don't want to be photographed.
 
First Darkroom Print

Last night I got a chance to make a contact sheet and a print in my school's darkroom. I think it turned out okay. I included the original to show the crop that I really, really did not want to make. But the crooked line had to go.

Print1_cropped.jpg


Print1.jpg


Tech specs:
Minolta SRT-202 w/ 50 mm Rokkor-X f/1.4
ilford HP5 400
1/2 @ f/8
 
First, welcome to film!

DOF has already been mentioned. If you are going to shoot close at wide aperture you have to be EXTREMELY precise with your focus. You have no margin for error.

Is the cat a scanned negative or print? You've got some dust and/or scratch issues going on with both images.

The tones look a muddy gray for me. If they are prints you might need to adjust printing time or the grade at which you are printing for better contrast. If they are scanned negatives you may still need to adjust contrast to get a better representation of the negative's potential.

My early prints were a muddy gray, too. This improved with more attention to printing times and contrast. Printing longer to bring in the shadows and filtering for some contrast made a big difference.

Keep at it! Printing is extremely rewarding as you work through these issues.
The newest pictures were printed on ilford multi-grade paper with no filter. My teacher said the paper has the equivalent of a #2 filter.

Yesterday was my first time printing ever. We haven't covered printing filters yet, or burning and dodging. That's probably what we'll be doing tomorrow.

The picture of the door/flower/lamp was adjusted in photoshop. The print is much more contrasty in real life:

Print1_cropped_contrastyoriginal.jpg


And this is something new I printed tonight. 12 seconds at f/16. I have a lighter print which is 9 seconds at f/16, but the white in her hood was really blown-out. I liked it, though, because there was more detail in her jacket and you could see the back of the chair she was sitting in, instead if being all black.

Print3.jpg
 
I just did this assignment last quarter in my Foto 111 class. I agree the cat's face needs to be a bit more in focus. But you're off to a good start. Once you get into using filters and maybe the zone system you could make some really nice prints.
 
Great pics!

The only thing I see, that does not have to do with DOF, is the cat. I would like to see a picture with the cat on the right side looking to the left. Giving him space to look through in the picture.
 
The newest pictures were printed on ilford multi-grade paper with no filter. My teacher said the paper has the equivalent of a #2 filter.

The more experienced printers may correct me if I'm wrong, but this doesn't sound correct to me. Variable contrast paper only prints at #2 contrast IF you use a #2 filter.

Either way, the door/flower/lamp needs more contrast. The highlights on the back wall are blocked out. Examine your negative and see if you've got detail on the wall. If so, you can bring it in with longer printing time.

Once you learn about dodging and burning you'll be able to manipulate the girl's image to bring in all your highlight and shadow detail.

With time you'll learn to evaluate your negative for all the information it contains. You may not be able to capture all it's highlight and shadow details with a simple straight print if it exceeds the range of your paper, but with burning, dodging and use of contrast you'll be able to bring it all into the image. That is where printing gets VERY cool.

To paraphrase St Ansel, the negative is like the score and the print is the performance.

In the very beginning learn the principles of developing and enlarging with basic dodging, burning and contrast control. Tighten up your technique, ie controlling dust, scratches, cross-contamination of chemicals, etc. Then start developing the creative and technical tools at your disposal for making the expressive print and realizing your vision.

Stick with it. You WILL be rewarded for your efforts.

And you should check out the forum at apug.org for more info about film photography than you can possibly digest in a lifetime.
 
Thanks, Sooner. Today I didn't spend a lot of time practicing burning like I thought I would -- just enough time to discover that precise burning is tough! I have a few negatives which are good candidates for burning, so I guess I'll just keep at it.

Maybe you can help shed some light on something for me. I read that a good rule of thumb is to "expose for the shadows, develop for the highlights". Does that mean for an overexposed negative I should underdevelop or overdevelop? All of the pictures in this thread (except the cat) were developed for 60 seconds. The shadows usually come up first and get progressively darker the longer they sit in the tray.

Anyway, here's three prints I made tonight. I'm using less paper to get prints that are decent, at least, which is an improvement from a couple days ago. The picture of the hands was adjusted in photoshop -- the detail in the hands isn't as dark in the print. It will be one of the pictures I'm going to practice burning with.

Print4.jpg


Print5.jpg


Print6.jpg
 
The saying "expose for the shadows, develop for the highlights" applies to the NEGATIVE, not the print. For now I would focus on normal development, especially if you are shooting 35mm roll film. Expose your photos as well as possible and develop normally. Don't mess around with pushing and pulling your film yet. If you are shooting roll film you would need to over/underdevelop the whole roll and develop accordingly. Don't worry about it yet. Expose normally and develop normally.

Developing your negatives and developing your film are two different processes and should be considered separately.

Normally develop your negative and then determine a printing strategy based on what you've got on your negative. Printing time is going to depend on the density of your negative, paper, grade, height of your light, etc. Determine your exposure time and any dodging/burning and then develop the PRINT normally, too. Ask your teacher how long you should develop the print and develop every print for the same amount of time. Don't go changing too many variables at once because you won't know where you screwed up. Don't develop by inspection either, ie don't sit there watching and pull it out when you think it looks good enough. They look different in the safelight than they will dried in regular lighting. They almost always dry down and your blacks will be flat or underdeveloped. I thought your muddy prints above might have been underdeveloped. Mine looked like that for awhile because I was jacking around with print developing times because I thought I knew better. I was wrong and wasted paper. Find out how long you should develop and develop for that long every time. That is assuming your developer isn't depleted. Ask your teacher how to go about testing or replenishing the developer.

How are you metering? Modern film has a pretty wide latitude so you'd have to really screw up your exposure to bump your highlights off the shoulder or drop the shadows off the toe. That saying about exposing and developing is in reference to the Zone System. Definitely explore the ZS later when you have a spot meter, but save that for later.

The hands would be a good one to practice with. You've been shooting wide open again, haven't you? The DOF is so narrow I can't really tell where the focal plane is supposed to be.

You are obviously thinking about all the right things. Keep at it. Learn the basics and understand the process. Learn the "normal" way to do things, then you can go about tweaking them to realize your vision.

Cool stuff, isn't it?
 
Thanks man. I really appreciate all the advice. I have a Minolta SRT-202, so I've been using the in-camera light meter which is center-weighted matrix, I believe. I'm still on the fence about whether the camera's meter is off slightly (causing overexposure) or my ineptitude. :) I'm more inclined to blame it on myself, though.

For most of these pictures I metered for the shadows, so when I re-composed the shot the meter typically read 1-2 stops overexposure. But for some, like the hands, I'm pretty sure the meter was set for normal exposure. So the negative & print were surprising -- I mean the forearm is basically pure white in the print. I chose to scale it down a little in photoshop.

I keep a log of all the settings. And you're right about shooting the hands wide-open, lol -- I'm a sucker for narrow depth of field. It was shot at 1/500 @ f/2, and I was pretty close to the subject. I probably could've shot at f/3.5 or f/4 and achieved the desired look. I wanted the hands in focus, but little else.

The curtain shot was 1/60 @ f/2.8 with a 50 mm prime lens. I had to use that setting because I didn't have a tripod set up and there was little light. Again, I'm surprised by the missed focus for the items on the table. I focused about halfway on that cardboard box flap; I guess it wasn't enough.

With this next roll I'm shooting I'm going to make sure the exposures are all normal. It might be tricky, though, since the assignment is line/architecture, and I'll probably be using a red filter for the landscape shots.

I try to print using the same variables all the time. I use the same enlarger (whenever possible), and typically all of my decent prints are 12 seconds @ f/16. Another question: I could get the same print at 6 seconds @ f/11, right? What are the benefits / disadvantages to longer and shorter print exposure times?

I don't think the developer would be depleted. We have a few lab techs who are usually on top of things.

Anyway, thanks again for all the help. Yeah it's really cool stuff. I don't care that film seems to be dying off. It's good fun being able to do this stuff hands-on.
 
A couple of issues. When you say you're metering for the shadows, how are you doing so? To use Zone System terminology, your meter is going to meter that area for Zone 5 or middle gray. If you then pull back and shoot the scene at those settings it is going to overexpose everything. Your shadows are going to come out middle gray. Not good for the shadows and the highlights are going to be 2-3 stops overexposed. "Metering for the shadows" implies that you are going to meter the shadow area and then stop down from there to put the shadows 2-4 stops below middle gray, depending on how much texture and detail you want in the shadows.

With that center-weighted meter you have to get up close enough to the shadow area so that it completely fills your frame. Any light that bleeds over from the more lighted areas is going to throw your meter off and you will be overexposing. Metering small, specific areas can be problematic with a center-weighted meter. Get a spot meter if you truly want to go there.

This is all Zone System 101. But like I said, learn the basic operations and principles before you start messing around with the ZS.

re: DOF. Like I said, if you are going to shoot shallow DOF at close range you have to be extremely precise. You have no margin for error. At that close range you will have a relatively shallow DOF even when you stop down a few stops.

re: the forearm. If you have detail in the forearm in the negative and not in the print then you aren't printing long enough. You can either print the whole thing longer or burn in the arm. If you've got detail in the negative then you CAN bring it into the print. If Photoshop can pull out the detail then so can your enlarger.

re: print times. 1 full stop should roughly double or half the time for printing. An advantage of longer times is that it gives you more time and margin for burning and dodging. It is really difficult to make subtle manipulations with short times. In theory you can lose sharpness at long times due to more diffusion of light within the emulsion. The longer the light falls on the paper the more time and opportunity it has to bounce around and spill over. My times are relatively short and I haven't had this problem but I've heard it from others.

And film isn't dying off. It is alive and well.
 
Some new ones. I got my first assignment. It's "Line / Architecture". Supposed to have 4 prints, preferably 2 for each concept.

I'll probably reshoot this one. I love the tones, but there are a couple things in the picture that bug me.

Print7.jpg


The actual print of this looks lighter and better. I just don't feel like messing with it in photoshop right now. Lazy. And tired.

Print8.jpg
 

Most reactions

New Topics

Back
Top