Skin Techniques?

AprilRamone

TPF Noob!
Joined
Nov 3, 2005
Messages
1,280
Reaction score
2
Location
Denver
Website
www.apriloharephotography.com
Can others edit my Photos
Photos OK to edit
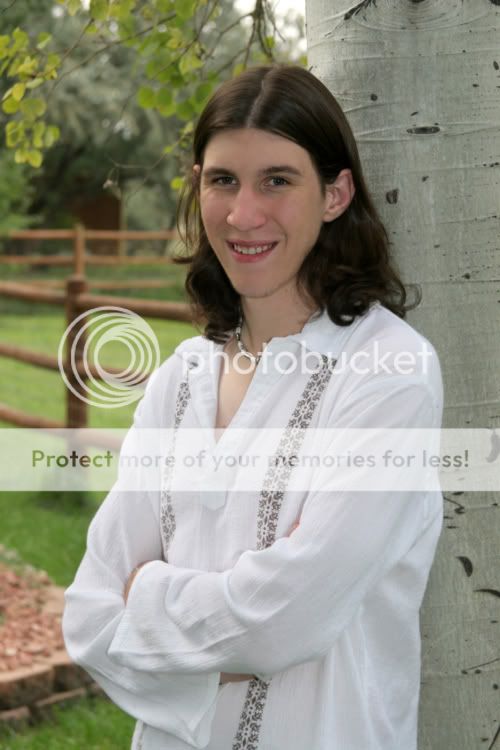
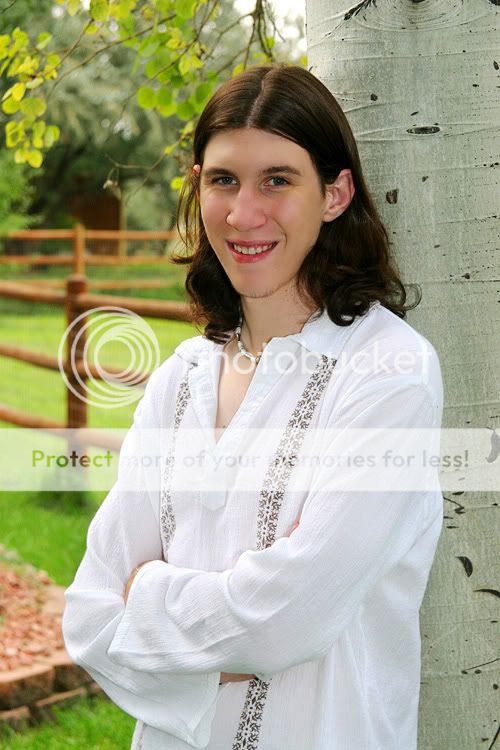
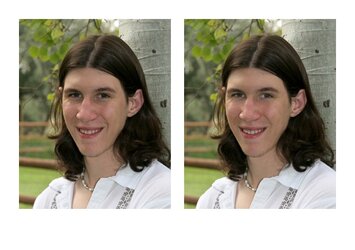
I wanted to try the technique that Bethany posted about painting on the skin with a low opacity. I had a senior portrait shoot today. Both images first had the general blemishes removed with the clone tool. What do you think of the difference? Too much? Looks good? The second one is where I did a little of that painting technique and I also added just a bit of a gaussian blur and then erased the parts I wanted sharp (eyes, jewelry mouth etc...)

Any suggestions or critique on what I've done with the skin is most appreciated:) Thanks!
-April

1.)
Ben1ResizedAgain.jpg


2.) (painting technique used on this one)
Ben1paintbrushtechniquewsofteningre.jpg
 
Here you go..
I first created a duplicate background layer by dragging the original background layer down to the "create a new layer mask". Then went to Filters>Blur>Gaussian Blur-Radius 2.0>click OK. Next to Filter>Noise>Dust & Scratches-Radius 2, Threshold 0>click OK. Click on the "Add A New Layer Mask" button, then select your paint bucket and select your foreground as black and fill the background copy with the black (this will turn your image back to normal). Select your paintbrush with an appropriate size (I used size 6 brush on this photo, because of his smaller face), change your foreground color to white and start painting on his face with the paintbrush. Once you have all of the areas on his face that you want smoot looking, you can change the opacity to whatever you feel comfortable with. Also, if you go out of bounds, you can change your foreground color back to black and fix the area that should not be smooth. Once you have done that, keep the foreground color black-reduce the opacity of the brush to something around 20-30 and go back over the facial lines to bring them back. Then flatten image. Also, after I flattened the image, i did another background duplicate copy and I did a little bit of curves and upped the saturation a little bit to enhance the background..after the saturation, i did a layer mask (stayed white) and used black foreground with 50% opacity brush and went back over his face to take most of the saturation out of his face so that it would not be too reddish. Oh yeah and I did a tiny bit of unsharp mask (Amount 100%, Radius 0.3, Threshold 0).
My results (keep in mind, i usually only do this on females lol):
Ben1ResizedAgain-1.jpg
 
Outstanding work mommy. i copied your instructions and gonna try it out myself.
 
Thanks to both of you Mommy and Pete. I only have elements right now, so I think I will save your directions for when I get a real version of PS. But, Pete, I tried to lighten the shadows, but felt that I made it look unnatural. How did you lighten them?
 
AprilRamone said:
I tried to lighten the shadows, but felt that I made it look unnatural. How did you lighten them?

Well... it's a 2-step process. First, lighten the shadows using the healing tool, or the clone tool, or the brush tool... whatever you're comfortable using. Then, FADE the effect. I'm not sure where this command is in Elements, but PS allows you to see a gradual fading, until you find it looks natural.

Have fun!

Pete

P.S. I also did a light dodge under the brow, slightly darkened the highlight at the top of the ear, and a slight whitening of the teeth.
 

Most reactions

Back
Top