Skin Tone Help

Now I have one more out of the box question. I saved Sw1tchFX's remake to my PC and when I opened it on PS I got a different look .. a less warm look. Why is it that it appears fine right here on the forum, yet when i open in PS & Lightbox the image looks different .. almost flatter. This is not the first image where this has happened.

Have processed images in lightbox but when imported to photoshop, seems like I'm losing some of the work.

HELP! :)
 
I'll go ahed and tell everyone here what I did and share the wealth instead of just telling you and only you in a PM.

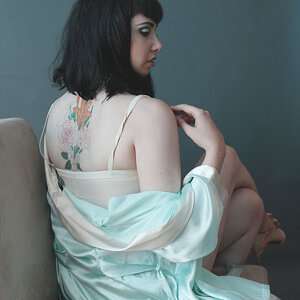
In my first edit, I saved the original image you posted on my computer and imported it into Adobe Lightroom. I adjusted the WB to 7150L and the tint to +21 towards magenta to keep her red skin tone and adjust for the green that came with the WB adjustment.

I than dialed in a 53% highlight recovery to give myself more room for exposure adjustments and to bring depth into her face and skin tones. I set the blacks to 7 to increase the contrast a bit.

I than adjusted my curves and set the highlights to +43 to lighten up the hair highlights, darks at -3, and shadows to -62 to give the hair and eyelashes some punch.

After that, I turned down the saturation of the red channel becuase her lips were too vibrant and not convincing at all.

I exported it into CS2 where i burned the nose and cheek highlights so they weren't so washed out and dodged the hair in the shadows so you could still see the strands. I also conducted some sharpening and added the border.


In my 2nd edit below, I tried to unchap her lips by cloning out the better parts of them and covering up some of the cracks. I than duplicated the layer and put a 2.5 pixel radius gaussian blur on that layer. I changed the layers opacity to 55% to give it less harsh of a look (worked great in the hair) and cover up some of my cloning. I flattened the image and did a slight smart sharpen to keep details and lightly sharpened here eyes over that to pull back even more detail, but still keep the gaussian blur. I also added a slight vignette because I like vignettes.

This is what the results look like:

IMG_0416_EDIT3_c.jpg


Like i said before, I'm amazed how well this little jpeg is holding up!\

EDIT:

Shooting the original in a "Daylight" white balance setting may have warmed it up a little although I must confess to using Auto WB too often in my shots.
The WB for the original shot rp uploaded is at 5000K which is only 500 degrees short of daylight.
Now I have one more out of the box question. I saved Sw1tchFX's remake to my PC and when I opened it on PS I got a different look .. a less warm look. Why is it that it appears fine right here on the forum, yet when i open in PS & Lightbox the image looks different .. almost flatter. This is not the first image where this has happened.

Have processed images in lightbox but when imported to photoshop, seems like I'm losing some of the work.

HELP! :)
What's your colorspace in photoshop? in lightroom? converting form sRGB to AdobeRGB can cause color shifts. I use sRGB in everything because it's universal.
 
I know we're a bit off topic for this thread, but my color space in both is sRGB. Hmmmmm. Unless i'm missing some other setting.
 
My go, in Picasa 2:

img0416editbw4.jpg
 
looks like the same thing I did, just with a little more magenta in it.
 
sw!tchFX, RMthompson, eos, julius, eena, and digimatt (did i leave anyone off?) .. .thanks for all your input and advice .. it has been a tremendous help.
 
That's what we're here for!
 

Most reactions

Back
Top