Sunset over Oatman Mtn- Need exposure help

flygning

TPF Noob!
Joined
May 5, 2008
Messages
372
Reaction score
0
Location
Phoenix, AZ
Can others edit my Photos
Photos OK to edit
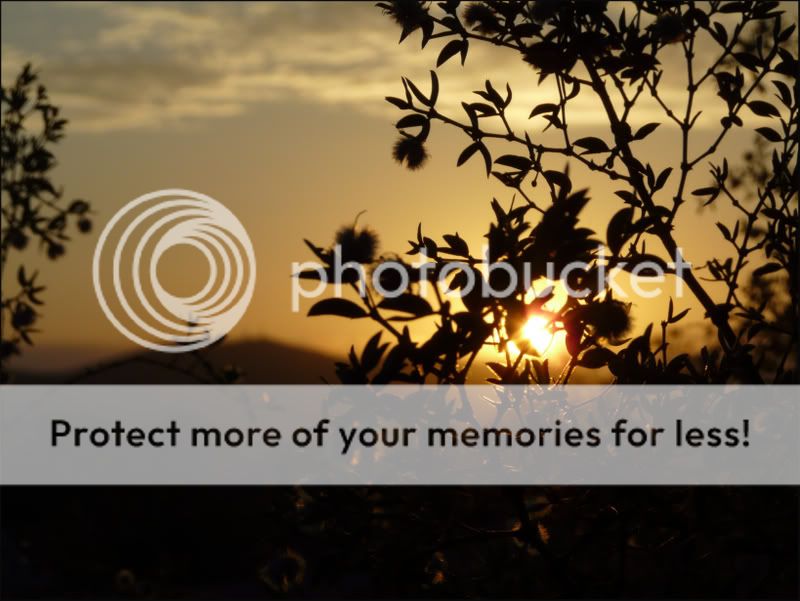
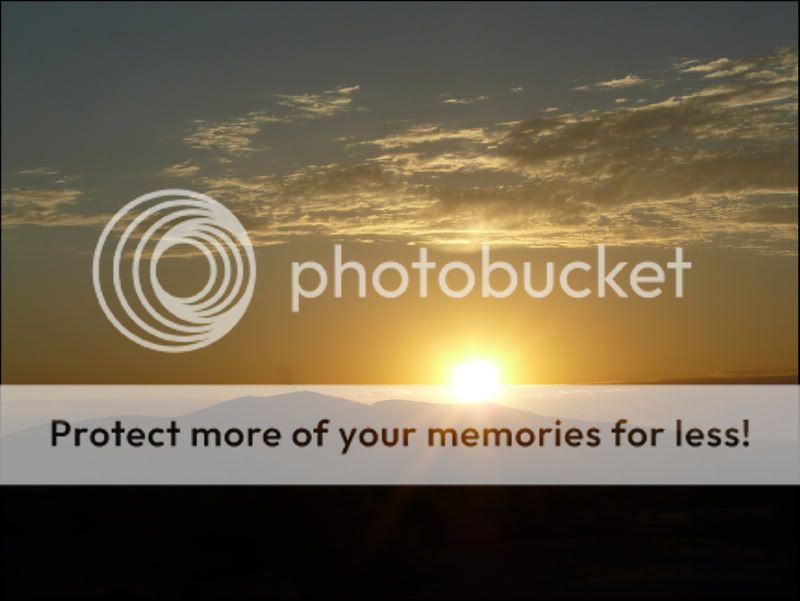
I read "Understanding Exposure" and wanted to try out some of the author's advice on getting proper exposures for certain scenes. I used Brother Backlit Sky (jeez, are we in kindergarten??) to meter these, taking my exposure reading by zooming in to a smaller area just to the side of the sun. Unfortunately, as you can see, the sun was still way overexposed:

Astrophotography047e1.jpg


Astrophotography044e1.jpg


Astrophotography048e1.jpg


According to the author, this should have correctly exposed the photograph/sun and nothing would have been blown out. So, how do I do this in the future to get a better exposure? Do I meter from an area of sky like I did and then stop it down a bit more, or is there a more direct process like the author claims in the book?
 
I initially got the same results when experimenting with the, ahem, Brother Backlit Sky. However, things improved a bit when I metered using the widest possible aperture, then adjusting aperture and shutter speed to the needs of the image.
 
Hi flygning,

Actually your images do look nice. The first question I would ask is do you know about grad filters? You can find these in just about any photog store. Basically, the upper portion of the filter is darker than the lower. This allows you to expose a little more for the foreground while keeping the sun in check.

The other thing and this is what digital is sooooo good for is braketing! Braket, braket and braket! If you have an SLR, you can do this. Then you would use Photoshop to only show the best exposures of each image. The details for this are out of the scope of this message, but braketing is probably your best bet. :mrgreen:

Ryan
http://whittierphotography.com
 
Victoria, it depends a lot on the look that you're going for, but what you really need is a 2 or 3-stop (0.6 or 0.9) gradiated (graduated) neutral density filter. They look like below:

20051010110802911_5.JPG


The dynamic range in your scene is so huge that there's no way to get a proper exposure of everything in it unless you do something to reduce the dynamic range, which is what grad ND filters do. Of course I kinda like the silhouette shots too, so again it depends on the look you're after. To do the metering trick you would have had to switch to center weighted or spot metering mode and then hit your exposure hold button, otherwise it wouldn't have done anything.

The last two were too far gone to do much with, but the first one had enough shadow details preserved that I was able to bring them up significantly, all from the small web-sized JPEG. So a bit of post-processing work can make a big difference too.


Original:
Astrophotography047e1.jpg


DxO - Lighting Correction: Strong (two clicks)
Astrophotography047e1d-vi.jpg


DxO - above plus cooled off white balance, massively lowered contrast, massively increased saturation (trying to improve color in shadowed area)
Astrophotography047e1d2-vi.jpg


A few minutes later also might have been a bit better when the sun isn't obliterating the scene like this. And yes, in scenes like this bracketing severl exposures (or shooting RAW) can definitely be helpful too since the light levels can change so drastically even from one second to the next.
 
However, things improved a bit when I metered using the widest possible aperture, then adjusting aperture and shutter speed to the needs of the image.

Perhaps this is what went wrong- I think I was probably on P mode so I took whatever aperture it gave me when I zoomed in.

Actually your images do look nice. The first question I would ask is do you know about grad filters? You can find these in just about any photog store. Basically, the upper portion of the filter is darker than the lower. This allows you to expose a little more for the foreground while keeping the sun in check.

The other thing and this is what digital is sooooo good for is braketing! ...

Thanks, and welcome to TPF! :)

I don't own a grad filter (broke college student), but I've always wondered how they work if the horizon is not flat like this one. I sorta hate flat horizons, so how do you make it so the line between the filtered part and the clear part line up with a crooked horizon?

And, I admit, I purposely didn't bracket on these. The author was so confident in this method he said you wouldn't even need to bracket-- I always have to be difficult and challenge a person on a statement like that :p

The dynamic range in your scene is so huge that there's no way to get a proper exposure of everything in it unless you do something to reduce the dynamic range, which is what grad ND filters do. Of course I kinda like the silhouette shots too, so again it depends on the look you're after. To do the metering trick you would have had to switch to center weighted or spot metering mode and then hit your exposure hold button, otherwise it wouldn't have done anything.

The last two were too far gone to do much with, but the first one had enough shadow details preserved that I was able to bring them up significantly, all from the small web-sized JPEG. So a bit of post-processing work can make a big difference too.
...
A few minutes later also might have been a bit better when the sun isn't obliterating the scene like this. And yes, in scenes like this bracketing severl exposures (or shooting RAW) can definitely be helpful too since the light levels can change so drastically even from one second to the next.

I suppose I should have mentioned that I like the silhouette, I just wanted the sky to come out less overexposed. In the creosote shots, I like the affect of the little fluffs being lit up, with everything else dark.

The spot meter/exposure lock is exactly what I did. Thanks for taking a few minutes to work on the one shot- I do like it with the extra detail.

I also took a few shots a bit later, but the sunset was pretty bland and they weren't terribly interesting. If there were more clouds, would I have metered off them once the sun went down?
 
On the sunsets I would meter the sky about 45 degrees away from the sun and place that on Zone VII. If on a tripod you might try a neutral density filter on-camera and bring the sky down closer to the mountain and foreground.
 
This is a case where I would probably try for an HDR because of the huge dynamic range. Once assembled, you can then make your own "digital neutral density filter."
 
Victoria, I also like the silhouette. I know they aren't exactly what you were going for but they're gorgeous.

Thank you :)

On the sunsets I would meter the sky about 45 degrees away from the sun and place that on Zone VII. If on a tripod you might try a neutral density filter on-camera and bring the sky down closer to the mountain and foreground.

I did meter fairly close to the sun-- I'll experiment with using a bit of the sky that is further away. I've started to realize my camera tends to overexpose anyway. Even when the histogram says the image is well exposed, it always looks washed out once I get it on the computer.

When you say to use a ND filter to bring the sky closer to the mountain, do you mean taking 2 separate exposures (one for sky, one for foreground) or do you mean use a graduated filter?

This is a case where I would probably try for an HDR because of the huge dynamic range. Once assembled, you can then make your own "digital neutral density filter."

I've been experimenting with this lately- I'm not doing so well with the HDRs. My photoshop skills leave a bit to be desired...


Very beautiful image, but I've found that I either want the lens flare (it adds some interest) or I want to see more detail in the sky. I guess that is where I'm trying to get with these photos.
 

Most reactions

New Topics

Back
Top