- Joined
- Dec 11, 2006
- Messages
- 18,743
- Reaction score
- 8,047
- Location
- Mid-Atlantic US
- Website
- www.lewlortonphoto.com
- Can others edit my Photos
- Photos NOT OK to edit
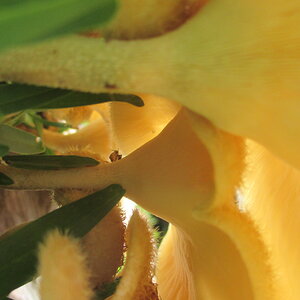
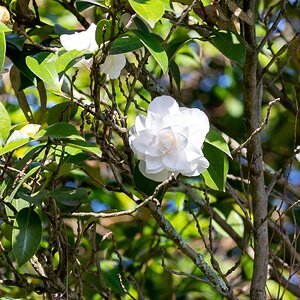
Here is a picture taken way back in 2006.
I removed some perspective distortion, added a bit of contrast, did a tiny bit of sharpening and cropped it.
The Nef file (the Nikon Raw file) is unchanged but Lightroom added a sidecar file with the same name but the suffix of .xmp that is simply the Metadata Plus an extensive description of how the file was edited.
When the NEF is opened again, these edits are applied before you see it.
These edits can be easily reversed in LR or other editors.

<x:xmpmeta xmlns:x="adobe:ns:meta/" x:xmptk="Adobe XMP Core 5.5-c002 1.148022, 2012/07/15-18:06:45 ">
<rdf:RDF xmlns:rdf="http://www.w3.org/1999/02/22-rdf-syntax-ns#">
<rdf escription rdf:about=""
xmlns:tiff="http://ns.adobe.com/tiff/1.0/"
xmlns:exif="http://ns.adobe.com/exif/1.0/"
xmlns:xmp="File management, metadata integration | Adobe Extensible Metadata Platform (XMP)"
xmlns:aux="http://ns.adobe.com/exif/1.0/aux/"
xmlns:Iptc4xmpCore="IPTC document"
xmlnshotoshop="Photo editor | Download free Adobe Photoshop CC trial"
xmlns:crs="http://ns.adobe.com/camera-raw-settings/1.0/"
xmlns:xmpRights="File management, metadata integration | Adobe Extensible Metadata Platform (XMP)"
xmlns:dc="DCMI Metadata Terms"
xmlns:crss="http://ns.adobe.com/camera-raw-saved-settings/1.0/"
xmlns:lr="http://ns.adobe.com/lightroom/1.0/"
xmlns:xmpMM="File management, metadata integration | Adobe Extensible Metadata Platform (XMP)"
xmlns:stEvt="File management, metadata integration | Adobe Extensible Metadata Platform (XMP)"
tiff:Make="NIKON CORPORATION"
tiff:Model="NIKON D70"
tiff:Orientation="1"
tiff:ImageWidth="3008"
tiff:ImageLength="2000"
exif:ExifVersion="0221"
exif:ExposureTime="1/50"
exif:ShutterSpeedValue="5643856/1000000"
exif:FNumber="11/1"
exif:ApertureValue="6918863/1000000"
exif:ExposureProgram="3"
exifateTimeOriginal="2006-01-17T10:47:54.70-05:00"
exif:ExposureBiasValue="0/6"
exif:MaxApertureValue="38/10"
exif:MeteringMode="5"
exif:LightSource="0"
exif:FocalLength="250/10"
exif:SensingMethod="2"
exif:FileSource="3"
exif:SceneType="1"
exif:FocalLengthIn35mmFilm="37"
exif:CustomRendered="0"
exif:ExposureMode="0"
exif:WhiteBalance="0"
exif:SceneCaptureType="0"
exif:GainControl="0"
exif:Contrast="0"
exif:Saturation="0"
exif:Sharpness="0"
exif:SubjectDistanceRange="0"
exifigitalZoomRatio="1/1"
exifixelXDimension="3008"
exifixelYDimension="2000"
xmp:ModifyDate="2006-01-17T10:47:54.70-05:00"
xmp:CreatorTool="Ver.1.03"
xmp:CreateDate="2006-01-17T10:47:54.70-05:00"
xmp:Rating="1"
xmp:MetadataDate="2015-01-22T10:09:36-05:00"
aux:LensInfo="180/10 700/10 35/10 45/10"
aux:Lens="18.0-70.0 mm f/3.5-4.5"
aux:ImageNumber="5927"
Iptc4xmpCore:CountryCode=""
photoshop:Country=""
photoshop:Category=""
photoshopateCreated=""
photoshop:State=""
photoshop:CaptionWriter=""
photoshop:Headline=""
photoshop:SidecarForExtension="NEF"
photoshop:EmbeddedXMPDigest="00000000000000000000000000000000"
crs:Version="8.7"
crsrocessVersion="5.0"
crs:WhiteBalance="As Shot"
crs:AutoWhiteVersion="134348800"
crs:Temperature="5550"
crs:Tint="-3"
crs:Exposure="+0.62"
crs:Shadows="5"
crs:Brightness="+50"
crs:Contrast="+25"
crs:Saturation="0"
crs:Sharpness="25"
crs:LuminanceSmoothing="0"
crs:ColorNoiseReduction="25"
crs:VignetteAmount="0"
crs:ShadowTint="0"
crs:RedHue="0"
crs:RedSaturation="0"
crs:GreenHue="0"
crs:GreenSaturation="0"
crs:BlueHue="0"
crs:BlueSaturation="0"
crs:FillLight="0"
crs:Vibrance="0"
crs:HighlightRecovery="0"
crs:Clarity="+37"
crs:HueAdjustmentRed="0"
crs:HueAdjustmentOrange="0"
crs:HueAdjustmentYellow="0"
crs:HueAdjustmentGreen="0"
crs:HueAdjustmentAqua="0"
crs:HueAdjustmentBlue="0"
crs:HueAdjustmentPurple="0"
crs:HueAdjustmentMagenta="0"
crs:SaturationAdjustmentRed="0"
crs:SaturationAdjustmentOrange="0"
crs:SaturationAdjustmentYellow="0"
crs:SaturationAdjustmentGreen="0"
crs:SaturationAdjustmentAqua="0"
crs:SaturationAdjustmentBlue="0"
crs:SaturationAdjustmentPurple="0"
crs:SaturationAdjustmentMagenta="0"
crs:LuminanceAdjustmentRed="0"
crs:LuminanceAdjustmentOrange="0"
crs:LuminanceAdjustmentYellow="0"
crs:LuminanceAdjustmentGreen="0"
crs:LuminanceAdjustmentAqua="0"
crs:LuminanceAdjustmentBlue="0"
crs:LuminanceAdjustmentPurple="0"
crs:LuminanceAdjustmentMagenta="0"
crs:SplitToningShadowHue="0"
crs:SplitToningShadowSaturation="0"
crs:SplitToningHighlightHue="0"
crs:SplitToningHighlightSaturation="0"
crs:SplitToningBalance="0"
crsarametricShadows="0"
crsarametricDarks="0"
crsarametricLights="0"
crsarametricHighlights="0"
crsarametricShadowSplit="25"
crsarametricMidtoneSplit="50"
crsarametricHighlightSplit="75"
crs:SharpenRadius="+1.0"
crs:SharpenDetail="25"
crs:SharpenEdgeMasking="34"
crsostCropVignetteAmount="0"
crs:GrainAmount="0"
crs:LensProfileEnable="1"
crs:LensManualDistortionAmount="0"
crserspectiveVertical="+21"
crserspectiveHorizontal="0"
crserspectiveRotate="0.0"
crserspectiveScale="100"
crserspectiveAspect="0"
crserspectiveUpright="0"
crs:AutoLateralCA="1"
crsefringePurpleAmount="0"
crsefringePurpleHueLo="30"
crsefringePurpleHueHi="70"
crsefringeGreenAmount="0"
crsefringeGreenHueLo="40"
crsefringeGreenHueHi="60"
crs:ConvertToGrayscale="False"
crs:ToneCurveName="Medium Contrast"
crs:ToneCurveName2012="Linear"
crs:CameraProfile="Adobe Standard"
crs:CameraProfileDigest="1D2B18E7ADE8EB1F68BC79DAFA30AAF5"
crs:LensProfileSetup="LensDefaults"
crs:LensProfileName="Adobe (Nikon AF-S DX Zoom-Nikkor 18-70mm f/3.5-4.5G IF-ED)"
crs:LensProfileFilename="NIKON D300S (Nikon AF-S DX Zoom-Nikkor 18-70mm f3.5-4.5G IF-ED) - RAW.lcp"
crs:LensProfileDigest="E89291B8905E38EEC9A1EE9C0D691D7E"
crs:LensProfileDistortionScale="100"
crs:LensProfileChromaticAberrationScale="100"
crs:LensProfileVignettingScale="100"
crs:HasSettings="True"
crs:CropTop="0.045989"
crs:CropLeft="0.030579"
crs:CropBottom="0.997573"
crs:CropRight="0.958"
crs:CropAngle="0.682806"
crs:CropConstrainToWarp="0"
crs:HasCrop="True"
crs:AlreadyApplied="False"
crs:RawFileName="2006 01 17Greenbelt_00129.NEF"
dc:format="image/x-nikon-nef"
xmpMM:InstanceID="xmp.iid:be24e52a-c756-6441-bf23-f355ff42e816"
xmpMMocumentID="xmp.did:be24e52a-c756-6441-bf23-f355ff42e816"
xmpMM:OriginalDocumentID="xmp.did:be24e52a-c756-6441-bf23-f355ff42e816">
<exif:ISOSpeedRatings>
<rdf:Seq>
<rdf:li>200</rdf:li>
</rdf:Seq>
</exif:ISOSpeedRatings>
<exif:Flash
exif:Fired="False"
exif:Return="0"
exif:Mode="0"
exif:Function="False"
exif:RedEyeMode="False"/>
<Iptc4xmpCore:CreatorContactInfo
Iptc4xmpCore:CiAdrPcode="21046-1318"
Iptc4xmpCore:CiAdrCtry="USA"
Iptc4xmpCore:CiEmailWork="[email protected]"
Iptc4xmpCore:CiTelWork="301-576-4200"
Iptc4xmpCore:CiAdrRegion="MD"
Iptc4xmpCore:CiAdrExtadr="10096 Hatbrim Terrace"
Iptc4xmpCore:CiAdrCity="Columbia"/>
<crs:ToneCurve>
<rdf:Seq>
<rdf:li>0, 0</rdf:li>
<rdf:li>32, 22</rdf:li>
<rdf:li>64, 56</rdf:li>
<rdf:li>128, 128</rdf:li>
<rdf:li>192, 196</rdf:li>
<rdf:li>255, 255</rdf:li>
</rdf:Seq>
</crs:ToneCurve>
<crs:ToneCurveRed>
<rdf:Seq>
<rdf:li>0, 0</rdf:li>
<rdf:li>255, 255</rdf:li>
</rdf:Seq>
</crs:ToneCurveRed>
<crs:ToneCurveGreen>
<rdf:Seq>
<rdf:li>0, 0</rdf:li>
<rdf:li>255, 255</rdf:li>
</rdf:Seq>
</crs:ToneCurveGreen>
<crs:ToneCurveBlue>
<rdf:Seq>
<rdf:li>0, 0</rdf:li>
<rdf:li>255, 255</rdf:li>
</rdf:Seq>
</crs:ToneCurveBlue>
<crs:ToneCurvePV2012>
<rdf:Seq>
<rdf:li>0, 0</rdf:li>
<rdf:li>255, 255</rdf:li>
</rdf:Seq>
</crs:ToneCurvePV2012>
<crs:ToneCurvePV2012Red>
<rdf:Seq>
<rdf:li>0, 0</rdf:li>
<rdf:li>255, 255</rdf:li>
</rdf:Seq>
</crs:ToneCurvePV2012Red>
<crs:ToneCurvePV2012Green>
<rdf:Seq>
<rdf:li>0, 0</rdf:li>
<rdf:li>255, 255</rdf:li>
</rdf:Seq>
</crs:ToneCurvePV2012Green>
<crs:ToneCurvePV2012Blue>
<rdf:Seq>
<rdf:li>0, 0</rdf:li>
<rdf:li>255, 255</rdf:li>
</rdf:Seq>
</crs:ToneCurvePV2012Blue>
<xmpRights:UsageTerms>
<rdf:Alt>
<rdf:li xml:lang="x-default">typical fair use</rdf:li>
</rdf:Alt>
</xmpRights:UsageTerms>
<dc:creator>
<rdf:Seq>
<rdf:li>Lewis Lorton</rdf:li>
</rdf:Seq>
</dc:creator>
<dc:rights>
<rdf:Alt>
<rdf:li xml:lang="x-default">Lewis Lorton</rdf:li>
</rdf:Alt>
</dc:rights>
<dc:subject>
<rdf:Bag>
<rdf:li>1dd- things</rdf:li>
<rdf:li>1ff-TypeofPicture</rdf:li>
<rdf:li>Structure</rdf:li>
<rdf:li>graffiti</rdf:li>
<rdf:li>graphic</rdf:li>
<rdf:li>machinery</rdf:li>
<rdf:li>mineral</rdf:li>
<rdf:li>wall</rdf:li>
</rdf:Bag>
</dc:subject>
<crss:SavedSettings>
<rdf:Bag>
<rdf:li>
<rdfescription
crss:Name="Import"
crss:Type="Snapshot">
<crssarameters>
<rdfescription
crs:Version="8.7"
crsrocessVersion="5.0"
crs:WhiteBalance="As Shot"
crs:AutoWhiteVersion="134348800"
crs:AutoExposure="False"
crs:Exposure="0.00"
crs:AutoShadows="False"
crs:Shadows="5"
crs:AutoBrightness="False"
crs:Brightness="+50"
crs:AutoContrast="False"
crs:Contrast="+25"
crs:Saturation="0"
crs:Sharpness="25"
crs:LuminanceSmoothing="0"
crs:ColorNoiseReduction="25"
crs:ChromaticAberrationR="0"
crs:ChromaticAberrationB="0"
crs:VignetteAmount="0"
crs:VignetteMidpoint="50"
crs:ShadowTint="0"
crs:RedHue="0"
crs:RedSaturation="0"
crs:GreenHue="0"
crs:GreenSaturation="0"
crs:BlueHue="0"
crs:BlueSaturation="0"
crs:FillLight="0"
crs:Vibrance="0"
crs:HighlightRecovery="0"
crs:Clarity="0"
crsefringe="0"
crs:GrayMixerRed="0"
crs:GrayMixerOrange="0"
crs:GrayMixerYellow="0"
crs:GrayMixerGreen="0"
crs:GrayMixerAqua="0"
crs:GrayMixerBlue="0"
crs:GrayMixerPurple="0"
crs:GrayMixerMagenta="0"
crs:HueAdjustmentRed="0"
crs:HueAdjustmentOrange="0"
crs:HueAdjustmentYellow="0"
crs:HueAdjustmentGreen="0"
crs:HueAdjustmentAqua="0"
crs:HueAdjustmentBlue="0"
crs:HueAdjustmentPurple="0"
crs:HueAdjustmentMagenta="0"
crs:SaturationAdjustmentRed="0"
crs:SaturationAdjustmentOrange="0"
crs:SaturationAdjustmentYellow="0"
crs:SaturationAdjustmentGreen="0"
crs:SaturationAdjustmentAqua="0"
crs:SaturationAdjustmentBlue="0"
crs:SaturationAdjustmentPurple="0"
crs:SaturationAdjustmentMagenta="0"
crs:LuminanceAdjustmentRed="0"
crs:LuminanceAdjustmentOrange="0"
crs:LuminanceAdjustmentYellow="0"
crs:LuminanceAdjustmentGreen="0"
crs:LuminanceAdjustmentAqua="0"
crs:LuminanceAdjustmentBlue="0"
crs:LuminanceAdjustmentPurple="0"
crs:LuminanceAdjustmentMagenta="0"
crs:SplitToningShadowHue="0"
crs:SplitToningShadowSaturation="0"
crs:SplitToningHighlightHue="0"
crs:SplitToningHighlightSaturation="0"
crs:SplitToningBalance="0"
crsarametricShadows="0"
crsarametricDarks="0"
crsarametricLights="0"
crsarametricHighlights="0"
crsarametricShadowSplit="25"
crsarametricMidtoneSplit="50"
crsarametricHighlightSplit="75"
crs:SharpenRadius="+1.0"
crs:SharpenDetail="25"
crs:SharpenEdgeMasking="0"
crsostCropVignetteAmount="0"
crsostCropVignetteMidpoint="50"
crsostCropVignetteFeather="50"
crsostCropVignetteRoundness="0"
crsostCropVignetteStyle="1"
crsostCropVignetteHighlightContrast="0"
crs:GrainAmount="0"
crs:GrainSize="50"
crs:GrainFrequency="50"
crs:LuminanceNoiseReductionDetail="50"
crs:ColorNoiseReductionDetail="50"
crs:LuminanceNoiseReductionContrast="50"
crs:ColorNoiseReductionSmoothness="50"
crs:LensProfileEnable="0"
crs:LensManualDistortionAmount="0"
crserspectiveVertical="0"
crserspectiveHorizontal="0"
crserspectiveRotate="0.0"
crserspectiveScale="100"
crserspectiveAspect="0"
crserspectiveUpright="0"
crs:AutoLateralCA="0"
crs:Exposure2012="0.00"
crs:Contrast2012="0"
crs:Highlights2012="0"
crs:Shadows2012="0"
crs:Whites2012="0"
crs:Blacks2012="0"
crs:Clarity2012="0"
crsefringePurpleAmount="0"
crsefringePurpleHueLo="30"
crsefringePurpleHueHi="70"
crsefringeGreenAmount="0"
crsefringeGreenHueLo="40"
crsefringeGreenHueHi="60"
crs:ConvertToGrayscale="False"
crs:AutoGrayscaleMix="False"
crs:AutoTone="False"
crs:EnableToneCurve="True"
crs:EnableSplitToning="True"
crs:EnableGrayscaleMix="True"
crs:EnableColorAdjustments="True"
crs:EnableDetail="True"
crs:EnableLensCorrections="True"
crs:EnableEffects="True"
crs:EnableCalibration="True"
crs:EnableRetouch="True"
crs:EnableRedEye="True"
crs:EnablePaintBasedCorrections="True"
crs:EnableGradientBasedCorrections="True"
crs:EnableCircularGradientBasedCorrections="True"
crs:ToneCurveName="Medium Contrast"
crs:ToneCurveName2012="Linear"
crs:CameraProfile="Adobe Standard"
crs:CameraProfileDigest="1D2B18E7ADE8EB1F68BC79DAFA30AAF5"
crs:LensProfileSetup="LensDefaults">
<crs:ToneCurve>
<rdf:Seq>
<rdf:li>0, 0</rdf:li>
<rdf:li>32, 22</rdf:li>
<rdf:li>64, 56</rdf:li>
<rdf:li>128, 128</rdf:li>
<rdf:li>192, 196</rdf:li>
<rdf:li>255, 255</rdf:li>
</rdf:Seq>
</crs:ToneCurve>
<crs:ToneCurveRed>
<rdf:Seq>
<rdf:li>0, 0</rdf:li>
<rdf:li>255, 255</rdf:li>
</rdf:Seq>
</crs:ToneCurveRed>
<crs:ToneCurveGreen>
<rdf:Seq>
<rdf:li>0, 0</rdf:li>
<rdf:li>255, 255</rdf:li>
</rdf:Seq>
</crs:ToneCurveGreen>
<crs:ToneCurveBlue>
<rdf:Seq>
<rdf:li>0, 0</rdf:li>
<rdf:li>255, 255</rdf:li>
</rdf:Seq>
</crs:ToneCurveBlue>
<crs:ToneCurvePV2012>
<rdf:Seq>
<rdf:li>0, 0</rdf:li>
<rdf:li>255, 255</rdf:li>
</rdf:Seq>
</crs:ToneCurvePV2012>
<crs:ToneCurvePV2012Red>
<rdf:Seq>
<rdf:li>0, 0</rdf:li>
<rdf:li>255, 255</rdf:li>
</rdf:Seq>
</crs:ToneCurvePV2012Red>
<crs:ToneCurvePV2012Green>
<rdf:Seq>
<rdf:li>0, 0</rdf:li>
<rdf:li>255, 255</rdf:li>
</rdf:Seq>
</crs:ToneCurvePV2012Green>
<crs:ToneCurvePV2012Blue>
<rdf:Seq>
<rdf:li>0, 0</rdf:li>
<rdf:li>255, 255</rdf:li>
</rdf:Seq>
</crs:ToneCurvePV2012Blue>
</rdfescription>
</crssarameters>
</rdfescription>
</rdf:li>
</rdf:Bag>
</crss:SavedSettings>
<lr:hierarchicalSubject>
<rdf:Bag>
<rdf:li>1dd- things|Structure|wall</rdf:li>
<rdf:li>1dd- things|graffiti</rdf:li>
<rdf:li>1dd- things|mineral|machinery</rdf:li>
<rdf:li>1ff-TypeofPicture|graphic</rdf:li>
</rdf:Bag>
</lr:hierarchicalSubject>
<xmpMM:History>
<rdf:Seq>
<rdf:li
stEvt:action="saved"
stEvt:instanceID="xmp.iid:be24e52a-c756-6441-bf23-f355ff42e816"
stEvt:when="2015-01-22T10:09:36-05:00"
stEvt:softwareAgent="Adobe Photoshop Lightroom 5.7 (Windows)"
stEvt:changed="/metadata"/>
</rdf:Seq>
</xmpMM:History>
</rdfescription>
</rdf:RDF>
</x:xmpmeta>
I removed some perspective distortion, added a bit of contrast, did a tiny bit of sharpening and cropped it.
The Nef file (the Nikon Raw file) is unchanged but Lightroom added a sidecar file with the same name but the suffix of .xmp that is simply the Metadata Plus an extensive description of how the file was edited.
When the NEF is opened again, these edits are applied before you see it.
These edits can be easily reversed in LR or other editors.
<x:xmpmeta xmlns:x="adobe:ns:meta/" x:xmptk="Adobe XMP Core 5.5-c002 1.148022, 2012/07/15-18:06:45 ">
<rdf:RDF xmlns:rdf="http://www.w3.org/1999/02/22-rdf-syntax-ns#">
<rdf
escription rdf:about=""xmlns:tiff="http://ns.adobe.com/tiff/1.0/"
xmlns:exif="http://ns.adobe.com/exif/1.0/"
xmlns:xmp="File management, metadata integration | Adobe Extensible Metadata Platform (XMP)"
xmlns:aux="http://ns.adobe.com/exif/1.0/aux/"
xmlns:Iptc4xmpCore="IPTC document"
xmlns
hotoshop="Photo editor | Download free Adobe Photoshop CC trial"xmlns:crs="http://ns.adobe.com/camera-raw-settings/1.0/"
xmlns:xmpRights="File management, metadata integration | Adobe Extensible Metadata Platform (XMP)"
xmlns:dc="DCMI Metadata Terms"
xmlns:crss="http://ns.adobe.com/camera-raw-saved-settings/1.0/"
xmlns:lr="http://ns.adobe.com/lightroom/1.0/"
xmlns:xmpMM="File management, metadata integration | Adobe Extensible Metadata Platform (XMP)"
xmlns:stEvt="File management, metadata integration | Adobe Extensible Metadata Platform (XMP)"
tiff:Make="NIKON CORPORATION"
tiff:Model="NIKON D70"
tiff:Orientation="1"
tiff:ImageWidth="3008"
tiff:ImageLength="2000"
exif:ExifVersion="0221"
exif:ExposureTime="1/50"
exif:ShutterSpeedValue="5643856/1000000"
exif:FNumber="11/1"
exif:ApertureValue="6918863/1000000"
exif:ExposureProgram="3"
exif
ateTimeOriginal="2006-01-17T10:47:54.70-05:00"exif:ExposureBiasValue="0/6"
exif:MaxApertureValue="38/10"
exif:MeteringMode="5"
exif:LightSource="0"
exif:FocalLength="250/10"
exif:SensingMethod="2"
exif:FileSource="3"
exif:SceneType="1"
exif:FocalLengthIn35mmFilm="37"
exif:CustomRendered="0"
exif:ExposureMode="0"
exif:WhiteBalance="0"
exif:SceneCaptureType="0"
exif:GainControl="0"
exif:Contrast="0"
exif:Saturation="0"
exif:Sharpness="0"
exif:SubjectDistanceRange="0"
exif
igitalZoomRatio="1/1"exif
ixelXDimension="3008"exif
ixelYDimension="2000"xmp:ModifyDate="2006-01-17T10:47:54.70-05:00"
xmp:CreatorTool="Ver.1.03"
xmp:CreateDate="2006-01-17T10:47:54.70-05:00"
xmp:Rating="1"
xmp:MetadataDate="2015-01-22T10:09:36-05:00"
aux:LensInfo="180/10 700/10 35/10 45/10"
aux:Lens="18.0-70.0 mm f/3.5-4.5"
aux:ImageNumber="5927"
Iptc4xmpCore:CountryCode=""
photoshop:Country=""
photoshop:Category=""
photoshop
ateCreated=""photoshop:State=""
photoshop:CaptionWriter=""
photoshop:Headline=""
photoshop:SidecarForExtension="NEF"
photoshop:EmbeddedXMPDigest="00000000000000000000000000000000"
crs:Version="8.7"
crs
rocessVersion="5.0"crs:WhiteBalance="As Shot"
crs:AutoWhiteVersion="134348800"
crs:Temperature="5550"
crs:Tint="-3"
crs:Exposure="+0.62"
crs:Shadows="5"
crs:Brightness="+50"
crs:Contrast="+25"
crs:Saturation="0"
crs:Sharpness="25"
crs:LuminanceSmoothing="0"
crs:ColorNoiseReduction="25"
crs:VignetteAmount="0"
crs:ShadowTint="0"
crs:RedHue="0"
crs:RedSaturation="0"
crs:GreenHue="0"
crs:GreenSaturation="0"
crs:BlueHue="0"
crs:BlueSaturation="0"
crs:FillLight="0"
crs:Vibrance="0"
crs:HighlightRecovery="0"
crs:Clarity="+37"
crs:HueAdjustmentRed="0"
crs:HueAdjustmentOrange="0"
crs:HueAdjustmentYellow="0"
crs:HueAdjustmentGreen="0"
crs:HueAdjustmentAqua="0"
crs:HueAdjustmentBlue="0"
crs:HueAdjustmentPurple="0"
crs:HueAdjustmentMagenta="0"
crs:SaturationAdjustmentRed="0"
crs:SaturationAdjustmentOrange="0"
crs:SaturationAdjustmentYellow="0"
crs:SaturationAdjustmentGreen="0"
crs:SaturationAdjustmentAqua="0"
crs:SaturationAdjustmentBlue="0"
crs:SaturationAdjustmentPurple="0"
crs:SaturationAdjustmentMagenta="0"
crs:LuminanceAdjustmentRed="0"
crs:LuminanceAdjustmentOrange="0"
crs:LuminanceAdjustmentYellow="0"
crs:LuminanceAdjustmentGreen="0"
crs:LuminanceAdjustmentAqua="0"
crs:LuminanceAdjustmentBlue="0"
crs:LuminanceAdjustmentPurple="0"
crs:LuminanceAdjustmentMagenta="0"
crs:SplitToningShadowHue="0"
crs:SplitToningShadowSaturation="0"
crs:SplitToningHighlightHue="0"
crs:SplitToningHighlightSaturation="0"
crs:SplitToningBalance="0"
crs
arametricShadows="0"crs
arametricDarks="0"crs
arametricLights="0"crs
arametricHighlights="0"crs
arametricShadowSplit="25"crs
arametricMidtoneSplit="50"crs
arametricHighlightSplit="75"crs:SharpenRadius="+1.0"
crs:SharpenDetail="25"
crs:SharpenEdgeMasking="34"
crs
ostCropVignetteAmount="0"crs:GrainAmount="0"
crs:LensProfileEnable="1"
crs:LensManualDistortionAmount="0"
crs
erspectiveVertical="+21"crs
erspectiveHorizontal="0"crs
erspectiveRotate="0.0"crs
erspectiveScale="100"crs
erspectiveAspect="0"crs
erspectiveUpright="0"crs:AutoLateralCA="1"
crs
efringePurpleAmount="0"crs
efringePurpleHueLo="30"crs
efringePurpleHueHi="70"crs
efringeGreenAmount="0"crs
efringeGreenHueLo="40"crs
efringeGreenHueHi="60"crs:ConvertToGrayscale="False"
crs:ToneCurveName="Medium Contrast"
crs:ToneCurveName2012="Linear"
crs:CameraProfile="Adobe Standard"
crs:CameraProfileDigest="1D2B18E7ADE8EB1F68BC79DAFA30AAF5"
crs:LensProfileSetup="LensDefaults"
crs:LensProfileName="Adobe (Nikon AF-S DX Zoom-Nikkor 18-70mm f/3.5-4.5G IF-ED)"
crs:LensProfileFilename="NIKON D300S (Nikon AF-S DX Zoom-Nikkor 18-70mm f3.5-4.5G IF-ED) - RAW.lcp"
crs:LensProfileDigest="E89291B8905E38EEC9A1EE9C0D691D7E"
crs:LensProfileDistortionScale="100"
crs:LensProfileChromaticAberrationScale="100"
crs:LensProfileVignettingScale="100"
crs:HasSettings="True"
crs:CropTop="0.045989"
crs:CropLeft="0.030579"
crs:CropBottom="0.997573"
crs:CropRight="0.958"
crs:CropAngle="0.682806"
crs:CropConstrainToWarp="0"
crs:HasCrop="True"
crs:AlreadyApplied="False"
crs:RawFileName="2006 01 17Greenbelt_00129.NEF"
dc:format="image/x-nikon-nef"
xmpMM:InstanceID="xmp.iid:be24e52a-c756-6441-bf23-f355ff42e816"
xmpMM
ocumentID="xmp.did:be24e52a-c756-6441-bf23-f355ff42e816"xmpMM:OriginalDocumentID="xmp.did:be24e52a-c756-6441-bf23-f355ff42e816">
<exif:ISOSpeedRatings>
<rdf:Seq>
<rdf:li>200</rdf:li>
</rdf:Seq>
</exif:ISOSpeedRatings>
<exif:Flash
exif:Fired="False"
exif:Return="0"
exif:Mode="0"
exif:Function="False"
exif:RedEyeMode="False"/>
<Iptc4xmpCore:CreatorContactInfo
Iptc4xmpCore:CiAdrPcode="21046-1318"
Iptc4xmpCore:CiAdrCtry="USA"
Iptc4xmpCore:CiEmailWork="[email protected]"
Iptc4xmpCore:CiTelWork="301-576-4200"
Iptc4xmpCore:CiAdrRegion="MD"
Iptc4xmpCore:CiAdrExtadr="10096 Hatbrim Terrace"
Iptc4xmpCore:CiAdrCity="Columbia"/>
<crs:ToneCurve>
<rdf:Seq>
<rdf:li>0, 0</rdf:li>
<rdf:li>32, 22</rdf:li>
<rdf:li>64, 56</rdf:li>
<rdf:li>128, 128</rdf:li>
<rdf:li>192, 196</rdf:li>
<rdf:li>255, 255</rdf:li>
</rdf:Seq>
</crs:ToneCurve>
<crs:ToneCurveRed>
<rdf:Seq>
<rdf:li>0, 0</rdf:li>
<rdf:li>255, 255</rdf:li>
</rdf:Seq>
</crs:ToneCurveRed>
<crs:ToneCurveGreen>
<rdf:Seq>
<rdf:li>0, 0</rdf:li>
<rdf:li>255, 255</rdf:li>
</rdf:Seq>
</crs:ToneCurveGreen>
<crs:ToneCurveBlue>
<rdf:Seq>
<rdf:li>0, 0</rdf:li>
<rdf:li>255, 255</rdf:li>
</rdf:Seq>
</crs:ToneCurveBlue>
<crs:ToneCurvePV2012>
<rdf:Seq>
<rdf:li>0, 0</rdf:li>
<rdf:li>255, 255</rdf:li>
</rdf:Seq>
</crs:ToneCurvePV2012>
<crs:ToneCurvePV2012Red>
<rdf:Seq>
<rdf:li>0, 0</rdf:li>
<rdf:li>255, 255</rdf:li>
</rdf:Seq>
</crs:ToneCurvePV2012Red>
<crs:ToneCurvePV2012Green>
<rdf:Seq>
<rdf:li>0, 0</rdf:li>
<rdf:li>255, 255</rdf:li>
</rdf:Seq>
</crs:ToneCurvePV2012Green>
<crs:ToneCurvePV2012Blue>
<rdf:Seq>
<rdf:li>0, 0</rdf:li>
<rdf:li>255, 255</rdf:li>
</rdf:Seq>
</crs:ToneCurvePV2012Blue>
<xmpRights:UsageTerms>
<rdf:Alt>
<rdf:li xml:lang="x-default">typical fair use</rdf:li>
</rdf:Alt>
</xmpRights:UsageTerms>
<dc:creator>
<rdf:Seq>
<rdf:li>Lewis Lorton</rdf:li>
</rdf:Seq>
</dc:creator>
<dc:rights>
<rdf:Alt>
<rdf:li xml:lang="x-default">Lewis Lorton</rdf:li>
</rdf:Alt>
</dc:rights>
<dc:subject>
<rdf:Bag>
<rdf:li>1dd- things</rdf:li>
<rdf:li>1ff-TypeofPicture</rdf:li>
<rdf:li>Structure</rdf:li>
<rdf:li>graffiti</rdf:li>
<rdf:li>graphic</rdf:li>
<rdf:li>machinery</rdf:li>
<rdf:li>mineral</rdf:li>
<rdf:li>wall</rdf:li>
</rdf:Bag>
</dc:subject>
<crss:SavedSettings>
<rdf:Bag>
<rdf:li>
<rdf
escriptioncrss:Name="Import"
crss:Type="Snapshot">
<crss
arameters><rdf
escriptioncrs:Version="8.7"
crs
rocessVersion="5.0"crs:WhiteBalance="As Shot"
crs:AutoWhiteVersion="134348800"
crs:AutoExposure="False"
crs:Exposure="0.00"
crs:AutoShadows="False"
crs:Shadows="5"
crs:AutoBrightness="False"
crs:Brightness="+50"
crs:AutoContrast="False"
crs:Contrast="+25"
crs:Saturation="0"
crs:Sharpness="25"
crs:LuminanceSmoothing="0"
crs:ColorNoiseReduction="25"
crs:ChromaticAberrationR="0"
crs:ChromaticAberrationB="0"
crs:VignetteAmount="0"
crs:VignetteMidpoint="50"
crs:ShadowTint="0"
crs:RedHue="0"
crs:RedSaturation="0"
crs:GreenHue="0"
crs:GreenSaturation="0"
crs:BlueHue="0"
crs:BlueSaturation="0"
crs:FillLight="0"
crs:Vibrance="0"
crs:HighlightRecovery="0"
crs:Clarity="0"
crs
efringe="0"crs:GrayMixerRed="0"
crs:GrayMixerOrange="0"
crs:GrayMixerYellow="0"
crs:GrayMixerGreen="0"
crs:GrayMixerAqua="0"
crs:GrayMixerBlue="0"
crs:GrayMixerPurple="0"
crs:GrayMixerMagenta="0"
crs:HueAdjustmentRed="0"
crs:HueAdjustmentOrange="0"
crs:HueAdjustmentYellow="0"
crs:HueAdjustmentGreen="0"
crs:HueAdjustmentAqua="0"
crs:HueAdjustmentBlue="0"
crs:HueAdjustmentPurple="0"
crs:HueAdjustmentMagenta="0"
crs:SaturationAdjustmentRed="0"
crs:SaturationAdjustmentOrange="0"
crs:SaturationAdjustmentYellow="0"
crs:SaturationAdjustmentGreen="0"
crs:SaturationAdjustmentAqua="0"
crs:SaturationAdjustmentBlue="0"
crs:SaturationAdjustmentPurple="0"
crs:SaturationAdjustmentMagenta="0"
crs:LuminanceAdjustmentRed="0"
crs:LuminanceAdjustmentOrange="0"
crs:LuminanceAdjustmentYellow="0"
crs:LuminanceAdjustmentGreen="0"
crs:LuminanceAdjustmentAqua="0"
crs:LuminanceAdjustmentBlue="0"
crs:LuminanceAdjustmentPurple="0"
crs:LuminanceAdjustmentMagenta="0"
crs:SplitToningShadowHue="0"
crs:SplitToningShadowSaturation="0"
crs:SplitToningHighlightHue="0"
crs:SplitToningHighlightSaturation="0"
crs:SplitToningBalance="0"
crs
arametricShadows="0"crs
arametricDarks="0"crs
arametricLights="0"crs
arametricHighlights="0"crs
arametricShadowSplit="25"crs
arametricMidtoneSplit="50"crs
arametricHighlightSplit="75"crs:SharpenRadius="+1.0"
crs:SharpenDetail="25"
crs:SharpenEdgeMasking="0"
crs
ostCropVignetteAmount="0"crs
ostCropVignetteMidpoint="50"crs
ostCropVignetteFeather="50"crs
ostCropVignetteRoundness="0"crs
ostCropVignetteStyle="1"crs
ostCropVignetteHighlightContrast="0"crs:GrainAmount="0"
crs:GrainSize="50"
crs:GrainFrequency="50"
crs:LuminanceNoiseReductionDetail="50"
crs:ColorNoiseReductionDetail="50"
crs:LuminanceNoiseReductionContrast="50"
crs:ColorNoiseReductionSmoothness="50"
crs:LensProfileEnable="0"
crs:LensManualDistortionAmount="0"
crs
erspectiveVertical="0"crs
erspectiveHorizontal="0"crs
erspectiveRotate="0.0"crs
erspectiveScale="100"crs
erspectiveAspect="0"crs
erspectiveUpright="0"crs:AutoLateralCA="0"
crs:Exposure2012="0.00"
crs:Contrast2012="0"
crs:Highlights2012="0"
crs:Shadows2012="0"
crs:Whites2012="0"
crs:Blacks2012="0"
crs:Clarity2012="0"
crs
efringePurpleAmount="0"crs
efringePurpleHueLo="30"crs
efringePurpleHueHi="70"crs
efringeGreenAmount="0"crs
efringeGreenHueLo="40"crs
efringeGreenHueHi="60"crs:ConvertToGrayscale="False"
crs:AutoGrayscaleMix="False"
crs:AutoTone="False"
crs:EnableToneCurve="True"
crs:EnableSplitToning="True"
crs:EnableGrayscaleMix="True"
crs:EnableColorAdjustments="True"
crs:EnableDetail="True"
crs:EnableLensCorrections="True"
crs:EnableEffects="True"
crs:EnableCalibration="True"
crs:EnableRetouch="True"
crs:EnableRedEye="True"
crs:EnablePaintBasedCorrections="True"
crs:EnableGradientBasedCorrections="True"
crs:EnableCircularGradientBasedCorrections="True"
crs:ToneCurveName="Medium Contrast"
crs:ToneCurveName2012="Linear"
crs:CameraProfile="Adobe Standard"
crs:CameraProfileDigest="1D2B18E7ADE8EB1F68BC79DAFA30AAF5"
crs:LensProfileSetup="LensDefaults">
<crs:ToneCurve>
<rdf:Seq>
<rdf:li>0, 0</rdf:li>
<rdf:li>32, 22</rdf:li>
<rdf:li>64, 56</rdf:li>
<rdf:li>128, 128</rdf:li>
<rdf:li>192, 196</rdf:li>
<rdf:li>255, 255</rdf:li>
</rdf:Seq>
</crs:ToneCurve>
<crs:ToneCurveRed>
<rdf:Seq>
<rdf:li>0, 0</rdf:li>
<rdf:li>255, 255</rdf:li>
</rdf:Seq>
</crs:ToneCurveRed>
<crs:ToneCurveGreen>
<rdf:Seq>
<rdf:li>0, 0</rdf:li>
<rdf:li>255, 255</rdf:li>
</rdf:Seq>
</crs:ToneCurveGreen>
<crs:ToneCurveBlue>
<rdf:Seq>
<rdf:li>0, 0</rdf:li>
<rdf:li>255, 255</rdf:li>
</rdf:Seq>
</crs:ToneCurveBlue>
<crs:ToneCurvePV2012>
<rdf:Seq>
<rdf:li>0, 0</rdf:li>
<rdf:li>255, 255</rdf:li>
</rdf:Seq>
</crs:ToneCurvePV2012>
<crs:ToneCurvePV2012Red>
<rdf:Seq>
<rdf:li>0, 0</rdf:li>
<rdf:li>255, 255</rdf:li>
</rdf:Seq>
</crs:ToneCurvePV2012Red>
<crs:ToneCurvePV2012Green>
<rdf:Seq>
<rdf:li>0, 0</rdf:li>
<rdf:li>255, 255</rdf:li>
</rdf:Seq>
</crs:ToneCurvePV2012Green>
<crs:ToneCurvePV2012Blue>
<rdf:Seq>
<rdf:li>0, 0</rdf:li>
<rdf:li>255, 255</rdf:li>
</rdf:Seq>
</crs:ToneCurvePV2012Blue>
</rdf
escription></crss
arameters></rdf
escription></rdf:li>
</rdf:Bag>
</crss:SavedSettings>
<lr:hierarchicalSubject>
<rdf:Bag>
<rdf:li>1dd- things|Structure|wall</rdf:li>
<rdf:li>1dd- things|graffiti</rdf:li>
<rdf:li>1dd- things|mineral|machinery</rdf:li>
<rdf:li>1ff-TypeofPicture|graphic</rdf:li>
</rdf:Bag>
</lr:hierarchicalSubject>
<xmpMM:History>
<rdf:Seq>
<rdf:li
stEvt:action="saved"
stEvt:instanceID="xmp.iid:be24e52a-c756-6441-bf23-f355ff42e816"
stEvt:when="2015-01-22T10:09:36-05:00"
stEvt:softwareAgent="Adobe Photoshop Lightroom 5.7 (Windows)"
stEvt:changed="/metadata"/>
</rdf:Seq>
</xmpMM:History>
</rdf
escription></rdf:RDF>
</x:xmpmeta>


![[No title]](/data/xfmg/thumbnail/37/37610-09a3b763265223288ccc8f30a63a666b.jpg?1619738149)
![[No title]](/data/xfmg/thumbnail/37/37614-3833b9d2e46075829c91cf9c0f47af69.jpg?1619738150)

![[No title]](/data/xfmg/thumbnail/37/37611-325cc048f59de7016225f9d516b910ee.jpg?1619738149)