What's with long exposures??

bbaker35

TPF Noob!
Joined
Sep 30, 2005
Messages
126
Reaction score
0
Location
U.S.A.
Can others edit my Photos
Photos OK to edit
I have seen many people talking about taking shots of stars and such with long exposures...

I'm really new to photography, so I have no idea what anyone is talking about... Will someone help me?

1) What is a long exposure?

2) What effect does it create?

3) Does anyone have a picture so I can see how it's supposed to look?

4) What else can you shoot long exposures of except stars?

5) What purpose does it serve?

5) How do I do it with my 350D?

Sorry for all the questions, but I'm sooo freakin new to photography.
 
A long exposure means using a slow shutter speed. This will keep the camera shutter open for longer and let more light onto the film/sensor.
As light levels decrease (gets darker) you need to let more light into the camera to record an image.
You can compensate in several ways. Using a higher ISO means that the film/sensor is more sensitive to light. Using a wider aperture (smaller f-number) or slower shutter speed to let more light in.
Long exposures means that moving objects will be blurred.
Working out the best combination of these for a given situation is one of the skills of photography.
Check out the Glossary at the top of the forum.
 
1) What is a long exposure?

Most photographs are taken with a shutter speed of 1/30th of a second or faster. A long exposure is just setting the shutter speed slower than normal for the subject matter (and "normal" will be different from person to person).

2) What effect does it create?

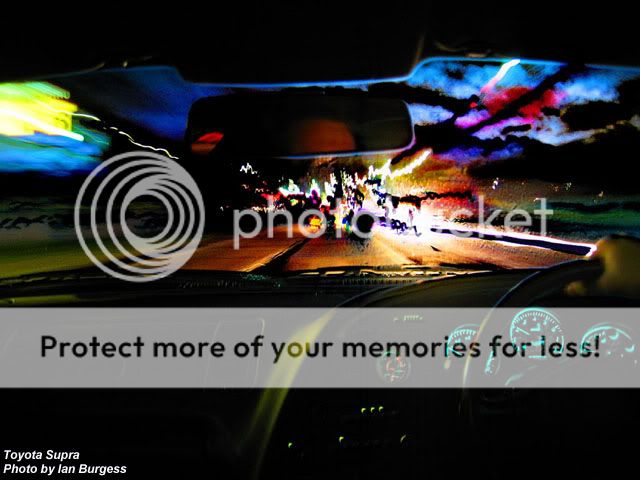
Slow shutter speeds capture time. If your subject doesn't move during the exposure, it may look just like if you had used a fast shutter speed. But if your subject moves during the exposure the movement shows up as a blur, streaks, etc... in the photo. Movement at the camera end is also recorded.

3) Does anyone have a picture so I can see how it's supposed to look?

Take your 350D and set it to Tv, and set the shutter speed to 1 second or longer, and photograph anything moving. You may have to decrease the ISO to 100 if you are trying this outdoors in the daytime.

4) What else can you shoot long exposures of except stars?
5) What purpose does it serve?

Moving water is popular to shoot with a slow shutter. It gives it that creamy look. You can shoot anything you want with a long exposure. It's just a different look. Imagine the difference between a photo of a running horse where the horse is frozen (with a very fast shutter speed) in the air in mid-gallop with all the details sharp, and a photo of the same running horse where the horse is blurred with movement. Neither is right, it's just personal preference, or what look your are trying to achieve.

You can pan the camera with a moving object as it goes past. This will allow portions of the subject to remain somewhat sharp, while the background is motion blurred.

You can combine flash with slow shutter to get your moving subject frozen (by the flash) along with motion blur.


6) How do I do it with my 350D?

Use the camera in manual or Tv (shutter priority) exposure modes, and select a long shutter speed. If you want non-moving objects to be sharp you'll need a tripod and a cable release.

For exposure times longer than 30 sec (or whatever the max shutter speed on the 350D is) you'll set the shutter to "bulb". On bulb the shutter will stay open as long as you hold down the shutter release button (preferably on a cable release). Some cable releases have button locks for really long exposures so you don't have to stand there. Canon has a really fancy cable release for the EOS cameras with timers, alarms, intervalometers, and all sorts of gizmos.
 
Thanks guys for the response...I had an idea about what it was and I was just about right. So thats how they do the water...lol


Anyone have a good picture of a star with a long exposure??
 
Heres an image from Scott Pommier of a long shutter.

ScottPommier1.jpg
 
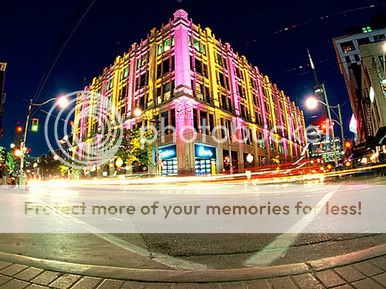
You can also use long exposure to remove stuff from the scene in the photo. For instance if you are trying to photograph a building, but don't want all the people walking by use a long exposure (several seconds), and as long as no one stands still they will not be in the photo.

In the photo above you know the cars were there because of the lights, but the cars themselves really didn't show up. They didn't stay still long enough to expose significantly.
 
Wow...Great Example. I really appreciate it.
 
During long exposures you can even enter the scene and mess with stuff. As long as you are dressed in dark clothing, and keep moving you won't show up (depending on the lighting).
 
I love long exposure. You got a great camera so go and practice and show us what you can do..
 
Yeah..I have a couple great opportunities for photoshoots tomorrow...

1) My cousin's wife had a baby about a week ago and they want me to come take some shots

2) I'm going to our lake house tomorrow. I'm thinking about a long exposure of a boat or skier??!!

3) I'm going to MONDAY NIGHT FOOTBALL tomorrow night to see The Panthers and Packers (GO PANTHERS!)

I will do my best (which isn't that good yet) and see what I come up With
 
Photographing star trails is not as easy as you might think, well technically it's pretty easy but in practice it isn't. First of all you will have to be far away from any light pollution, so taking these shots in or around a city is right out of the question. So you're going to have to be out in the country, preferably in the middle of nowhere, and then you're going to have to be there a few hours. I've taken all of my star trail shots when I've been camping. I set up the camera for the shot, start the exposure, and set the alarm clock and go to sleep for a few hours.

Now for the easy part, well relatively easy. This is the equipment that you will need to photograph star trails:

  1. Tripod
  2. Camera with bulb setting
  3. Locking cable release (mechanical or electronic)
  4. Small battery powered fan and holder
  5. Wide angle lens
  6. Flashlight to see what you're doing when you're setting up the camera and also that you don't trip over a log on your way back to your campsite.
Decide on a composition, now since you want to get long arcs of light you will need to include the North Star in it. You might want to include some foreground objects, such as trees, mountains/hills, or the horizon line of a lake. These provide a base or reference point for the image.

To find the North Star you have to begin by finding the Big Dipper, once you've found it find the two stars that form the outer lip (the side farthest from the handle) of the dipper. Now mentally extend the line through those two stars starting from the outer bottom star to the outer top star of the Big Dipper's bucket. Extend this line about five times the distance between the two stars of the Big Dipper. You will find the North Star along this line; it's the first prominent star that you'll see. The North Star also forms part of the Little Dipper's handle.

The stars appear to rotate around the North Star, in reality it's caused by the rotation of the Earth. It's easy to see why early man thought that the universe rotated around the Earth. The farther your image is away from the north star, the straighter the star trails will look.

A problem that I've frequently encountered while photographing star trails, is that while my camera is outside at night condensation forms all over it, including the front of the lens. A solution to this problem is to keep the air moving in front of the lens. That's what the small battery powered fan is for. Set it up so that it is physically just outside of the field of view, you can shine the flashlight on it. Look through the viewfinder, if you can't see it, it won't be in your image.

I use either 50 or 100 ISO speed film; you don't really need fast film for these shots. Set the aperture on your lens as far open as possible (f2.8, f3.5). Open the shutter on the bulb setting of your camera with a locking cable release with either a mechanical or electronic release. For the exposure time, the longer the better! The longer you leave the shutter open, the longer the star trails will be. I've found that somewhere between 4 to 6 hours is optimum
 
stressrelief said:
A problem that I've frequently encountered while photographing star trails, is that while my camera is outside at night condensation forms all over it, including the front of the lens. A solution to this problem is to keep the air moving in front of the lens. That's what the small battery powered fan is for.

Wow! Fantastic tip.
 

Most reactions

Back
Top