b&w w/ color

centrerugger

TPF Noob!
Joined
Jun 27, 2004
Messages
15
Reaction score
0
Location
zville, indiana
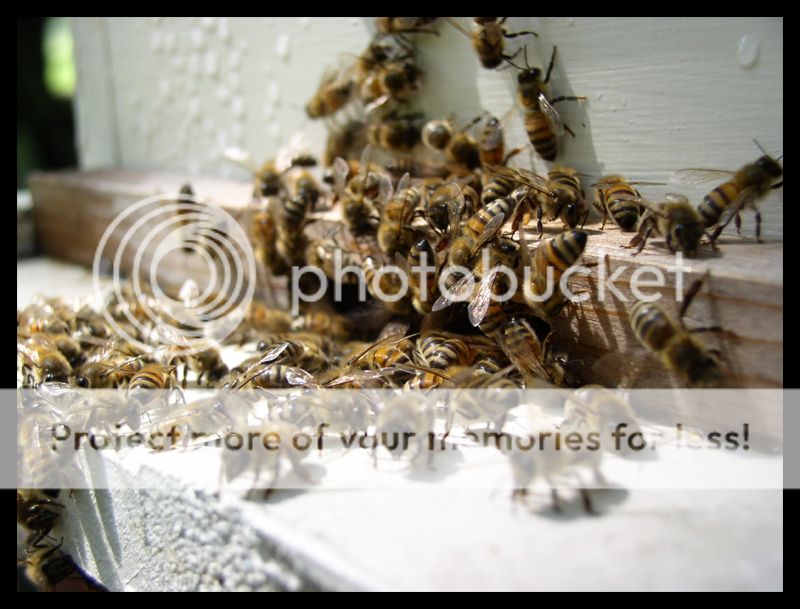
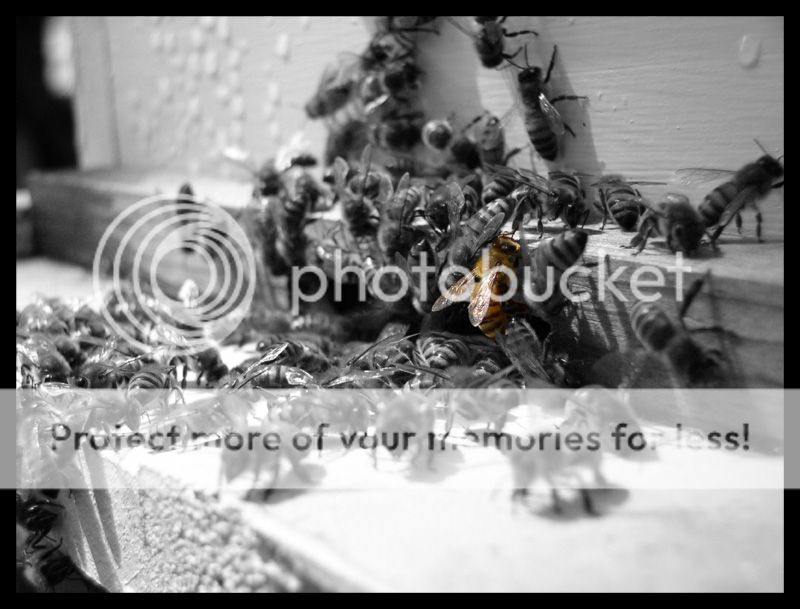
unless i missed the post that says this-how do you do the thing where you take a black and white photo and make only one part of it color- like the picture of the kids and just their hats are in color. thanks in advance
 
probably has to be done in photoshop... (i feel stupid cuz i'm not sure if you can do it in the darkroom somehow)
in photoshop, you would just duplicate the layer, mask off the area you want to be colorful (in the top layer), and then desaturate the bottom layer.
there's more ways to do it, but that's the simplest one that comes to mind

plz tell me if that's too jargon-y
 
If you use photoshop you can convert the image to black and white then use the history brush in the areas you want. There are many other methods of doing this but I think that is the best.

I've heard you can use oil paits or something on your prints.
 
There are photo oils specifiacally made to use on b&w prints.

The answer to how you do it digitally depends on whether you're starting with a color picture or b&w.

If you're starting with a color photo, I prefer a technique that uses masking. If you're using a mask, it's easier to undo a mistake without undoing the whole thing.

The way I do it is to open the image. Then:
1. In the Layers palette, click on the "Create New Fill or Adjustment Layer." Select the Channel Mixer.

2.Click the "Monochrome" check box at the bottom of the pop-up window and then adjust the Red, Green, and Blue sliders until you get the tone of the image the way you wnt it. I have found that using mostly the Green channel (70-80%) with 10-20% of Red and Blue works best.

3. You'll notice that the Channel Mixer layer you just made has a mask already applied to it. That's the blank white box to the right of the layer thumbnail. Click on this mask. Your foreground/background colors should now be black and white. Choose the paintbrush tool, and paint the areas you want to be in color.

4. If you paint too much, just switch to the eraser and erase the color from the parts you want to be b&w.

If you're starting from a b&w photo, the process is more involved. I outlined the method I use here.
 
take your color image, create a channel mixer layer....press the option for "monochrome", then take your brush with the color black, and paint what you want to be color.!!!! easy!!


md
 
Wrote this for a different website.

Reviewing images for the Critque Club for this challenge, I've realized a few things.

Choosing a photo:
For starters, the photo you choose is very important. Having a chaotic shot works very well. Having a relatively calm shot does not. Let me explain.

When you desaturate all but a small portion of a photo, the part left in color becomes the foreground. Everything else becomes the background. This means leaving the background in color, and the foreground black and white, the background becomes the foreground. It's where your eye goes to first. Keeping this in mind when choosing a shot will help you leaps and bounds.

A bland background desaturated:


As you can see there is virtually no impact on the photo. There's barely any change, especially none that would draw your interest to an area of the photo where you wouldn't normally think.

Compare that to using a chaotic picture, where you see the colored object(s) as the foreground right off the bat. Only after which your eye allows you to look at the rest of the picture.

A chaotic photo selectively desaturated:


There are better examples obviously but these at least demonstrate my point.

Choosing what to desaturate:
Since your creating a new foreground in essence, you only want that foreground in color. If you keep other parts that you don't consider part of the new foreground in color, you're only detracting from the impact the selective desaturation provides.

You've learned that distractions are best cropped out of your photos, so why would you put a spot light on parts of the photo you don't want highlighted?

Highlighting extra information:


And really that's the whole gist of it. I have a bright spotlight to shine on my photo. What do I want to highlight, and what do I want to mute.

Choosing the right photo, and the right thing(s) to highlight are essential to a good selective desaturation. The rest is just your photoshop skills. ;)
 
fadingaway1986 said:
I am starting with colour photo. it just isnt letting me paint the colour back on. So its turning to B&W. But wont let me put colour back.

Are you using Photoshop? This happens to me when I use Paint Shop Pro. You need to 'greyscale' OR 'desaturate' and then increase the number of colors back up to 16 million. Then you can add whatever color you want.

What I do in Paint Shop Pro is to select what I want to be in color. Copy it. Greyscale. Increase colors back to 16m. Then 'paste into selection'.

Works like a charm.
 
as for digital pics on the pc, i do this, its so easy...
start with color photo in rgb mode in PS, then change to b/w, then change mode back to RGB, then use the history brush where u want it color again
 
In PhotoShop CS (also PS 7) it works like this.
You can also use the “lasso” tool or if your subject is nice enough you can use the “magic wand” tool. Once you get your subject selected you can use the menu “select” “select inverse”. After that you go to menu "Image" select "adjustments", "desaturate". Or hit “Shift+Ctrl+U”

you start with this

beez01.jpg


And end up with this

beez-spotcolor.jpg


Hope this helps
If you have any questions you can always e-mail me!
 

Most reactions

Back
Top