Basic Retouching Step by Step

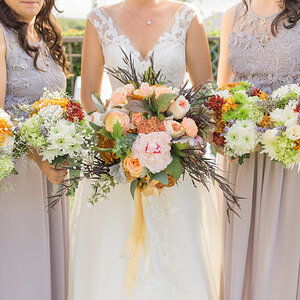
I will be a part of a book coming out this fall called, "Spectacular Weddings" by Signature Publishing. (I've got 8 weddings in there).

2.gif
How wonderful (and well deserved!) is that??!! I agree with previous comments, that you're an inspiration. You came so far so fast, it makes one's head spin.
 
thanks...this was a fantastic step by step...i need help with fixing up skin as you do...right now I only do blemishes and razor burn, but only the most noticeable ones! thanks!!!
 
Thanks you Emogirl. Check out my Angela-Glam thread to see just how far you can take it. It's crazy, but it's a lifesaver as you will see.
Many Hugs,
Cindy
 
Hi Cindy,
I was wondering if you could go into more detail about the final step. I saw that you posted on my thread about using the vivid light, and I did make a new layer and just used to pull down menu to put the vivid light over everything. And then I lowered the opacity until it didn't look too weird. I like the effect (I'll post it to my thread) but in this tutorial you are talking about using the burn tool with the vivid light and I'm confused:confused:
 
Hi April,
I'm not sure how to "print screen". Do you know how (or somebody?) I think I would need that to show people where it is and how to work it.
 
Also, if you look back at Angela Glam, Vivid light is used in all three examples. Particularly in the first.
 
Hmm...I'm still using Elements (Can't wait to upgrade to a real version of PS though!) so I'm not sure about the "print screen" option. Maybe someone will read over this and know how to do it?

On a side note, I think I figured out a way to make it work for me, but I am still curious on how you go about doing it
 
Print screen...it should be the key (on your key board) above the insert key...or somewhere over there. Basically that takes a snapshot of your screen and puts it into the clip board. Just open a blank canvas and paste...there you go.
 
Print screen...it should be the key (on your key board) above the insert key...or somewhere over there. Basically that takes a snapshot of your screen and puts it into the clip board. Just open a blank canvas and paste...there you go.


Assuming she uses a PC :p

On a Mac press shift + open apple + 3 at the same time. The screen shot will be automatically saved on your hard drive as picture 1. :)
 
I think it has reached the point were photographs have to be retouched to be of a professional standard now days as results can not be reached without it
 
Assuming she uses a PC :p

On a Mac press shift + open apple + 3 at the same time. The screen shot will be automatically saved on your hard drive as picture 1. :)

Shift-command(open apple)-4 :)
 
I think it has reached the point were photographs have to be retouched to be of a professional standard now days as results can not be reached without it

I agree with you, but there are some times when the shot comes out just right. But most of the time, retouching is used/required
 
Even when a shot is exposed perfectly there is something that can improve on it. Even just a basic unsharp mask or a burn and dodge.
 

Most reactions

New Topics

Back
Top