Black photo in manual when using Sunny 16.

Adikt_072

TPF Noob!
Joined
Jun 30, 2013
Messages
6
Reaction score
1
Location
Brisbane
Can others edit my Photos
Photos NOT OK to edit
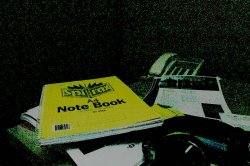
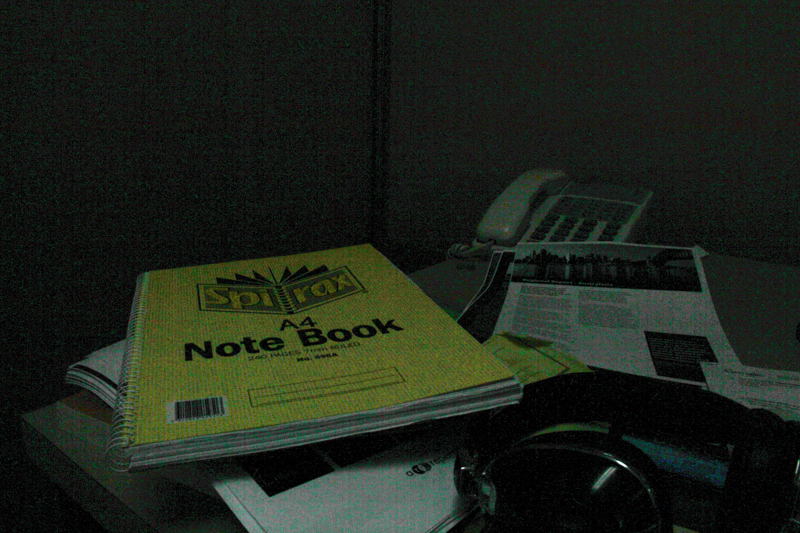
I am quite new to photography and I was doing some lessons/challenges. I am trying to move onto manual shooting. I started with Sunny 16 which is meant to be a basic exposure. However I get a black screen. As my camera focuses everything is looking ok, then as soon as it focuses bam, black. The exposure reads at -3 so that is obviously not good as it is meant to be 0 I believe.

1/125
F16
ISO 100
Flash exposure 0
image effect Auto and tried Neutral
White balance Daylight (5200k)
Auto correct image brightness off
metering mode (tried all centre weight average, spot metering evaluative)

Cannon 600D
EFS 18-200mm

$IMG_1270.JPG
 
The EXIF data does confirm that you really did use those settings:


  • Exposure Time (1 / Shutter Speed) = 1/125 second ===> 0.008 second
  • Lens F-Number / F-Stop = 16/1 ===> ƒ/16
  • Exposure Program = manual control (1)
  • ISO Speed Ratings = 100

Were you, in fact, taking a photo of a subject outdoors in noon-day sunlight -- full sun?

Did you remove the lens cap?

The sunny-16 rule works extremely well. The sun is very consistent. The rule has nuances for light, moderate, and heavy overcast conditions (or light/moderate/heavy shade conditions). Early morning or late evening sun will be different than mid-day sun. But this image is completely black -- even if it had been a heavily overcast day, you'd see a very under-exposed result but it wouldn't be completely black. Hence... my question about whether the lens cap was removed.
 
Yeah well it isn't a perfectly sunny day, I mean it is a little overcast but surely it wouldn't be entirely black.

Yeah I don't own a lens cap so that is impossible, it fell off a year ago in Vietnam into the ocean, also I am not a bumbling idiot (despite losing my lens cap, I swear it was my brothers fault) but I am sure you get many on here so I won't take offense to it. I tried many different settings and it works perfect when I use other modes. The photos are fine in Auto/landscape etc so not a lens issue.

That sucks, I really thought this would be some common mistake and I would feel silly for not adjusting the whatever setting I will play around with it some more after work and see if I can fix the issue.

Do you know by any chance how to reset it to default that may help me.

Thanks a lot for the help,

I truly wish it was a lens cap issue.
 
Yeah but surely not fully black, I mean I live in northern Australia and it is not dark in the middle of the day here.
 
also I am not a bumbling idiot (despite losing my lens cap, I swear it was my brothers fault)

Well, you did try using Sunny 16 indoors... I don't mean to be snarky, but seriously - the room is mostly shaded by the walls and roof.
 
I fixed it I changed the white balance (increased) and the auto correct image brightness and I can see a feint outline now of the building.

Thanks everyone I still have not mastered manual photography (obviously). I was under the impression that sunny 16 would give you an exposure of 0 I didn't think that a bit of clouds could effect it so much. Tomorrow is meant to be sunny so hopefully I can test it out again.

That brings up a question though. Why does artificial light not work, I tried it in my office before going down stairs. Does the type of light matter?
 
ANYWAY - spot meter off the wall and increase exposure to +1.6-2.0, provided they are painted white.

The meter is calibrated to middle grey, one important thing to realize is that zero does not mean "correct exposure" it means "similar value as calibrated". By increasing exposure to one and two thirds above how the meter was calibrated you're basically using the walls as a reference for everything else. It doesn't matter what that reference is, so long as the exposure is compensated to represent how much more or less light than the standard calibrated value is allowed to accumulate onto the sensor.

It sounds SUPER complicated, but give it a try. Expose the walls dialed in at "zero" and again at +1.6. Notice how the walls appear grey and everything darker than the walls (i.e. most of the room) will appear far too dark. At +1.6, things will look more like how they should.

That brings up a question though. Why does artificial light not work, I tried it in my office before going down stairs. Does the type of light matter?

Artificial light is far more dim than sunlight. We don't notice it because our eyes compensate for this both in terms of iris (f-ratio) and through "post processing" in the brain.
 
I tried both and neither worked... I didn't know that artificial light was so bad. I mean my office is bright as.
 
Great thanks very much. I will try this.
 
I tried both and neither worked... I didn't know that artificial light was so bad. I mean my office is bright as.

This is just a testament to how sensitive our eyes are. But without any compensation, even our eyes wouldn't work well. Have you ever had your eyes dilated at the eye doctor? Not only does it hurt, but also appears way over saturated. This is because the signal presented is far higher than what can be compensated for by the brain. In a sense, it clips in the same way, though more elegantly than a DSLR might.
 
After I switched to digital, I quickly gave up trying to 'come up with' a list of settings like: "If it's bright and sunny, then...","If it's not so bright, then...", etc. Instead, I take a 'lazy mans' approach and let the camera tell me what IT wants to do. I take a 'sample' picture with whatever settings happen to be in the camera and look at the results in the LCD. Too dark? Slow down the shutter/use a wider aperture (lower f-stop number)/use faster ISO...or any combination of them. Take another test shot. Repeat as needed. Too bright? Faster shutter/smaller aperture/slower ISO...you get the idea. Using the histogram of the photograph is also very usefull to determine if the highlights are 'blown out' (overexposed) or the darks have no detail (underexposed).

It all comes down to understanding the exposure triangle and the effects of changing each of the settings. Wider apertures produce smaller depth of field, smaller apertures, bigger DOF. Too slow a shutter speed will result in blurring due to subject and/or camera movement. Too high an ISO will result in unaccepatable noise in the picture. Rather than thinking about specific setting combinations, I simply think in terms of 'more or less of this, more or less of that, and perhaps a little more or less of the other thing'. Depending on what general results I hope to get, "this", "that", and "the other thing" are the three parts of the exposure triangle..."This" may be f-stop for one shot, but ISO on another, "That" may shutter speed on one shot, or f-stop on another, etc.

The 'trick' of the exposure triangle is finding the right COMPROMISE between the settings to achieve the desired result. Opening up the aperture on a 'fast' lens to f2.0 to get a thin DOF for example, will immediately over-expose the photograph unless I compensate by using a faster shutter speed and/or slower ISO speed. While many photographers think in terms of 'stops' (eg, increasing the aperture 2 full f-stops requires 2 stops faster shutter speed to get same exposure), I simply think 'smaller', or 'larger', or 'slower', or 'faster'. The clicks on the adjustment wheels help, but I look at the LCD after I take the shot, and if I need, adjust again and take another shot. This method saves this old-guy from having to remember ANYTHING about specific exposure requirements...I simply shoot, look at the LCD, and make an informed decision of what to adjust 'somewhat' to get the correct exposure.
 
As my camera focuses everything is looking ok, then as soon as it focuses bam, black.

HMMM. this part of your explanation puzzles me. Can you explain this more? when it focuses, or when you press the shutter. If it's focus, as you say, then that may be where the problem lies.

Metering choices have no effect in this instance.
 
Your image isn't black, it's just grossly underexposed. Probably close to 5 stops underexposed. I had to max out the curves just to get this much out of it.

img_1270.jpg


The Sunny 16 rule ONLY applies in direct sunlight. It has NOTHING to do with indoor shooting and will not give a proper exposure, as your shot shows.

After I switched to digital, I quickly gave up trying to 'come up with' a list of settings like: "If it's bright and sunny, then...","If it's not so bright, then...", etc. Instead, I take a 'lazy mans' approach and let the camera tell me what IT wants to do. I take a 'sample' picture with whatever settings happen to be in the camera and look at the results in the LCD. Too dark? Slow down the shutter/use a wider aperture (lower f-stop number)/use faster ISO...or any combination of them. Take another test shot. Repeat as needed. Too bright? Faster shutter/smaller aperture/slower ISO...you get the idea. Using the histogram of the photograph is also very usefull to determine if the highlights are 'blown out' (overexposed) or the darks have no detail (underexposed).

I agree in principal but disagree in application. I shot in manual for years because that's all I had. I also use the lazzy approach these days and use the metering system in my camera. Rather than taking a test shot I would recommend that you learn how to anticipate what situations are going to cause the metering system to read wrong. Take care with scenes having a high percentages of tones that will radically change the exposure, such as a bright blue sky in the background or a big block of black shadow. Learn to compensate for things such before the shot as opposed to after the shot. Sometimes you will only get one.
 

Most reactions

Back
Top