AMcNeice
TPF Noob!
- Joined
- Apr 22, 2004
- Messages
- 36
- Reaction score
- 0
- Location
- South Kackalacky
- Website
- www.drivingsong.com
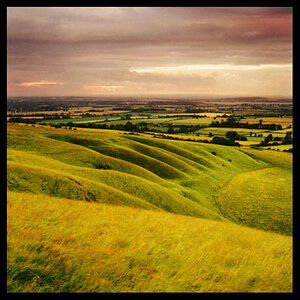
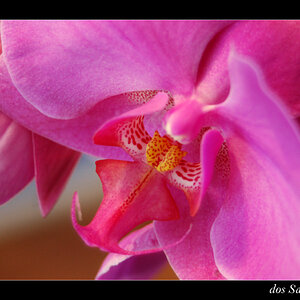
I've had a couple of people on ask me how I put the border this photo:

Since I typed it up for them I figured I'd go ahead and share it with ya'll. This works in photoshop 6-8. I'm pretty sure it'll work in almost all versions the functions just might be located in different places.
Steps:
1) Open finished processed photo in PS
2) Size photohow you want it
3) Duplicate the layer
3.5) Over in the tools menu, make black the background color and white the foreground color.
4) Click on the bottom layer
5) Open the adjust canvas size (image > canvas size) window, switch the box that says inches to percent.
6) The values are arbitrary but if you want to get uber technical and have it appear all nice with the same width border on all sides you need to do some math.
For the longside do : 100 + x
For the shortside percentage do : 100 + (longside/shortside * x)
x is however far you want to go out on the long side of your photo. I've found that 10% is not only easy to work with but looks good.
Now the hardparts over, continue on:
7) Select the top layer
8 ) Write click in the layers window and select blending options menu. This is also avaible via layer > layer style > blending options
9) Click the checkbox next to outerglow
10) This is the settings I have (in order top to bottom)
Blend Mode : Normal
Opacity: 95% (I mess with this to get the one that looks the best with the photo)
Noise: 0
I've got the box on the left selected with white as the color
Technique: Precise
Spread: 25
Size: 2
Contor: Select the option that looks like a hill
Range: 100
Jitter: 0
11) Add text, etc (if you want to add the copyright symbol do alt-0169)
Thats about all I did. It's actually rather quick once you get used to doing the method.
![[No title]](/data/xfmg/thumbnail/32/32805-61ca9a4fb87d37c0ef4f991ac1705e1f.jpg?1619735667)

![[No title]](/data/xfmg/thumbnail/42/42327-560f11a37bb209e9091c0fc9e1028cdc.jpg?1619740128)
![[No title]](/data/xfmg/thumbnail/31/31751-fb2f68cca32f9eec468dbde7d649840f.jpg?1619734990)