Can we discuss a 3 way lighting setup?

You won't make me feel bad at all, as i said a million options on 3 lights and i googled.

Yeah, well, I like you man, and we;'ve been talking about stuff off and on, and I figured it was a Google search link.

I want to summarize two points. First off, when there is no nose shadow on a face, the lighting is FLAT. So, his first setup, the one with the photo, the one that he calls Main and Fill lights is WRONG. He has created flat,virtually shadowless lighting by using TWO LIGHTS that act together as basically one, large light source. He is cross-lighting with two, competing lights of equal strength at equal distances--the photo sample shows that. That is NOT "Main" and "Fill"....it's erroneous,newbie-talk. He is not qualified to write or illustrate this article.

Second point: in his bottom diagram, showing how to use one single light + a reflector to provide fill light. It is wrong because of a thing called "physics". The angle of incidence equals the angle of reflection. But, in his idiotic diagram, the beam of the main light blows right past the reflector positioned parallel to the EDGE of the light beam!!! My God! That round refelctor is aimed at the subject's face--but the Main light is not aimed at the reflector! Good God--has this guy ever played Pong? Or pool? What planet is he from?

The reflector must be positioned to actually "see" or "catch" or "bounce" the light coming from the main light! "Doah!!"
 
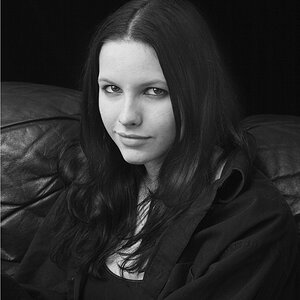
Ok now I have a question about the image in that link. Isnt that lighting flat? I know its not a bad thing to have flat ligthing just curious.

You know, the above-linked article is EXACTLY the type of thing that is wrong with the world wide web as far as learning. The guy does not know jack $h!+ about lighting, or about lighting diagrams!!! This is a case of a newbie writing an article, and being in wayyyyyy over his head. YES DEE,THE LIGHTING ON HER IS TOTALLY FLAT!!!!!!!!!!!!! But, there is much,much worse in the article!

He talks about a Main and Fill light, and then sets up two lights that CANCEL ONE ANOTHER OUT TOTALLY.Good God....there is no "fill"...this is simple, bad, cross-lighting. And, flat as heck. Words do not match the lighting--at ALL! Yes,Dee, the lighting is FLAT!!

Look at the bottom diagram, showing using an umbrella camera left, and the a round reflector aimed at the subject's face, with the beam of the main light MISSING THE REFLECTOR!!! The way the reflector is set up screams "Newbie!!!" It is 100%r wrong,wrong,wrong,wrong!

That is the MOST_COMMON NEWBIE blunder--positioning a reflector where it will not do jack SQUAT!!! zOMG...zOMG...zOMG No,no,no, a thousand times NO to that last diagram.That diagram is utter,total,unmitigated B.S.! If you were to follow this dunderheaded diagram, and set up lights as shown in his last diagram, and expect "fill" from a reflector positioned that way, you would be sorely disappointed. His entire,basic location or position of the fill reflector in relation to the main light, show that he is utterly,totally ignorant. I hate to come off as being so agitated, but that diagram is flat out idiotic. Just "wrong". I cannot emphasize enough how much disconnect this article shows between the pictures, and real-world, proper BASICS!!!!

I do not want to make 2wheel feel bad for suggesting this article, but the words, practices, and lighting diagrams in that web-based article are NONSENSE.The lighting on the model in shot one?=Yess, Dee, the lighting is flat as a pancake. There is no "shadowing" to make her face have any shape...but the bottom lighting diagram showing how to position a reflector to create fill lighting----------ARG!!!!!!! No,no,no,no! That reflector will provide almost zero fill at that angle: a reflector must be positioned so that it "CATCHES THE LIGHT", and bounces it back toward the shadowed side of the subject! Again, this is the kind of nonsense that anybody with an internet connection can upoload. Without the filter of editors, or somebody who actually KNOWS how to light properly, we get people who use these new, automated lighting diagram creation apps, and created totally WRONG, even STUPID,nonsensical diagrams, and then write articles as if they know what's going on...

The guy who slapped that article together does not know squat. He's a total hack. I am POSITIVE,absolutely POSITIVE, that he has zero training from any professional or even book source.

Derrell, if I've said it once I've said it a thousand times. Please, for the love of God, if you aren't going to tell us how you really feel, I mean REALLY REALLY feel (!!), then why post at all? :lmao:
 
He is cross-lighting with two, competing lights of equal strength at equal distances--the photo sample shows that.

He says below this diagram that the "fill" light should be at about 1/2 the power of the key light???


Second point: That round refelctor is aimed at the subject's face--but the Main light is not aimed at the reflector!

The reflector must be positioned to actually "see" or "catch" or "bounce" the light coming from the main light! "Doah!!"

Are you saying that the reflector should be directly across from the key light or just feathered a little more more around towards the side of the model's face?

Thanks!
 
I'm sure Derrel will reply but lighting in order for it not to be flat must be at some different measurements; differently metered f/stops. One light usually a stop or two different than the other based on your subject position and what you want to achieve.
 
One light usually a stop or two different than the other based on your subject position and what you want to achieve.

Exactly. Isn't that what this guy suggested though? I still agree that the reflector is in the wrong location.
 
I'm on iPhone so I haven't reviewed the links. Just going from the dialog posted.
 
He is cross-lighting with two, competing lights of equal strength at equal distances--the photo sample shows that.

He says below this diagram that the "fill" light should be at about 1/2 the power of the key light???


Second point: That round refelctor is aimed at the subject's face--but the Main light is not aimed at the reflector!

The reflector must be positioned to actually "see" or "catch" or "bounce" the light coming from the main light! "Doah!!"

Are you saying that the reflector should be directly across from the key light or just feathered a little more more around towards the side of the model's face?

Thanks!

THAT photograph and the text that accompanies it are bogus. The diagram is terrible. If she has hair lighting from behind, camera right, how come her hair is BLACK inside the arm that touches her head? How come the best-lighted hair is on the left hand side of the photo? He talks about a main light's role this way: "It’s main purpose is not only to light the subject but also to provide depth by creating shadows." But then, the illustration shows an image lighted with a face that has FLAT, basically almost shadowless lighting on both sides of the nose...which tells us that there is no "main and fill light" light...the lights are functioning as one,big,united light source! The utter lack of hairlight from the side the hairlight is shown diagrammed on....hmmm...again, this photo, the words, and the lighting diagram are rubbish.

The text, diagrams, and the photo are utter rubbish.

And yes, I am stating that in order to effectively FUNCTION as a fill light,a reflector of that size and shape (as-shown, a round reflector not much bigger than an umbrella) needs to be angled in such a way that it can "see", or "catch", or "catch and reflect" or "bounce" the light emanating from the main light. He shows it positioned parallel with the beam of the main light,and quite far away from the subject. THAT IS ONE OF THE MOST-COMMON newbie mistakes,and seeing it diagrammed here shows that this guy is not a capable teacher.He is demonstrating and writing and diagraming nonsense.

When trying to learn things, it is imperative that you be taught by somebody who is qualified to teach. The web page under discussion here has text that does not jibe with the results shown. "Shadows" on her face...uh...not hardly..main and fill lights? Uh, no, not really what is being shown....reflector use and positioning, uh...not the way it's done due to that doggone physics thing...
 
One light usually a stop or two different than the other based on your subject position and what you want to achieve.

Exactly. Isn't that what this guy suggested though? ...
Even if two lights are two stops different it is totally possible to produce flat light if the positions of the lights aren't appropriate (Think: Inverse square law).
 
And yes, I am stating that in order to effectively FUNCTION as a fill light,a reflector of that size and shape (as-shown, a round reflector not much bigger than an umbrella) needs to be angled in such a way that it can "see", or "catch", or "catch and reflect" or "bounce" the light emanating from the main light. He shows it positioned parallel with the beam of the main light,and quite far away from the subject. THAT IS ONE OF THE MOST-COMMON newbie mistakes,and seeing it diagrammed here shows that this guy is not a capable teacher.

So would you suggest that the set up be adjusted as I have demonstrated below, along with turning the reflector counterclockwise per this diagram about 20 degrees give or take a few degrees?

6680885349_a004644794.jpg
[/URL] Photo Diagram.jpeg by jwbryson1, on Flickr[/IMG]
 
Yes, move the reflector counter-clockwise, so that the reflector's "face" catches a substantial part of the light from the main light. Also, from actual experience, I can tell you that a round reflevtor of that size, kif it is white, will also benefit from being closer to the subject. Move it "forward", and turn it "to the left". I would say this" turn the reflector so that the far edge is pointed at 12 o'clock to 11 o'clock.and so the closest edge of the reflevtor is about where here FEET are positioned--that is where it will create some fill lighting. as-diagrammed, the fill light effect is going to be virtually nil. Negligible.

As tirediron was talking about--inverse square law...the main light's strength at the reflector position is quite a bit weaker than it is at the subject position, so the reflector typically is so close that it is just outside the camera's angle of view. The reflector needs to be CLOSE to the subject when it is that small. The way the light is raking across the subject in the diagram as-shown, the off-side (shadowed side) will be fairly dark with a softbox shown as small as that one in the diagram.

A lot of people think a 30 inch round disc-shaped reflector is "big", but it really is not.

JUst for giggles, draw some "light rays" from that softbox, and let a few of them hit the reflector, as shown...and laugh when you see where the light bounces to; in the diagram as shown, the light will virtually ALL miss the seated subject.
 
Look at the size of the softbox; it is about as long as the depth of the seated woman; that means it's less than 30 inches wide. it is close to her. The beam spread cannot even reach the reflector, as shown. The reflector is round, which is the smallest area of actual,working reflector (I prefer square or rectangular reflectors). If a person is going to diagram lights, the SIZE of the box, and the beam spread of the reflectors needs to be specified.

A 24 inch x 32 inch softbox and 30 inch or 32 inch round reflector, as diagrammed, will provide almost no fill light. Trever had the same,exact problem a month ago on a post he did, and I made the same suggestion on how to position the reflector so that it actually has some light to reflect. For beginners shooting with speedlights, the lack of modeling lights makes setting up reflectors very difficult until they have some serious practice under their belt--and somebody to show or explain WHY the "lessons were wrong". That is why these nonsensical web-based articles irritate me so much...
 
Personally, I think that 3 way lighting is almost always the way to go if possible. You can up it to four but to me that doesn't really make a big difference. If you decrease it to two, sometimes you can lose of light quality in places, specifically in the background. And while mom lighting is artistic, it presents a lot of technical challenges.
 

Most reactions

Back
Top