tron
TPF Noob!
- Joined
- Apr 26, 2008
- Messages
- 352
- Reaction score
- 6
- Location
- Michigan
- Can others edit my Photos
- Photos NOT OK to edit
Hello:
I'm not sure if anyone has posted this DIY before but I thought it was something that might be of help. That and I was bored tonight and needed something to do
 . Please excuse any grammatical errors as it is 130am and I'm about to start writing this. This DIY is for my silver Nikon FM, I'm not sure if the FE is the same so please follow this DIY at your own risk.
Overall the DIY was pretty straightforward and only took a couple hours with me being exceedingly careful. Difficulty was like 5/10, not very hard at all.
Problem:
I picked up this Nikon FM secondhand and it has served me well. The problem I was having is when I would turn the aperture ring on the lens, the meter couple ring on the camera body would get stuck. For example, I would turn from f/22 to f/1.8 and the meter coupling ring would "stick" and not spring back.
Also the seals on the camera were getting pretty crusty. The mirror would get stuck in the 'up' position and stick to the mirror damper pad. So I thought this would be a good time to fix these issues on my camera.
Part 1: Metering Ring Clean or Replace:
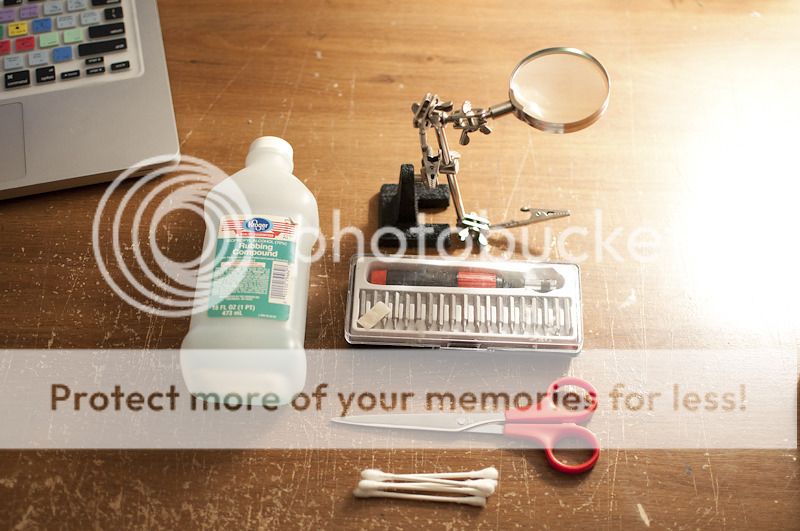
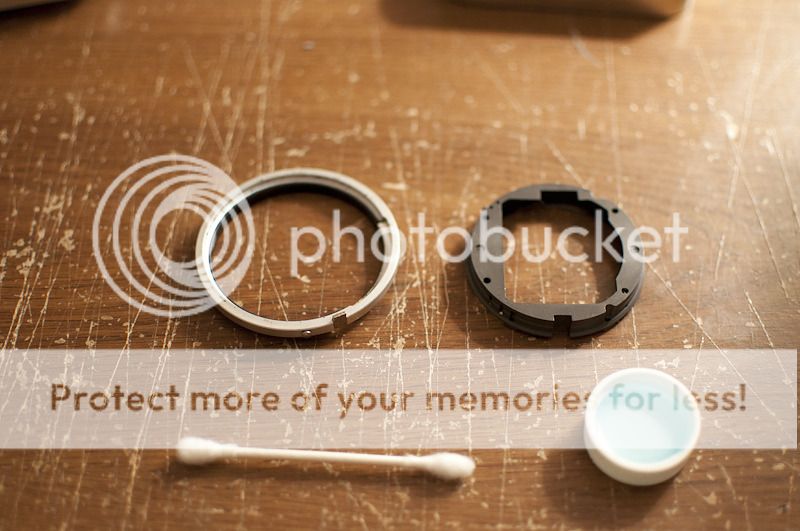
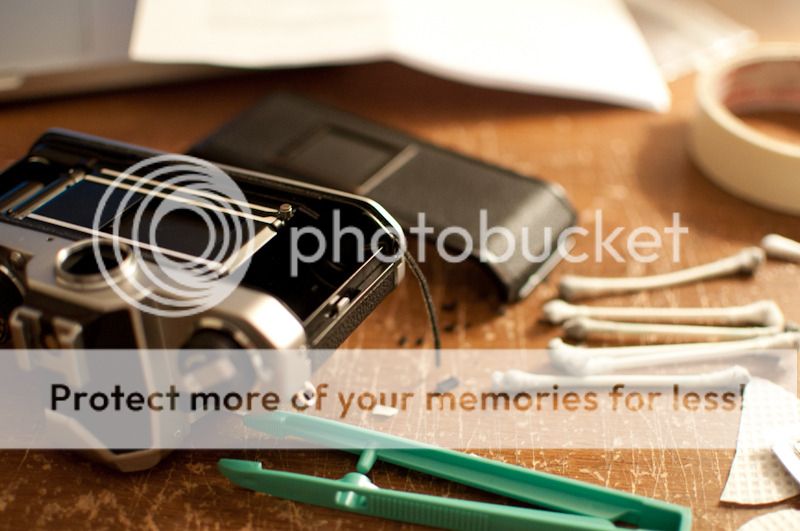
1. First step is to gather all of your stuff. I used:
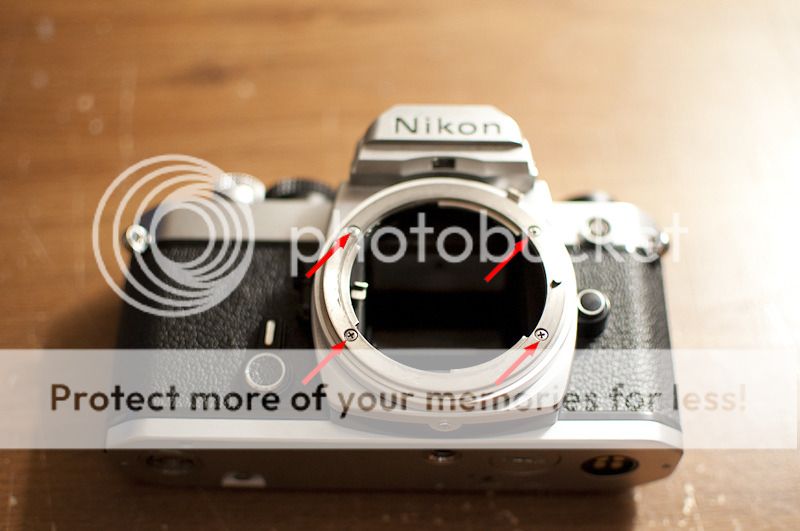
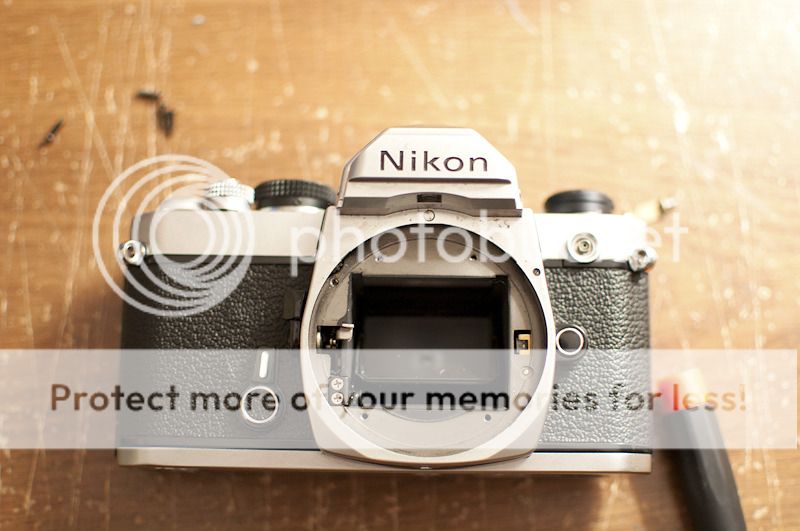
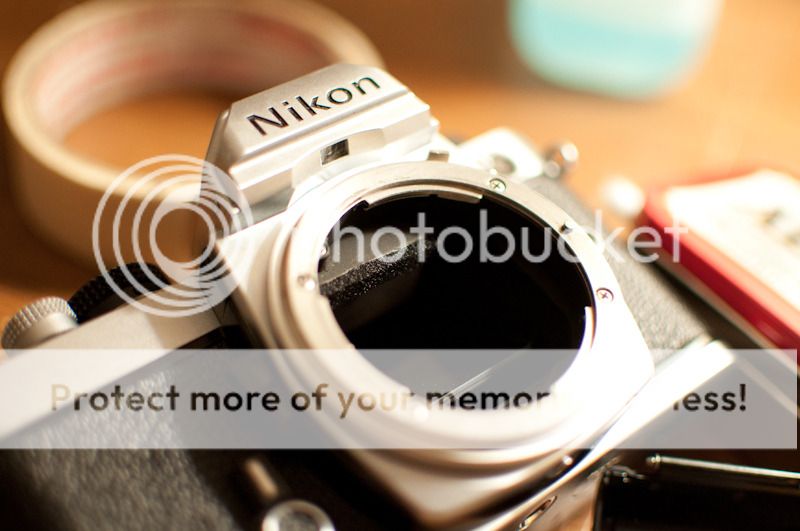
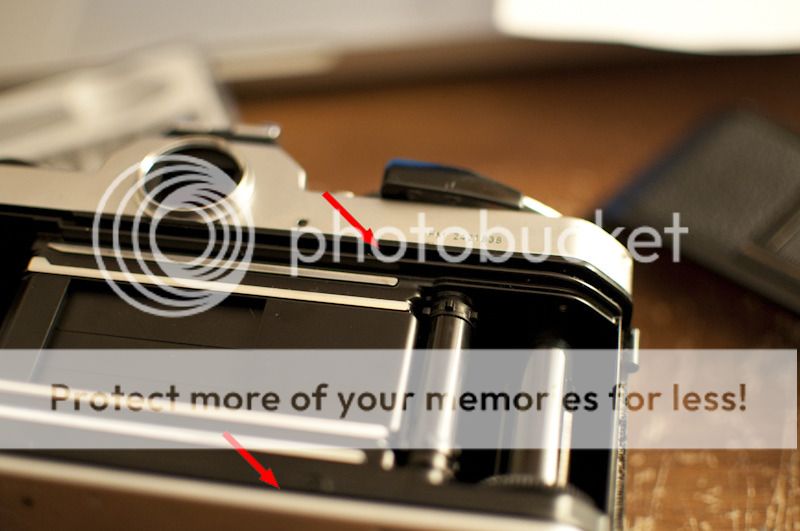
2. With the camera mount side up, begin by undoing the four screws that hold the mount onto the body.
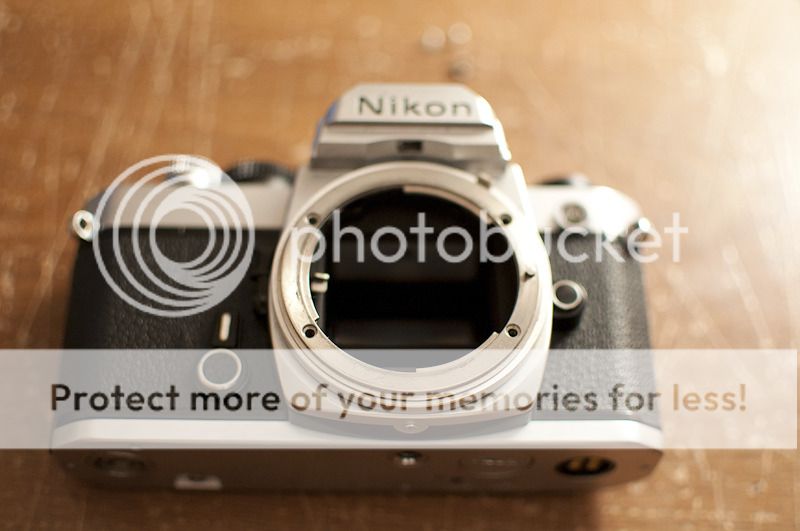
3. Screws removed.
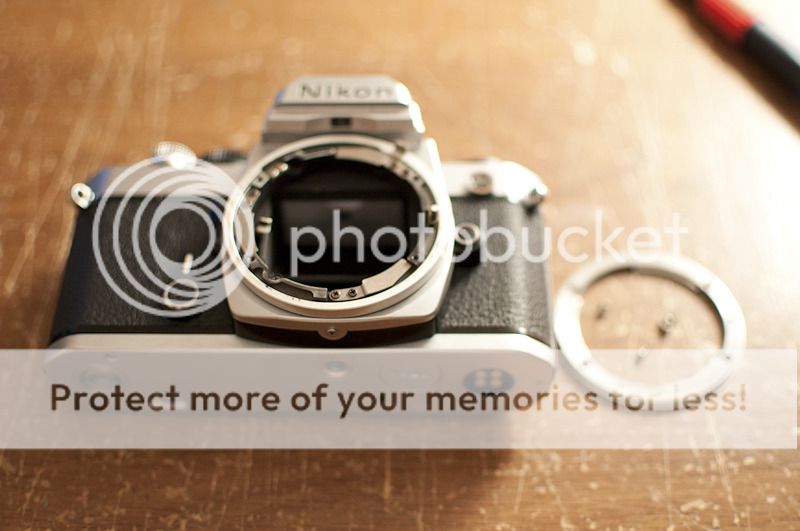
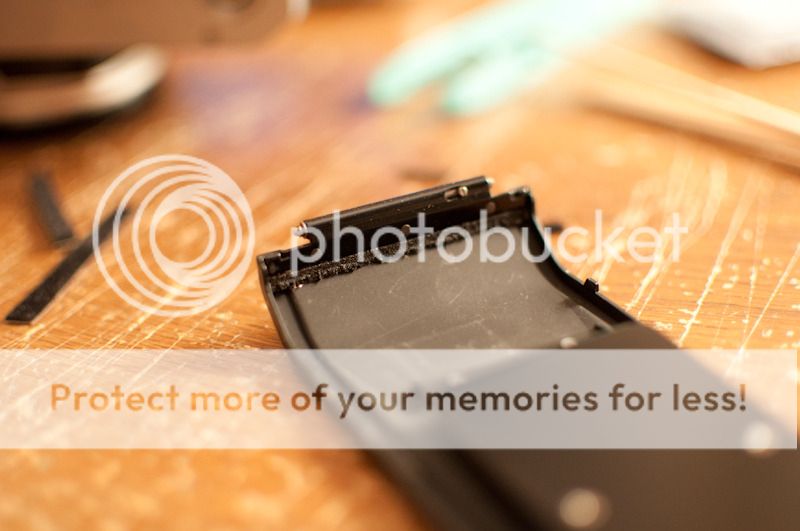
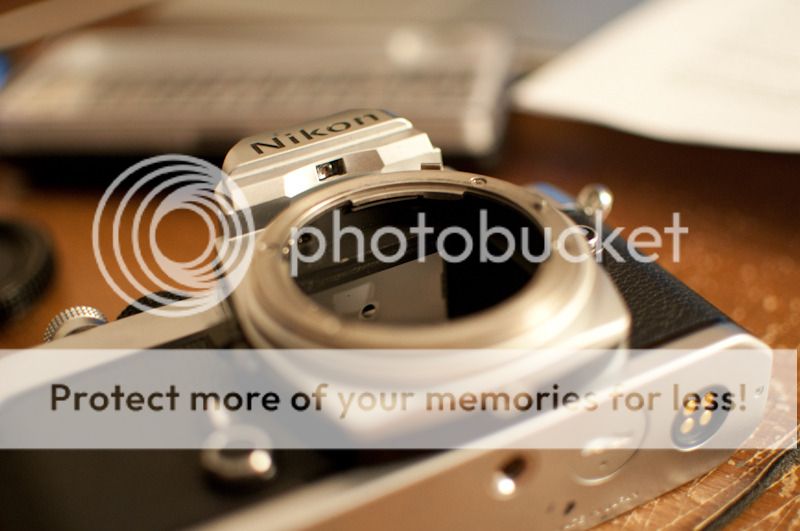
4. Next lift the lens mount off the body.
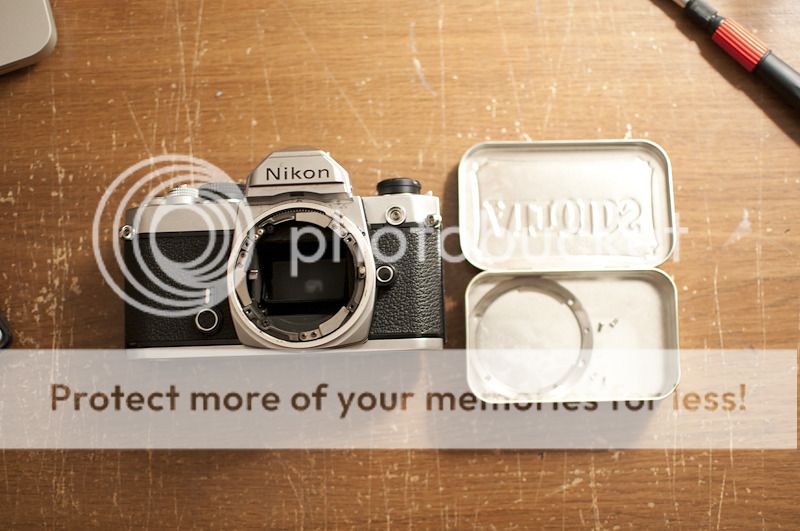
5. I like storing small parts in used Altoid tins. This prevents mad tron from losing stuff and throwing things everywhere.
6. Undo the four screws highlighted below. Some FM's have a little tin gasket, this one does not (my black one has the gasket). If you have the little tin gasket, simply lift it off and skip to the next step. If not then undo the following screws.
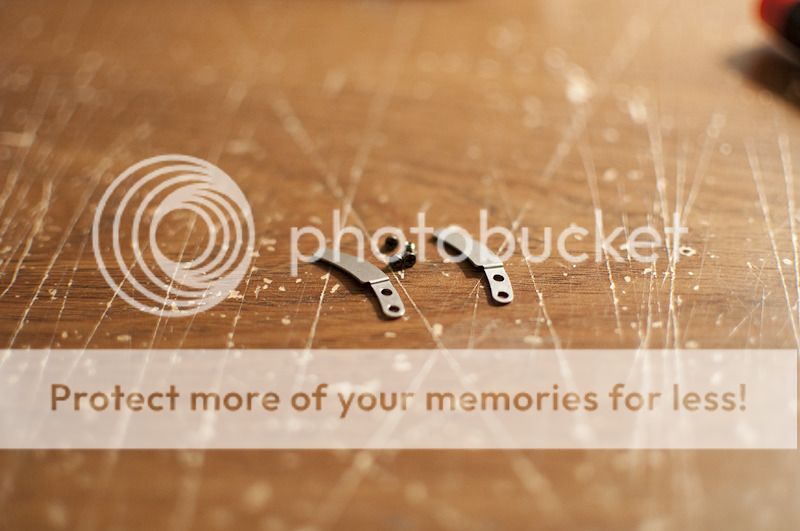
7. Lift these tabs out and set them to the side.
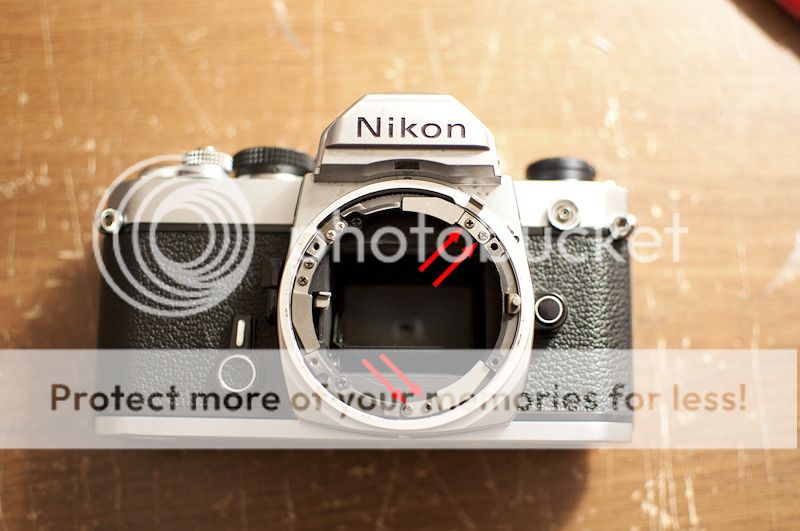
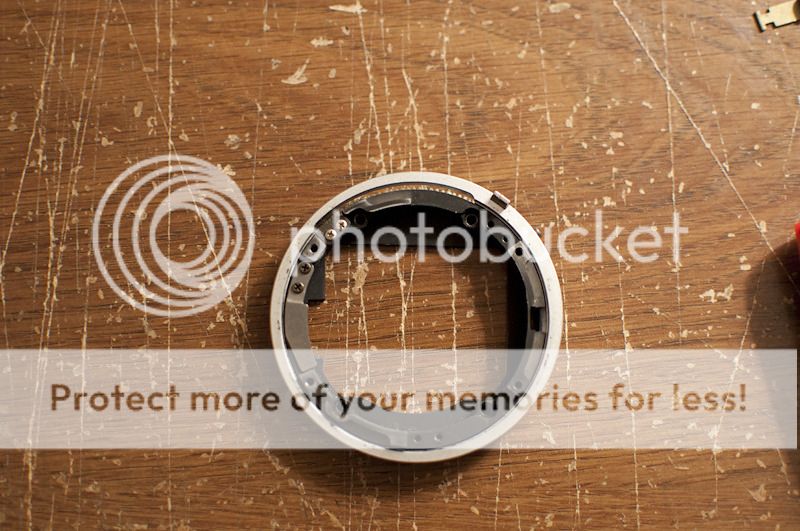
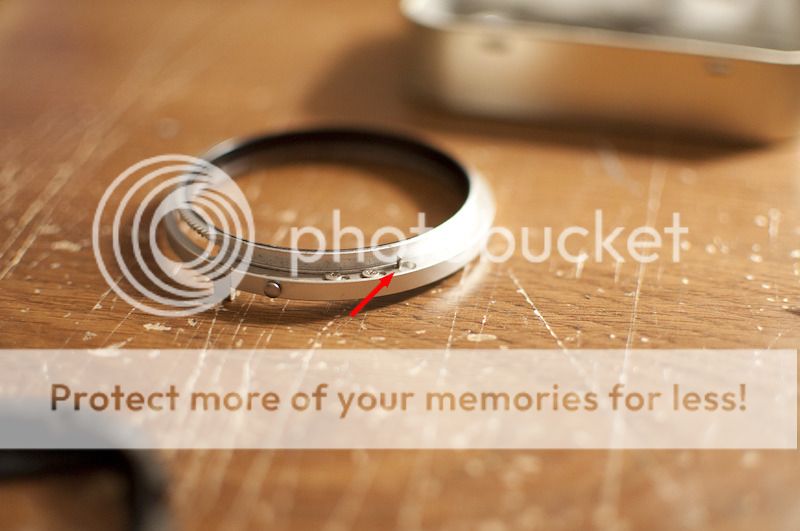
8. Remove the following screws. These hold the metering ring to the body.
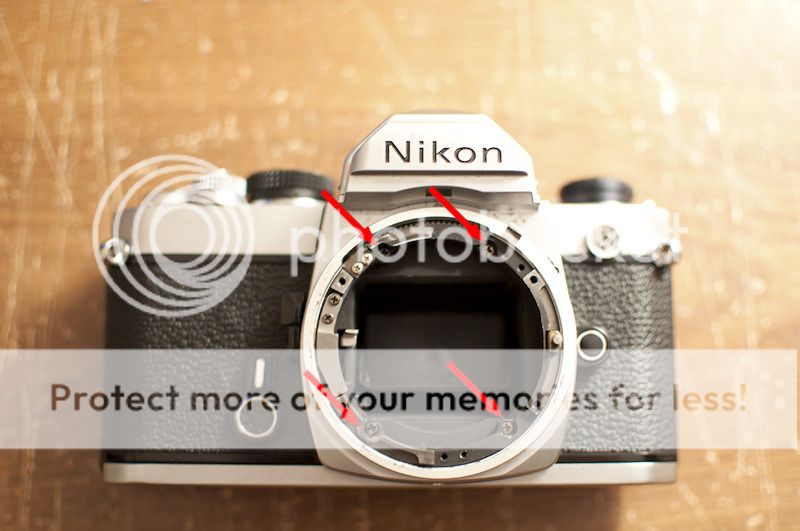
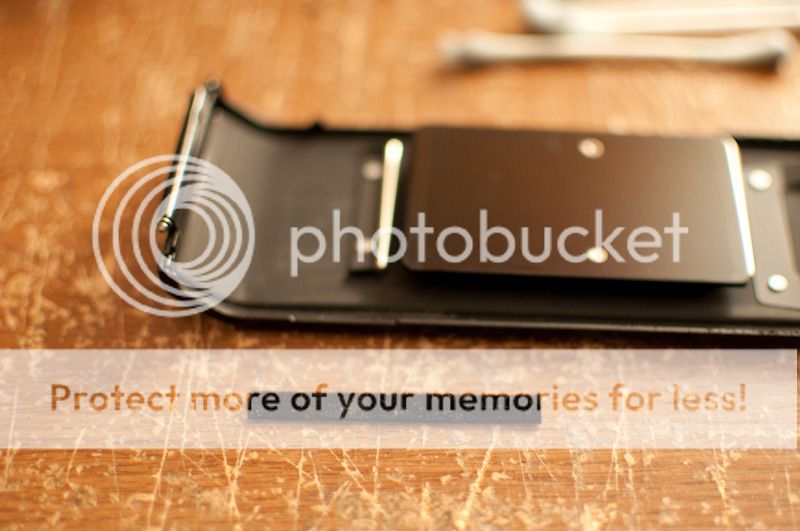
9. Now lift the metering ring out of the body. Also slip the lens locking pin out of the body (the little gold tab at the 3 o'clock position in the previous photo).
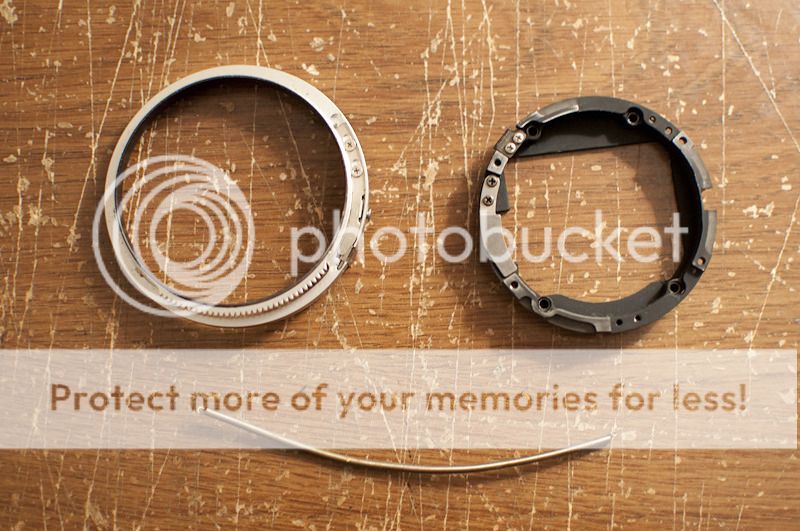
10. Set the camera body off to the side and now you have your metering ring.
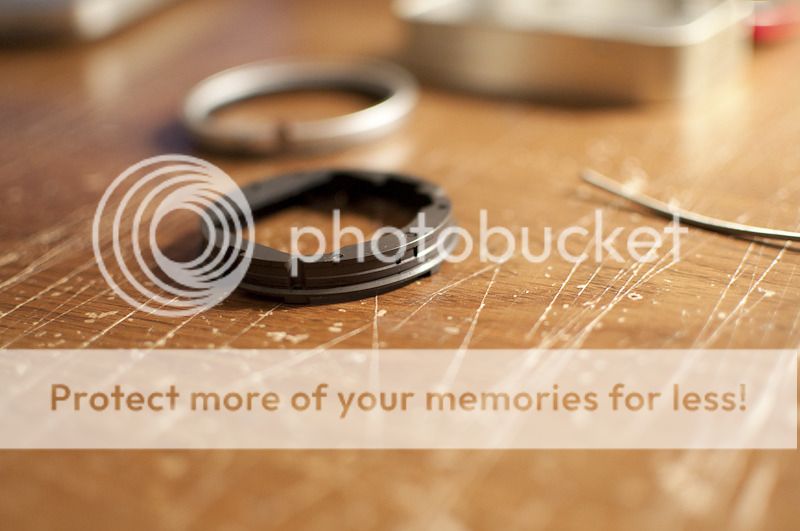
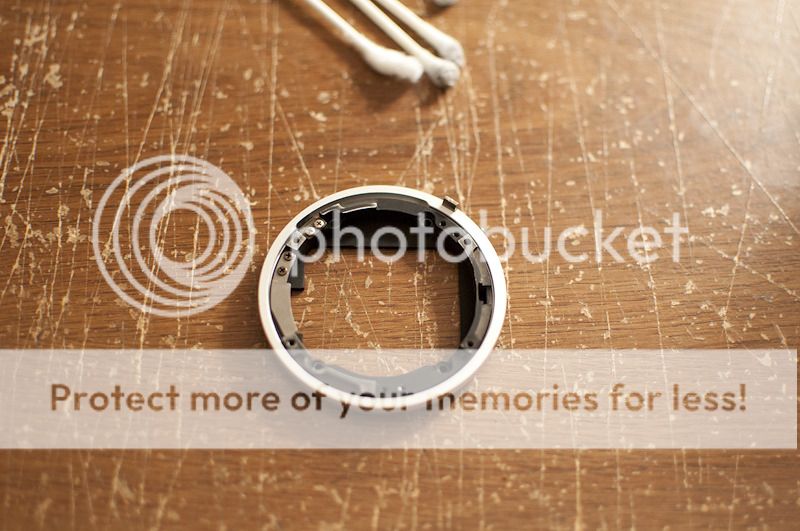
11. Lift the inside (black) portion out of the outside (silver) portion. There is a spring that links the two pieces together so be gentle. After removing the pieces you will have the following:
12. Here is the dirt that is causing the ring to stick and not retract to its original position.

13. Here is the ring on the inner portion. Its hard to see in the picture but trust me it was there.
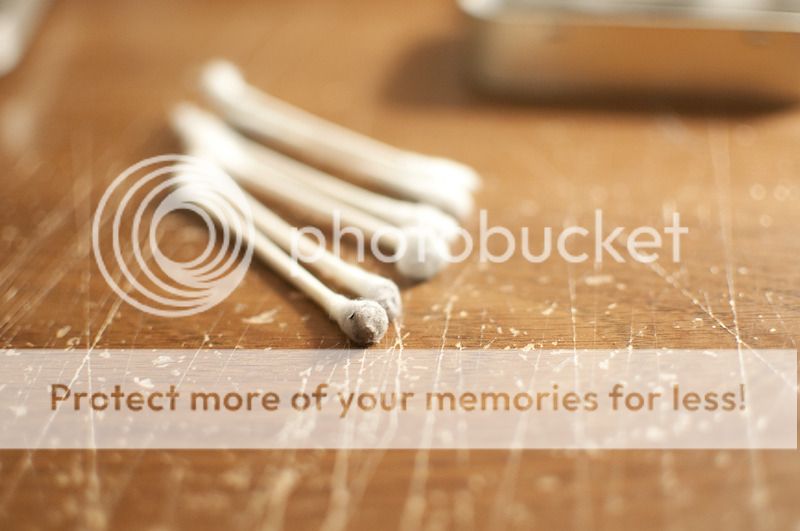
14. Take a bit of rubbing alcohol and use a q-tip to gently clean the dirt off the rings. Make sure you get all the dirt and allow the parts to dry.
15. Some of the dirt I removed. Makes tron_ a very sad man.
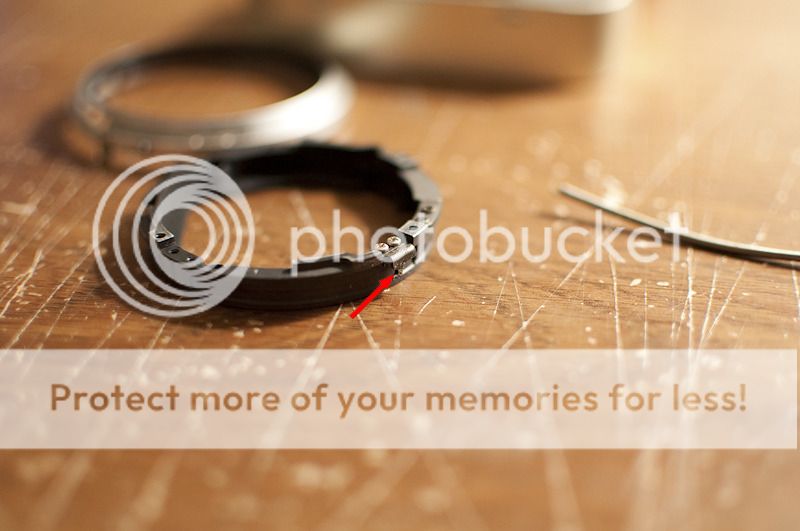
16. Time for reassembly. Take the spring and loop it around the inner portion first. The red arrow indicates where the spring attaches to.
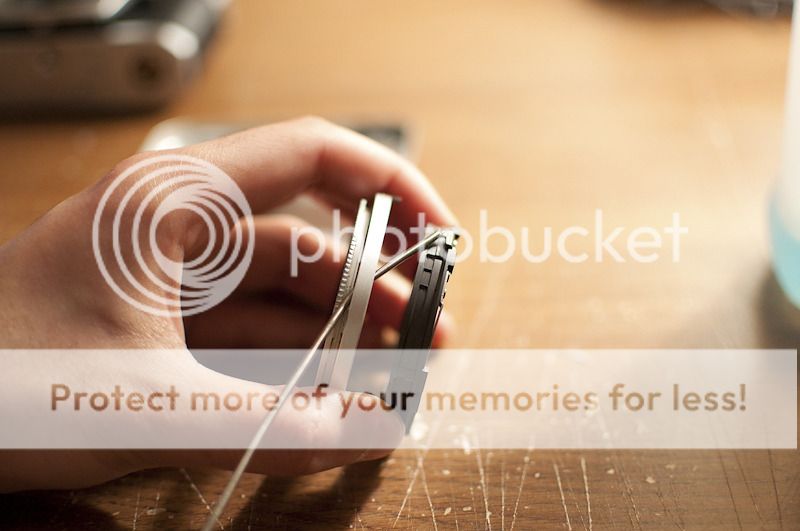
17. Set the inner ring inside the outer ring while snaking the spring through the opening as follows.
18. Here is a picture showing where the spring attaches on the outer ring.
19. After reassembling the ring you should have something like this. If not, it might be time to panic.
20. Reassembly is just the opposite of assembly!
Part 2: Seal Replacement (not the kind at the zoo)
1. Lay out the contents of your seal kit. I forgot where I ordered mine from (I have been putting off this DIY for some time now) but I will try to find the link. The contents included:

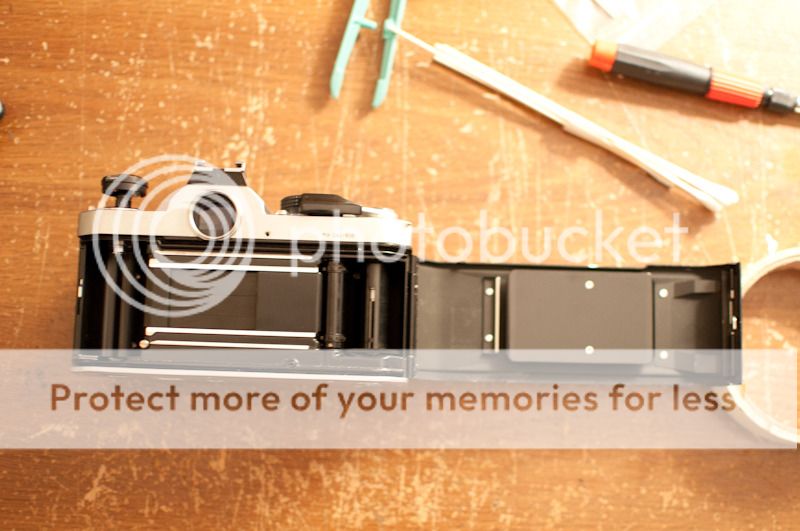
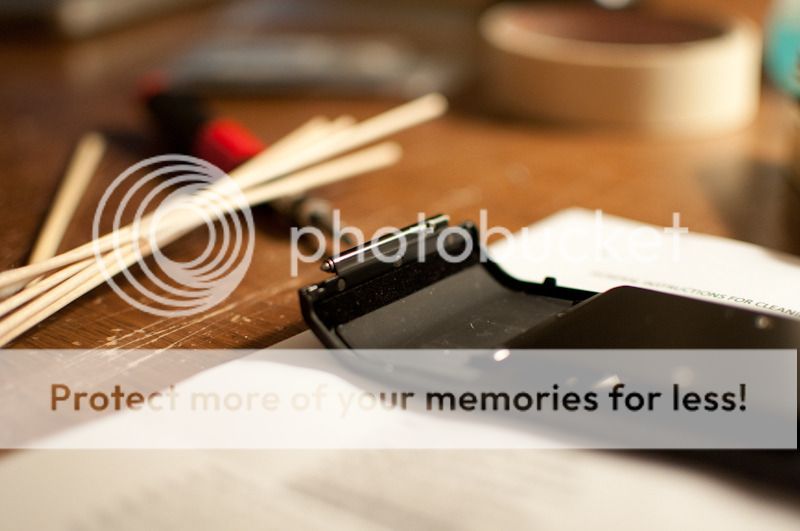
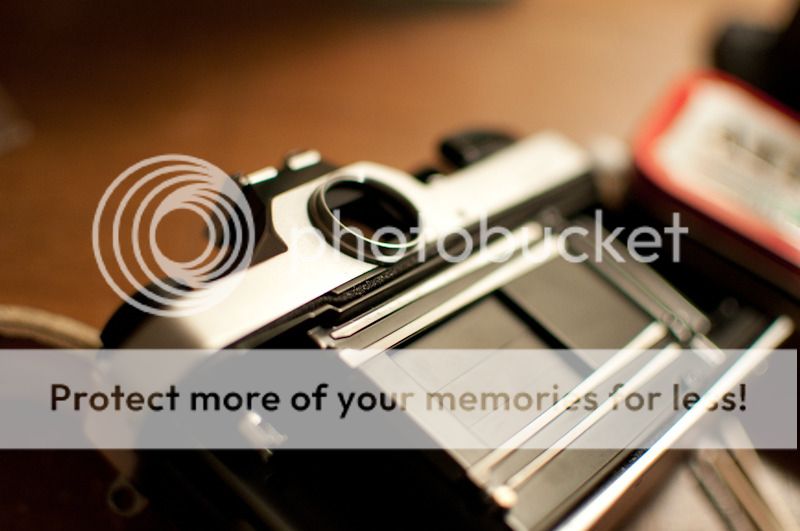
2. Open the film door on your camera. If you don't know how to do this, it might be a good thing to learn. You should be looking at something like this.
3. Inside the camera on the door you will see this little screw. Push the screw downwards and the back door will come off.

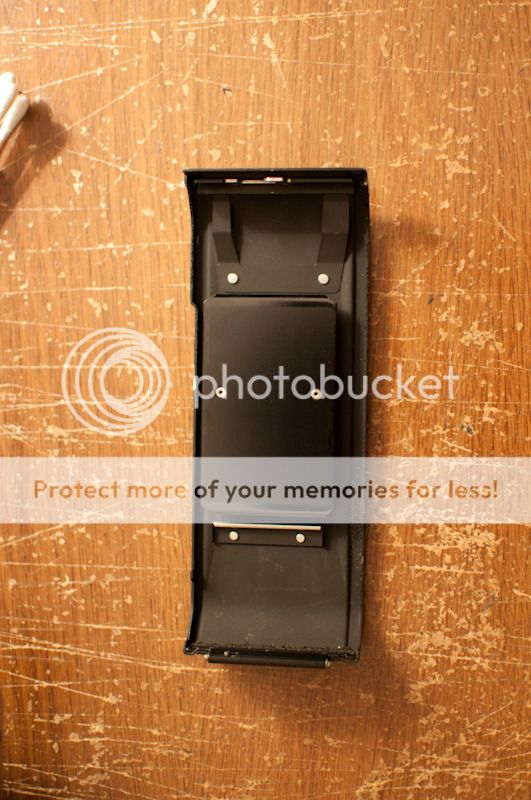
4. Removed door.
5. The first seal I did was the film door seal. Here you can see the location along with the crusty old seal.
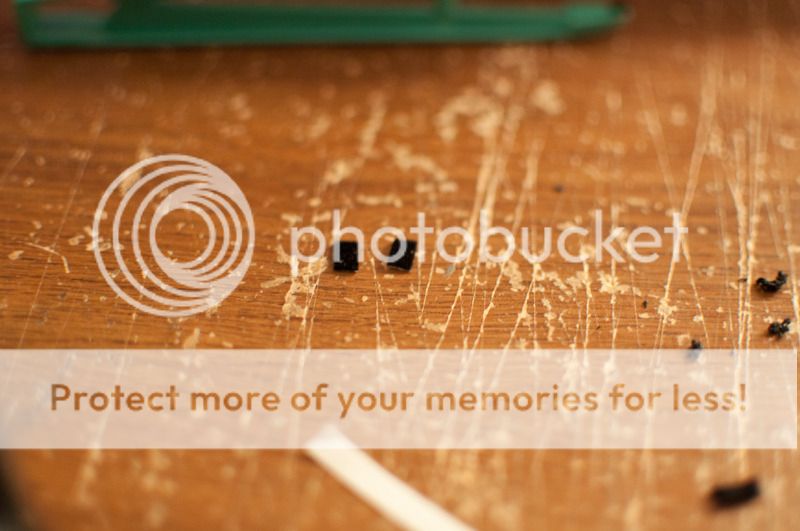
6. Use the supplied bamboo stick to scrape off the old gunk. Then use the rubbing alcohol or supplied wipes to get rid of the remaining seal material. Heres a shot of some dirty q-tips.

7. All clean!

8. Here is the new seal along with the film door. Peel the adhesive strip off the back of the new seal.
9. And stick that bad boy back in place!
10. The next seal I wanted to do is the mirror dampening seal. This protects the mirror from shock every time the mirror flips upwards. Clean off the old material like in the last step. Here is a shot of the location cleaned.
11. New damper seal!

12. And stuck into place.
13. Next are two seals on the film door. They are located on the opposite side of the seal replaced above. They are pretty small and it took me a second to find them. Here is the bottom seal.

14. And the top seal.
15. New seals looking happy and ready to go in. A word of advice, be careful putting these in. you need to slide them under a lip to get them to stick to the film door. You can lick the back of the seals (not joking) and slide them into place. Or you could eat them (joking).
16. Latch end seals in place.

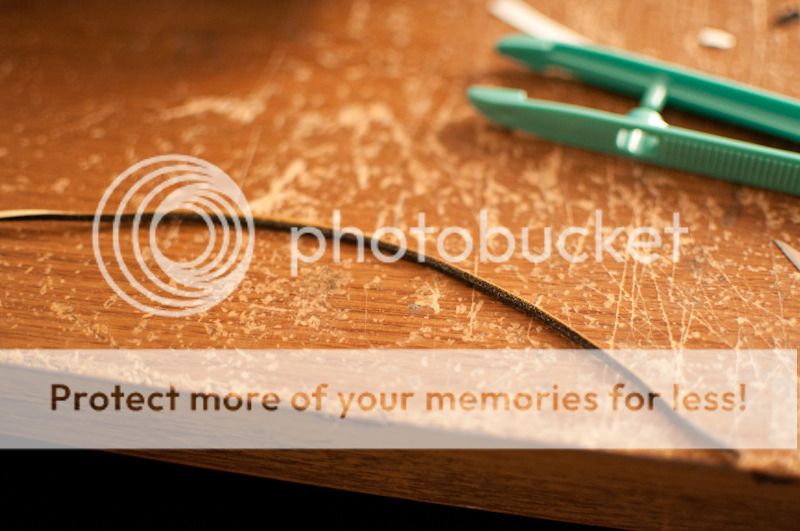
17. The next two seals are the body seals that seal the gap between the film door and the camera body. These were a pain in the ass. Unfortunately I wish I had different seals because these were kind of low quality. The instructions said they were non adhesive but they clearly had an adhesive strip on the background. Again start by cleaning out the old seal material. Here is the seal.
18. And the gaps we will be stuffing them into.
19. Start at the side with the film advance and work your way towards the rewind knob.

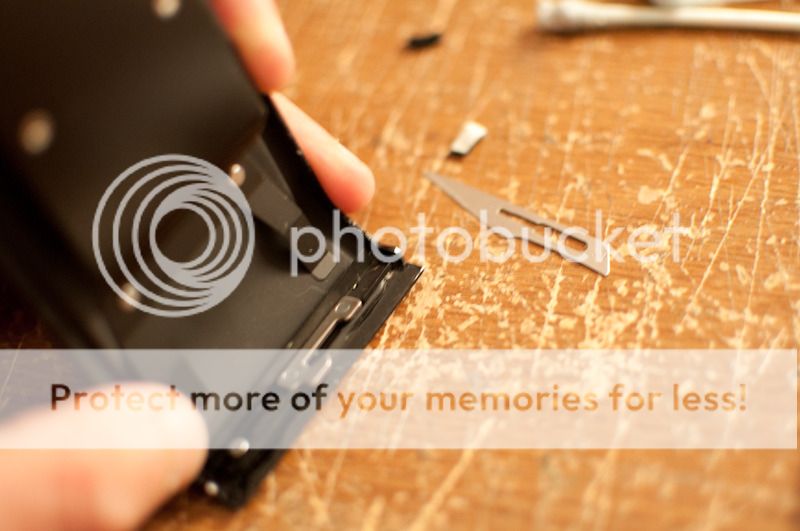
20. The seal might be a bit long so you will have to trim it using some scissors or the provided x-acto knife.

21. Top seal in.
22. Bottom seal in and trimmed.
23. The last seal is a tiny seal on the film door. Simply take the new seal and plop it to the door.

DONE!
Conclusion:
Overall I have to say this went pretty smoothly. I try to be pretty organized and methodical when I work, I hope this DIY helps some people out. Yeah I probably went overboard with the pictures but then again at least everything is here and documented! Total time was a couple hours like I said, it really wasn't too bad of a job. If you have any questions please feel free to pm me!
tron_
I'm not sure if anyone has posted this DIY before but I thought it was something that might be of help. That and I was bored tonight and needed something to do
Overall the DIY was pretty straightforward and only took a couple hours with me being exceedingly careful. Difficulty was like 5/10, not very hard at all.
Problem:
I picked up this Nikon FM secondhand and it has served me well. The problem I was having is when I would turn the aperture ring on the lens, the meter couple ring on the camera body would get stuck. For example, I would turn from f/22 to f/1.8 and the meter coupling ring would "stick" and not spring back.
Also the seals on the camera were getting pretty crusty. The mirror would get stuck in the 'up' position and stick to the mirror damper pad. So I thought this would be a good time to fix these issues on my camera.
Part 1: Metering Ring Clean or Replace:
Please keep in mind I am just cleaning my metering ring out. If you want to replace yours, the procedure is the same!
1. First step is to gather all of your stuff. I used:
- Screwdriver set
- Rubbing alcohol
- Q-tips
- Brain (optional)
- Helping hands (optional)
2. With the camera mount side up, begin by undoing the four screws that hold the mount onto the body.
3. Screws removed.
4. Next lift the lens mount off the body.
5. I like storing small parts in used Altoid tins. This prevents mad tron from losing stuff and throwing things everywhere.
6. Undo the four screws highlighted below. Some FM's have a little tin gasket, this one does not (my black one has the gasket). If you have the little tin gasket, simply lift it off and skip to the next step. If not then undo the following screws.
7. Lift these tabs out and set them to the side.
8. Remove the following screws. These hold the metering ring to the body.
9. Now lift the metering ring out of the body. Also slip the lens locking pin out of the body (the little gold tab at the 3 o'clock position in the previous photo).
10. Set the camera body off to the side and now you have your metering ring.
11. Lift the inside (black) portion out of the outside (silver) portion. There is a spring that links the two pieces together so be gentle. After removing the pieces you will have the following:
12. Here is the dirt that is causing the ring to stick and not retract to its original position.
13. Here is the ring on the inner portion. Its hard to see in the picture but trust me it was there.
14. Take a bit of rubbing alcohol and use a q-tip to gently clean the dirt off the rings. Make sure you get all the dirt and allow the parts to dry.
15. Some of the dirt I removed. Makes tron_ a very sad man.
16. Time for reassembly. Take the spring and loop it around the inner portion first. The red arrow indicates where the spring attaches to.
17. Set the inner ring inside the outer ring while snaking the spring through the opening as follows.
18. Here is a picture showing where the spring attaches on the outer ring.
19. After reassembling the ring you should have something like this. If not, it might be time to panic.
20. Reassembly is just the opposite of assembly!
Part 2: Seal Replacement (not the kind at the zoo)
1. Lay out the contents of your seal kit. I forgot where I ordered mine from (I have been putting off this DIY for some time now) but I will try to find the link. The contents included:
- Bamboo stick to remove old seal material
- Electronic wipe
- Blade
- Seals
- Q-tips
- Instructions (useless)
- Little cloths
- Tweezer
2. Open the film door on your camera. If you don't know how to do this, it might be a good thing to learn. You should be looking at something like this.
3. Inside the camera on the door you will see this little screw. Push the screw downwards and the back door will come off.
4. Removed door.
5. The first seal I did was the film door seal. Here you can see the location along with the crusty old seal.
6. Use the supplied bamboo stick to scrape off the old gunk. Then use the rubbing alcohol or supplied wipes to get rid of the remaining seal material. Heres a shot of some dirty q-tips.
7. All clean!
8. Here is the new seal along with the film door. Peel the adhesive strip off the back of the new seal.
9. And stick that bad boy back in place!
10. The next seal I wanted to do is the mirror dampening seal. This protects the mirror from shock every time the mirror flips upwards. Clean off the old material like in the last step. Here is a shot of the location cleaned.
11. New damper seal!
12. And stuck into place.
13. Next are two seals on the film door. They are located on the opposite side of the seal replaced above. They are pretty small and it took me a second to find them. Here is the bottom seal.
14. And the top seal.
15. New seals looking happy and ready to go in. A word of advice, be careful putting these in. you need to slide them under a lip to get them to stick to the film door. You can lick the back of the seals (not joking) and slide them into place. Or you could eat them (joking).
16. Latch end seals in place.
17. The next two seals are the body seals that seal the gap between the film door and the camera body. These were a pain in the ass. Unfortunately I wish I had different seals because these were kind of low quality. The instructions said they were non adhesive but they clearly had an adhesive strip on the background. Again start by cleaning out the old seal material. Here is the seal.
18. And the gaps we will be stuffing them into.
19. Start at the side with the film advance and work your way towards the rewind knob.
20. The seal might be a bit long so you will have to trim it using some scissors or the provided x-acto knife.
21. Top seal in.
22. Bottom seal in and trimmed.
23. The last seal is a tiny seal on the film door. Simply take the new seal and plop it to the door.
DONE!
Conclusion:
Overall I have to say this went pretty smoothly. I try to be pretty organized and methodical when I work, I hope this DIY helps some people out. Yeah I probably went overboard with the pictures but then again at least everything is here and documented! Total time was a couple hours like I said, it really wasn't too bad of a job. If you have any questions please feel free to pm me!
tron_


