bianni
No longer a newbie, moving up!
- Joined
- Jun 2, 2011
- Messages
- 304
- Reaction score
- 117
- Location
- philippines
- Can others edit my Photos
- Photos OK to edit

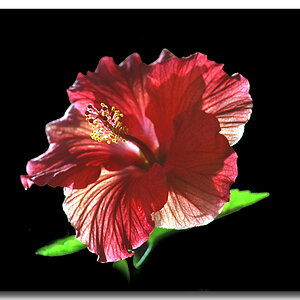
Here are two edits.
Follow along with the video below to see how to install our site as a web app on your home screen.

Note: This feature currently requires accessing the site using the built-in Safari browser.


bianni said:<img src="http://www.thephotoforum.com/forum/attachment.php?attachmentid=15764"/>
Here are two edits.
MLeeK said:0 is proper exposure only if you are metering middle gray or somewhere around this shade when you look at the image in terms of light to dark:
Some of the new cameras are more complex in their metering, but it all boils down to the basics and this is it.
The following is a metering tutorial that I have propbably posted here a dozen times, but I don't have it bookmarked, so here it is again: (let's hope all of the image links work!)
In order to use full manual effectively you need to first understand your meter and have a good relationship with it. This is something that nearly every tutorial and class I have ever seen either skips totally or glosses over.
In camera meters don't measure the light in your scene. It's not like a scale or a tape measure that measures the ACTUAL LIGHT in any quantitative measurement. It measures what the reflected light from your subject looks like. A light meter actually measures the LIGHT of your scene and tells you what proper exposure settings should be. It's a ruler for light.
Now you are saying... um... ok.... what is the difference? Let's use snow as an example: A foot of light fluffy snow could weigh 1 ounce. A foot of heavy wet snow would weigh more like 1 pound. They both APPEAR the same-it's a foot of snow!!! But in reality one is heavier. It's the same with light. Things can look the same, but they aren't.
Your camera's meter takes that reflection off of whatever you are metering-could be snow, could be a black backdrop. No matter what it is, your camera tries to make that reading equal middle of the road or middle gray on the light to dark scale. The camera doesn't know if you are metering a black scene or a white scene. It only knows that average exposure should be middle gray.
Take a look at a black and white photo.
If I had metered off her dress it would have made her dress middle gray... This color:
Her dress would be really underexposed at that color. If I metered the background the camera would have tried to make that middle gray. Her dress would have been blown out. On this particular image I probably would have metered skin if I wanted something to be middle gray.
Now that you know that much, you also have to consider what the metering modes are using your scene and trying to average to middle gray.
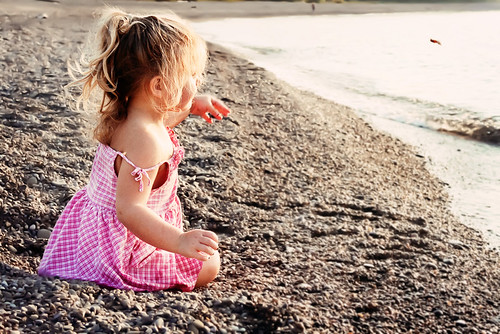
Evaluative metering is measuring the whole scene. Sky, water, child playing in the sand... EVERYTHING and it's trying to make it average middle gray. Just like a grade in school it adds all of those pixels up and tries to equal middle gray when it divides them out. On the beach with the sky and water? Probably not going to be extremely accurate. For example this photo of Haley on the beach.
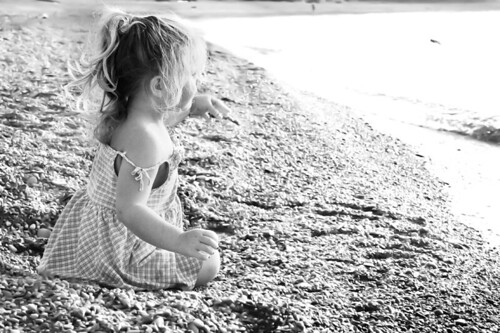
Convert it to grayscale and look at the bright and dark of it:
If I average the pixels out this is the gray they come out.
Compare that to middle gray and it's a lot brighter tone-and there was a lot of dark stone in that one.
If you're on a white sandy beach on a bright day your gorgeous child playing in the sand is probably going to be drastically underexposed. You have lots of bright sky pixels, lots of bright sand pixels and a few dark ocean and child pixels... The bright ones win and hold the average up. In high contrast situations like my beach example evaluative doesn't really work well.
Consider an average setting like maybe your living room (assuming your walls are fairly light) with your kids playing? It might work really well!
Center Weighted average metering takes all of the pixels into consideration, but like a mid term and final test is worth more points than any other test, so are the pixels in the center of your scene. It averages all of them together and counts the center ones multiple times to make them more important than the outer pixels. It would sure help with that beach scene to make the pixels that were of your child more important. Closer at least!!!
Then there is Spot Metering. Your meter only evaluates the pixels you put your SPOT on. This works well if you can train yourself to look at the scene in terms of light and dark and decide what you want to be the middle tone. White, non-african/asian/indian etc skin is not usually middle gray It's much lighter. Think of when you convert to black and white. Is skin ever that color ^ up there? Nope. I find that your average grass is a good middle gray outside. My light oak hardwood floors indoors are a good middle of the road. For the image of Haley I would have metered Haley's skin on the back of her arm and then set my exposure to about +1 or JUST before the skin would blow out.
So, now that you understand metering a little better and have a better friendship with your meter it'll be easier to make it do what you want it to do.
")
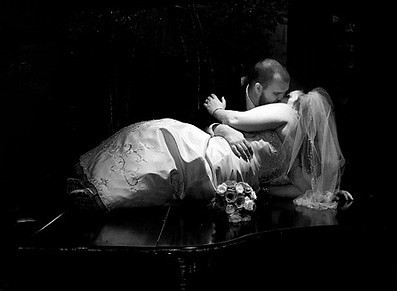
 guys here is another picuture i took over the weekend while going to black tie event...please let me know what you think as i did a bunch of reading on proper exposure as well as using the histogram to tell if proper exposure was achieved..
MLeeK said:Exposure looks good.

![[No title]](/data/xfmg/thumbnail/41/41901-789e8104ff95e5862c8f07611e3c34c0.jpg?1619739938)