
AJ153
TPF Noob!
picture taken off flicker, [needs to be revised/edit] thank you for your inputs
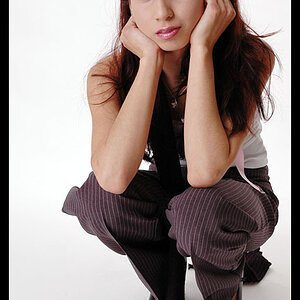
This is my first attempt into Self-Portrait, Shot with a 60D, and a 50mm 1.4 of myself with timer. I first used a mini statue of Jesus to focus in, and then set it to manual to lock the focus. I used a self timer of ten seconds to take the shot. It was around 2:55 P.M in northern Illinois so the light coming out of the window was a indirect soft light which made a fantastic rim light.
This also my first attempt with lighting
haha I just learned the lighting terms (or technical names) so I made a picture to save explaining time, I just kinda did what I thought looked nice on the screen

After taking the picture, and importing at first I was worried that the sparkle in the eye (I guess its called the Catchlight) should have been on the right side (left side of my face), but after doing research, I learned that in my picture; that light on the right side (left side of my face) is actually the rim light caused by lighting #4, and lighting #3 I placed overhead because I thought my hair was not highlighted enough ( I guess that was the hair light). I placed lighting #2 there because there was a really harsh shadow that needed to go ( I guess that was the fill light) and finally I placed lighting #1 there because I saw a picture of a lighting studio which had a lighting lamp in that position on eye level. It also took the shadow away from the rim/hair light, and gave the face that balanced natural light on the face (which is I learned is key light?). In the research I found out that Catchlight is in terms in the correct spot of 10-11ish'Oclock in corresponds to the key light (light #1) of my picture.
Is this correct?
Well basically in short is the catch-light in the correct spot? is the lighting, and position correct?
This is my first attempt into Self-Portrait, Shot with a 60D, and a 50mm 1.4 of myself with timer. I first used a mini statue of Jesus to focus in, and then set it to manual to lock the focus. I used a self timer of ten seconds to take the shot. It was around 2:55 P.M in northern Illinois so the light coming out of the window was a indirect soft light which made a fantastic rim light.
This also my first attempt with lighting
haha I just learned the lighting terms (or technical names) so I made a picture to save explaining time, I just kinda did what I thought looked nice on the screen
After taking the picture, and importing at first I was worried that the sparkle in the eye (I guess its called the Catchlight) should have been on the right side (left side of my face), but after doing research, I learned that in my picture; that light on the right side (left side of my face) is actually the rim light caused by lighting #4, and lighting #3 I placed overhead because I thought my hair was not highlighted enough ( I guess that was the hair light). I placed lighting #2 there because there was a really harsh shadow that needed to go ( I guess that was the fill light) and finally I placed lighting #1 there because I saw a picture of a lighting studio which had a lighting lamp in that position on eye level. It also took the shadow away from the rim/hair light, and gave the face that balanced natural light on the face (which is I learned is key light?). In the research I found out that Catchlight is in terms in the correct spot of 10-11ish'Oclock in corresponds to the key light (light #1) of my picture.
Is this correct?
Well basically in short is the catch-light in the correct spot? is the lighting, and position correct?
Last edited:
")
![[No title]](/data/xfmg/thumbnail/31/31749-6cf0f99d6bdedf47f7387c5b943fb717.jpg?1619734989)
![[No title]](/data/xfmg/thumbnail/31/31751-fb2f68cca32f9eec468dbde7d649840f.jpg?1619734990)
![[No title]](/data/xfmg/thumbnail/34/34039-a3bf38301d5ee5f8b658c43a86558500.jpg?1619736250)
![[No title]](/data/xfmg/thumbnail/37/37109-62e1b65e6f8bd2a349250acd6d653f1e.jpg?1619737882)
![[No title]](/data/xfmg/thumbnail/31/31747-2e2e2bda16938a6a1d5fd6120c558293.jpg?1619734987)
![[No title]](/data/xfmg/thumbnail/37/37111-64f64f2c8371420041bf39244ff12117.jpg?1619737882)
![[No title]](/data/xfmg/thumbnail/38/38292-ab7b4579becf6f3bda3ef5b18219d707.jpg?1619738563)
![[No title]](/data/xfmg/thumbnail/31/31750-f3936d67895e1ef2756eb06d7b15fe9c.jpg?1619734990)