Fluid Mask 3 - I love compositing

Ls3D

TPF Noob!
Joined
Dec 15, 2007
Messages
1,279
Reaction score
3
Location
Encinitas Cali
Website
www.shea-design.com
Can others edit my Photos
Photos NOT OK to edit
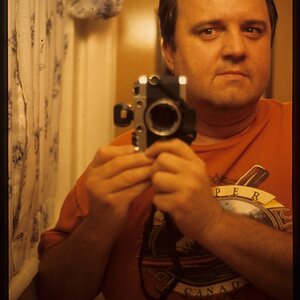
Anyone want to talk Fluid Mask? I'm a few hours into learning it and already... (click for 1:1):


-Shea :greenpbl:
 
In short it cuts a mask that is otherwise not possible to create (3 images above, cut in 10 minutes, faster as you learn).

When you load an image, it finds all the edges in the image and traces vectors around them creating fillable 'objects'. Then using brushes you can quickly define the 'keep' & 'delete' areas of the mask.. Hiding the edges makes this part pretty simple and different tools are available for different problems, such as correcting a few errors and isolating areas for more detailed analysis.

I watched a live demo where the guy was able to isolate smoke off a noisy green background!! Then a wild hair head shot was masked down to individual hairs, with the anti-aliasing (against original background) removed - meaning no halo or edge problems.

Between the red & green (delete & keep) areas is a blue line that can be cleaned up rather intuitively to extend the mask into soft areas that very nearly match background values, or where high contrast has bleed into the blending area.

I'm still have a few videos to watch to learn the finer aspects of the program, but the learning curve is not bad and all the usual PS shortcuts work (brush size, pan, zoom, etc..). They even do live demo's that you can join on the net. These people have really done their homework.

This is the future of advanced compositing and something to consider if you do much cutting.

-Shea
 
That is the beauty of demoware!

The super short of it:
Global fill the delete area first by loosely brushing the background. Then auto fill with keep. Now turn off Show Object Edges. Switch to the Delete Exact Brush(es) and brush over any remaining spots in the two mask.

Use the Blend Exact brush to cover any area's that feather into the background, such as the rim of the head.. Be aware that turning Edge Blending to none will enable you to detail the mask and blending areas without introducing more edges. Also the Mask Opacity slider can help you see low contrast areas. Watch for stray areas with the alternate mask color as the program bleeds like water on cotton in these areas.

Next do the cut and refine by returning to the Workspace and re cutting after a few more adjustments.. You will want to probe the video and daily live demo's for the more advanced stuff and basic skipped here.

BTW - It does not work in 16 bits per pixel on my system (XP), and you must save as .PSD for the history erasure to work. They need to float the image in full screen mode so we can paint into details from the edge...


-Shea
 
Last edited:
If anyone wants a sample image and project file to work with this 42Mb zip file contains a study I worked on for a while. It still needs work, and I'm still learning the complete toolset.

14 day demo on the site.
 
No I don't work for them :lol: Just a new user seeing if anyone else wants to learn with me.

For basic cuts the learning curve is near zero, for more complex extractions it looks like you just have to explore a few other tools that let you select by color ranges and isolate sections for local analysis.

If you setup a shot with the intention of cutting it, things can go very quickly... doing cutouts on different colored & textured backgrounds so far takes me a bit more time. The Demo artist just plowed through any extraction, so the potential seems high for reaching a good pace flood filling all the vectorization.

I'm cruising the videos one more time in case I missed anything. So far have not synced up with any of the live demos.

Post something if you want it cut, preferably a simple subject on a simple background, maybe with some wispy hair or ragged edges that would be tough in PS.

-Shea
 
I tried Fluid Mask on this recent photo of me


Click above image to go to full-size image file.

It wasn't able to pick my long hairs over my right shoulder. The background and my hair color was too close. I'm going to fiddle with Fluid Mask settings and see if I can get it to do a better job.
 
I took a quick look at your picture and even when I brushed out a region to refine it was difficult, as you know, to generate vectors over the shoulder. This is not a problem but becomes more tedious as you can basically paint in clues for the masking engine (the cutting step) by defining blue areas somewhat manually.

You might see if you can get your image cut in one of those live demos... I have a new camera body today So I'm a bit distracted at the moment.

Also a contrast adjustment layer could be used for the mask, then get discarded after the cut - with some success... maybe use the alpha channel to transfer the cut?

Thanks for contributing.

-Shea
 

Most reactions

Back
Top