Looks very similar to the images of chapter 7 of Light Science and Magic where they talk about lighting glass. The only thing that I see different is the position of the light. The book shows the reflection to be more on the side of the glass. (caused by moving the light past 45 degrees from the camera. (hope that makes sense).
Those highlights are too much. Take them down, not in post but when set up. However, if this is your first glass shot, it's good. And yeah, black bg rocks!
Those highlights are too much. Take them down, not in post but when set up. However, if this is your first glass shot, it's good. And yeah, black bg rocks!
I need less transparent white paper next time.. I had a lot of issues with the stands being reflected... Thanks for the input! The one on the left is a bit much for me as well.
*goes in search of more money for some fancy lighting equipment*
But really, that's a great video. The biggest problem is that my dorm room isn't quite large enough, and I get a lot of bounce back from the walls. Once I move into a larger space, and have more room to work and move around, I'll be able to try some of the things he suggested.
And what about that spotlight?! Looks kinda crappy... (awkward shadow below "aged 12 years."
yeah the spotlight could have filled the label completely. But I think it's an awesome video showing you the setup and all the tricks and the effect of each light.
yeah the spotlight could have filled the label completely. But I think it's an awesome video showing you the setup and all the tricks and the effect of each light.
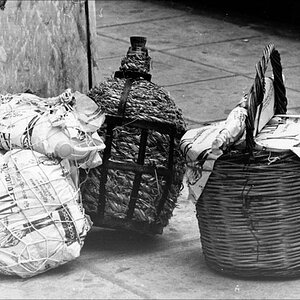
Intead of tracing paper I actually used drawing paper. It was only a two light setup, but I still wanted that soft vertical highlights like in the video. I had a reflector camera left almost directly up against the bottle to get the highlight on the left.
another trick I've tried, if it's big enough, is using a light box. Mine's 36"x36" so I can use that to diffuse light fairly well--even if you want to shoot on black:
I did this inside my lightbox. The black bg is a strip of velvet that was just wide enough to fill the frame. That gave me the nice even highlights/reflections on the sides/stem.
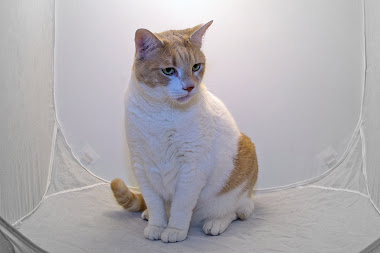
But remember: It's not the size of your lightbox, but the cat inside:
Most lighting stuff (other than the actual lights) can be as cheap as you're willing to put up with depending on how often you use it.
For instance, I use like $1 pieces of foam board and chip bag clamps for flags, because I don't use them that often. Or rolled up paper/tagboard for snoots if you don't use those often.
I would never put up with the hassle and flimsiness if I shot with that stuff every day, but if you're just playing around and learning, or weekend warrioring your glass shoots, you can do pretty much everything in that video to your current setup for $0-10.
I think your shot looks great, but I think it could be more dramatic if it was backlit. For instance, the video previously mentioned shows using reflectors the shape of the bottles behind the bottles in order to add backlighting to the bottles. I have also seen using foam core (black in this case) and cutting a hole exactly the shape of the bottle, then backlighting the foam core so that the light only comes through where the holes are and backlights the bottles.
I don't have a ton of experience with bottle photography, but I found backlighting really key.