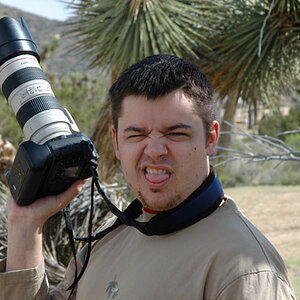
Grand canyon in B&W?

DriedStrawbery

No longer a newbie, moving up!
Joined
Sep 20, 2015
Messages
117
Reaction score
49
Can others edit my Photos
Photos OK to edit
IMG_5613.JPG


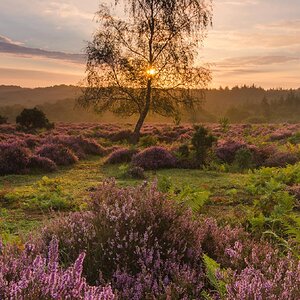
Tried a B&W with grand canyon.

The big shadow in the middle is something I couldn't avoid.

Pls share your thoughts and comments. Thanks!


Sent from my iPhone using Tapatalk
 
Classic.

There is nothing wrong with shadows without detail ... just as there is nothing wrong with shadows with detail. It is entirely up to the photog and his interpretation of the scene. Now, if your intent was to have detail in the shadows and you failed ... now, there is something wrong.

To my eye there is an area that could use some darkening. You have a canyon in the middle of the frame which hangs a 90 degree turn to the top of the ridge. That area, a bit after the turn and up to the top of the ridge, can be darkened a bit to match foreground and right side.
 
Nikon DSLR cameras have a feature called Active D-Lighting that brings up the exposure of dark shadow areas like that one in the middle of your photograph.
You could also think of it as Adaptive Dynamic Range.
Canon DSLRs have the same kind of feature, but use a different name for it.

Did you make a Raw file of the scene, and did you have the camera set to it's Monochrome option?
The Raw file would be in color.
The made in-the-camera monochrome feature at best makes mediocre B&W photographs.
You can make a much nicer B&W image by post processing the color Raw file. You adjust the monochrome response of each color.
5 Steps To Convert RAW Files To B&W
For lightening (dodge) and darkening (burn) just parts of a photo, color or B&W:
Dodge or burn image areas in Photoshop

I did a quick and dirty edit.
Using Adobe Camera Raw's Adjustment Brush I added .5 EV of exposure to the dark shadow in the middle of the shot and to a variety of other dark areas in the scene. Those were all 'local' edits in that I only applied the edit to parts of the frame, not the entire frame, which would be a global edit.
I subtracted .5 EV from the clouds to separate them , light wise, more from the sky. I then added back .5 EV to those parts of the clouds that should be white.
I set the Clarity slider in the Basic panel to +30, a global edit, to boost the mid-tone contrast of the entire photograph.

In Photoshop I added a narrow black border to the photo.

IMG_5613.JPG
 
Thanks @Gary A. & @KmH for the tips and the links.

I only shoot in raw and in color, have edited the pic in LR as much as I have learnt. Tried some of what @KmH suggested.
 
It's a well done photo but, IMO the b&w reduces the impact of this scene which, for me, is all about the beautiful colors.
 
classic and wonderful capture, with pleasurable neutral tuning and very good tone management.
All the best,
sandro
 
I disagree to some degree with Gary as to completely blocked in shadows. I've never seen one when shooting so do not believe they should exist in the printed image...but that's just my sore old eyes speaking. I did agree with Gary as to the 90 degree spot and altered it a bit.

I didn't get as fancy as 101 though in the end, we ended up pretty much in the same place. Perhaps a blend of the two or perhaps just ignore this altogether :) I used midtone masking: basic midtones and expanded midtones to broaden the midrange tones, only using a levels adjustment layers. In an additional expanded midtones mask, I did a brightness contrast layer for some bump here and there. It's kind of like burning and dodging but it is far more selective and far less destructive.

I didn't see the need for so much sky and the slope on the right was too blown for me to do much with so I cropped it and the sky. My shadows are still deeper than I would like but this is a "gray" image and the latitude to go deeper into my repertoire of tricks just wasn't there. Oh, and I gave it a slight clockwise twist in as much to satisfy my sense of horizontal balance and not to suggest it was wrong.

This is just another opinion. It is not intended to be better, only different. In the end, it is the one making the shot that should always determine the eventual outcome.

strawb.jpg
 
Boy did the internet ever screw this edit up...shadows are way too dark. Open it in Photoshop and you'll see the changes more clearly.
 
Thanks @bulldurham ! Will open in PS and check it out.

I tried to follow the 1/3rd rule for the sky, though i see that is quite plain on the top. Thanks for the other details of how you went about editing.

I still need to understand 'tones' - mid/low/high etc, I find a lot of talk with that as references - right from editing to monitors to gamut talk! If anyone has a good article about it, pls share. (I can of course google and find tons, wont know the one that many agree as a good one).

Tony Kuyper explains them as well as anyone I've ever heard. Just type his name into google and his stuff will show up. A lot of it is free Tony Kuyper Photography—TKActions Basic Panel and you should avail yourself of the freebie stuff, but in reality, I think all his actions total are but $39. Sean Bagshaw is also a great source for understanding tonal ranges as per luminosity masking. The Complete Guide to Luminosity Masks
 

Most reactions

Back
Top