Help/Idea with editing in cs5 for this photo

Joined
Aug 7, 2011
Messages
740
Reaction score
84
Location
South Range, WI
Can others edit my Photos
Photos OK to edit
Hi guys!

So I finally got my CS5 and i am a true newbie to that editing program!! I was looking at some tutorials on youtube to start figuring things out.

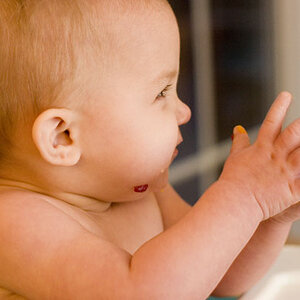
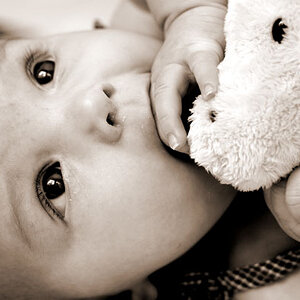
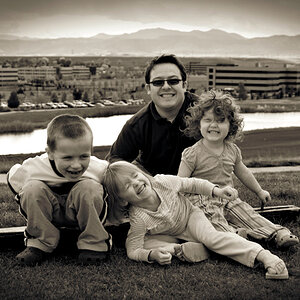
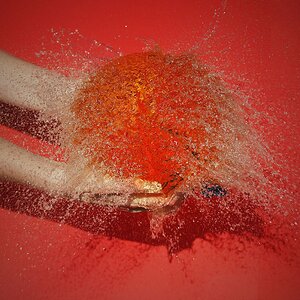
These are some pictures that I had taken for my cousin Jeni of her little guy! I had not gotten my lighting set yet, backdrops, or my new flash. She suprised everybody and came home a month b4 she was supposed to. I know I posted these before asking about posing this time I was wondering if anyone had any helpful ideas on how to better these thru cs5? or if you know of any tutorials in particular that would help me.

To give you an idea of how new to cs5 I am, I just learned how to blur my background and use the lasso tool lol (hey everyone's gotta start somewhere! lol)

My goal for this winter is to really learn cs5 and play around more with backdrops and my awful continuous lighting set.

1

188 by Rebecca Andresen Photography, on Flickr

2

156 by Rebecca Andresen Photography, on Flickr

3

131 by Rebecca Andresen Photography, on Flickr


I would eventually like to start photographing more babies but I need to learn more about the things that I want to study this winter before I even want to ask anyone else to let me photograph their baby lol
 
First thing to learn is how to make you basic density adjustments using either Curves or Levels.These should be made on a separate Adjustment Layer which has been made easier in CS5 new adjustment tools. But that also means you should learn how to use layers and also layer masks (Masks allow you to put the adjustments you make only where you want) The density adjustments will adjust the brightness and contrast of your image

And then you should learn how to make white balance adjustments to you image.

There is so much you can do with just those two things, a well shot image will not need much of anything else except for maybe some sharpening depending on your end use of the image.

Your first Image is actually stunning but shot about a 1/2 stop underexposed. With a quick curves adjustment and then a quick white balance adjustment ( it was low in the red channel) turned it into a wonderful image with great light that you used effectively.

Learn the simple basic things. When you are a good photographer, they are all you need
 
yea i started to play with layers and kinda had no clue what masks were til you just told me!

I've read and talked to others that its easiest to do basic adjustments in lightroom I also have that. Do you find that to be true too? and thanks for the comment!! :)
 
First shot is more like 1.5 stops under had a quick look in lightroom and it wouldn't take much to make it better
 
The most important and useful tool to learn and understand in Photoshop, is Masks. Once you learn how to mask adequately ( there are a million different techniques for selecting, creating, and adjusting masks ) you can then take full control of all of the adjustment tools/layers that CS5 has to offer.
 
yeah don't forget layers is what it says. It took me awhile to get used to having seperate layers and needing to work on a certain layer for the work to show up. It takes some getting use to but once you get going with it something will eventually click. youtube!
 
yea i started to play with layers and kinda had no clue what masks were til you just told me!

I've read and talked to others that its easiest to do basic adjustments in lightroom I also have that. Do you find that to be true too? and thanks for the comment!! :)
Yes you an make all most all the adjustments you may need in Lightroom and do it well and maybe in some ways easier. I'm just not a great fan of lightroom even though I do use it. But then I am probably one of 5 photographers in the world that isn't a huge fan of it. You have to find what you are most comfortable with ( and please don't write and tell me how stupid I am not to like lightroom..I don't care LOL)
 
A better place than Youtube for good Photoshop video tutorials is AbobeTV.com.

Also, with CS5 open if you press the F1 key, it will take you directly to Adobe Community Help (or click Help> Photoshop Help). Click on Photoshop (and Bridge) and find "Getting Started and Tutorials". In the Getting Started section I highly recommend perusing the 'Learn More' section and the 'selecting and masking' subsection.
 
just increase the exposure about a step or two.
 

6466459941_ccecff5d50_bedit by Deanna D Chambers, on Flickr

Just a quick edit, I might have gone a bit over with skin smoothing. But its not so underexposed now. Color is still a bit off as well. In lightroom you can dodge and burn just like you can in CS5 or you can adjust your levels. You can also use the skin smoothing brushes in Lightroom to get the same effect.
 
I suggest you need to learn more about digital photography first.

All of the photos you posted are grossly under exposed.

Because if the way digital photos work, you want to be sure you get as much image data as possible in the brightest EV your camera's image sensor can capture. Otherwise you can wind up with some ugly looking editing artifacts by upping the exposure post process.

It's called ETTR - Expose to the Right - which refers to the image's histogram and the luminocity distribution of the image's pixels.

Getting everything as close to right in the camera is quicker, easier, and you produce more consistant images.

Expose Right

ETTR

Photo Editing Tutorials
 
Hi Rebecca,

Any chance you have RAW files of these?

As noted above they're badly underexposed and if all you have are these JPEGs then the word salvage applies. The closeup of the baby is the least underexposed and can be pretty well repaired. I'm a sucker for new babies so they're worth some effort:


newbaby2.jpg


newbabyp.jpg


Here's a step by step in Photoshop for the baby closeup:

1. Open the layers palette and duplicate the background layer.
2. Select (click on) the dupe (top layer), then in the upper left corner of the layers palette there's a drop box showing the word Normal -- change it to Screen.
3. Use the magnifier to zoom in on the baby's right eye till it's so big it fills the screen.
4. Add a Levels adjustment Layer (icons on bottom of layers palette -- the black/white circle.
5. Find the 3 eyedroppers in the Levels dialog that just opened up and click on the grey (middle) one.
6. With the mouse hovering over the photo right click and from the menu select 5x5 average.
7. Find the line formed by the baby's iris and the white of the eye. You're looking for a grey point, not in the white and not in the iris but between them and about 1/4 down the line from the left (top of baby). Click there with the grey point eyedropper and the color will change. This is tricky, you may need to zoom out to see the photo, undo the change and try again until the baby's color looks good. Mom's hand and the right top of the baby's head will still be yellow/green -- that's next.
8. You can check the baby's skin color with the Color Picker. You'll have to flatten the image (Layer menu). Color Picker is at the bottom of the tool bar (two big squares). With the color picker open click on different spots on the baby's right cheek. The H(ue) values should be in the low to mid teens.
9. Now Mom's hand. From the Image menu find Selective Color. At the bottom of the dialog make sure the radio button is on for Absolute. From the drop box pick Yellow and then set the Yellow slider to -25 and the Cyan slider to -30. Click OK.
10. Form the Image menu pick Hue/Saturation and in the drop box that says Master pick Yellow. Move the Hue slider to -8.
11. Almost there. From the Image menu pick Mode and select Lab color. Then again from the Image menu select Levels. You're looking for the three input sliders under the graph. Slide the white (right) one to the left a little and watch the photo, it should brighten up. You may want to tweak the middle one a couple points to the right.
12. Back to the Image menu and make sure to switch the photo back to RGB.

I ran both photos through a noise filter (not Photoshop).

Joe

P.S. I've kept the full-res versions for now -- send me an email if you want me to send them to you.
 
I suggest you need to learn more about digital photography first.

All of the photos you posted are grossly under exposed.

Because if the way digital photos work, you want to be sure you get as much image data as possible in the brightest EV your camera's image sensor can capture. Otherwise you can wind up with some ugly looking editing artifacts by upping the exposure post process.

It's called ETTR - Expose to the Right - which refers to the image's histogram and the luminocity distribution of the image's pixels.

Getting everything as close to right in the camera is quicker, easier, and you produce more consistant images.

Expose Right

ETTR

Photo Editing Tutorials

Thanks KMH! Yea I def understand that these are grossly under exposed. I hadn't really started reading or really studying photography when I took these. I'lve read A LOT since then, and feel like I've grown in leaps and bounds since these photos! I def am still learning digital photography :) These were just a set of photos that came out AWFUL! In my first post of these I blantly (sp)said much worse about these photos hahaha! I'm just trying to "fix" these to make them look some what presentable. Honestly where I took these I wish babies would freeze in time b/c the light is AWESOME this time of year thru the window in my living room :) I hadn't even learned how shutter speed vs aperature vs iso = good exposure yet. Now I read and re read Understanding Exposure now.

Just takes time to learn :)

Thanks for the links! Muchly appreciated :)
 
Hi Rebecca,

Any chance you have RAW files of these?

As noted above they're badly underexposed and if all you have are these JPEGs then the word salvage applies. The closeup of the baby is the least underexposed and can be pretty well repaired. I'm a sucker for new babies so they're worth some effort:


newbaby2.jpg


newbabyp.jpg


Here's a step by step in Photoshop for the baby closeup:

1. Open the layers palette and duplicate the background layer.
2. Select (click on) the dupe (top layer), then in the upper left corner of the layers palette there's a drop box showing the word Normal -- change it to Screen.
3. Use the magnifier to zoom in on the baby's right eye till it's so big it fills the screen.
4. Add a Levels adjustment Layer (icons on bottom of layers palette -- the black/white circle.
5. Find the 3 eyedroppers in the Levels dialog that just opened up and click on the grey (middle) one.
6. With the mouse hovering over the photo right click and from the menu select 5x5 average.
7. Find the line formed by the baby's iris and the white of the eye. You're looking for a grey point, not in the white and not in the iris but between them and about 1/4 down the line from the left (top of baby). Click there with the grey point eyedropper and the color will change. This is tricky, you may need to zoom out to see the photo, undo the change and try again until the baby's color looks good. Mom's hand and the right top of the baby's head will still be yellow/green -- that's next.
8. You can check the baby's skin color with the Color Picker. You'll have to flatten the image (Layer menu). Color Picker is at the bottom of the tool bar (two big squares). With the color picker open click on different spots on the baby's right cheek. The H(ue) values should be in the low to mid teens.
9. Now Mom's hand. From the Image menu find Selective Color. At the bottom of the dialog make sure the radio button is on for Absolute. From the drop box pick Yellow and then set the Yellow slider to -25 and the Cyan slider to -30. Click OK.
10. Form the Image menu pick Hue/Saturation and in the drop box that says Master pick Yellow. Move the Hue slider to -8.
11. Almost there. From the Image menu pick Mode and select Lab color. Then again from the Image menu select Levels. You're looking for the three input sliders under the graph. Slide the white (right) one to the left a little and watch the photo, it should brighten up. You may want to tweak the middle one a couple points to the right.
12. Back to the Image menu and make sure to switch the photo back to RGB.

I ran both photos through a noise filter (not Photoshop).

Joe

P.S. I've kept the full-res versions for now -- send me an email if you want me to send them to you.

Ysarex

Thank you so much for going WAY WAY WAY above and beyond helping! It was so so so nice of you to explain what you did to these so I can go and try to do these also! I really really appreciate all your help :)
 

Most reactions

New Topics

Back
Top