How do I do that? A pictorial guide to using TPF.

Status
Not open for further replies.

Corry

Flirtacious and Bodacious
Supporting Member
Joined
Feb 5, 2004
Messages
21,168
Reaction score
110
Location
North Central Illinois
Website
corryttc.blogspot.com
Can others edit my Photos
Photos NOT OK to edit
Below is a pictorial guide to using the forum. I have tried to include things that new forum users have trouble with. TPF was my very first forum, and I know it took me a while to learn how to do certain things. :)

If you have any suggestions for more 'how to use the forum' pictorials, please PM me with the suggestion.
 
HOW TO UPLOAD AND POST A PICTURE

There are two ways you can post a picture on TPF. You can host your photos through a third party hosting website, such as SmugMug or Photobucket, or, you can upload directly to the site if you are a TPF Subscriber.


I am going to use Photobucket to demonstrate how to go through a third party hosting site.

Posting from a Third Party Host

First step is signing up, obviously. It's free, and doesn't take long at all.


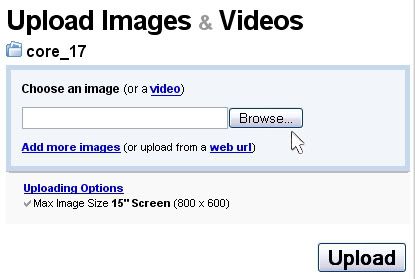
Once you are signed up, you need to upload the pictures you want to post from your computer onto Photobucket. You will notice on your main page of your account, right at the top there is a box for uploading pictures. In this box, click 'Browse'.

PPStep1.jpg


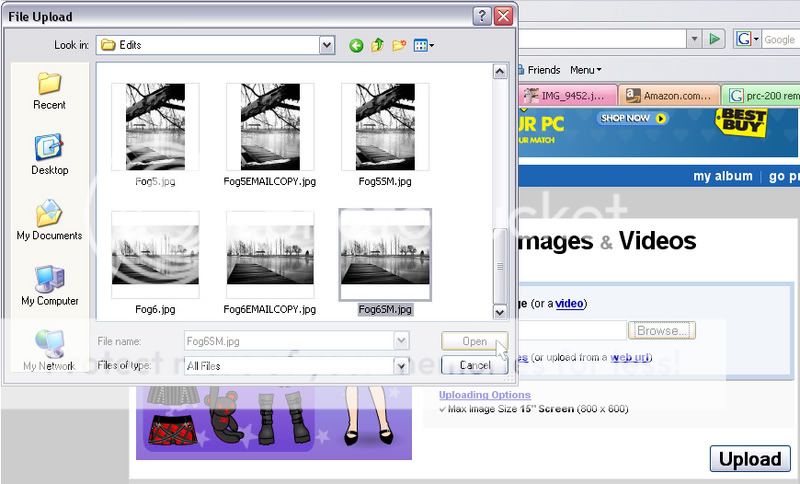
A file browser will pop up. Search through and find the photo you wish to upload...click on it once, and then click 'open'.

PPStep2.jpg


Next click the 'UPLOAD' button. Uploading should only take a few moments, depending on your connection speed and the size of your photo. And remember that your photo should already be sized down for forum viewing before uploading. The maximum size should be no more than 800 pixels wide, and 600 pixels high, in order for it to fit on most screens without having to scroll.


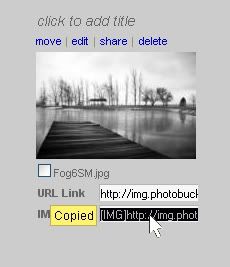
Once uploaded, a thumbnail of your picture will appear down below the upload box. Depending on your photobucket settings, there should be up to three 'tag' boxes below it. You want the one that says 'IMG Code' next to it. Click inside the box once, and it should automatically copy. (if not, just highlight, right click, and copy). A little yellow box will pop up momentarily and say 'copied' when you click.

PPStep3.jpg


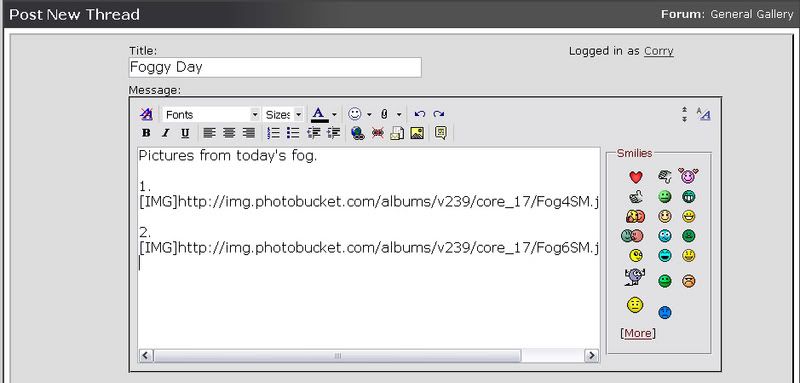
Paste the tagged url that you copied from Photobucket into your text editor box on The Photo Forum, making sure to leave spaces and to number each picture, if you are doing more than one. It's also a good idea, if you have a large amount of images, to split it into more than one thread. This makes it much easier for people to view and comment on your photos.

PPStep4.jpg


Click 'submit thread', and you have just posted your pictures! :D


Posting by uploading directly to the forum.

The other option is uploading directly to the forum. This can only be done if you are a TPF Subscriber.


To do this, open up a new thread edit box, or a new post edit box.

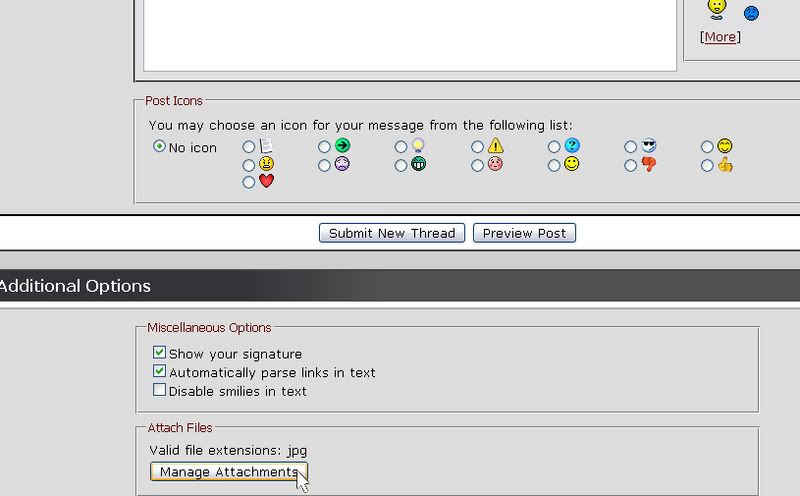
Once inside, scroll down below the text box, to where it says "Additional Options". There will be a heading that says "Attach files', with a button that says "manage attachments.". Click that button.

PPSStep1.jpg


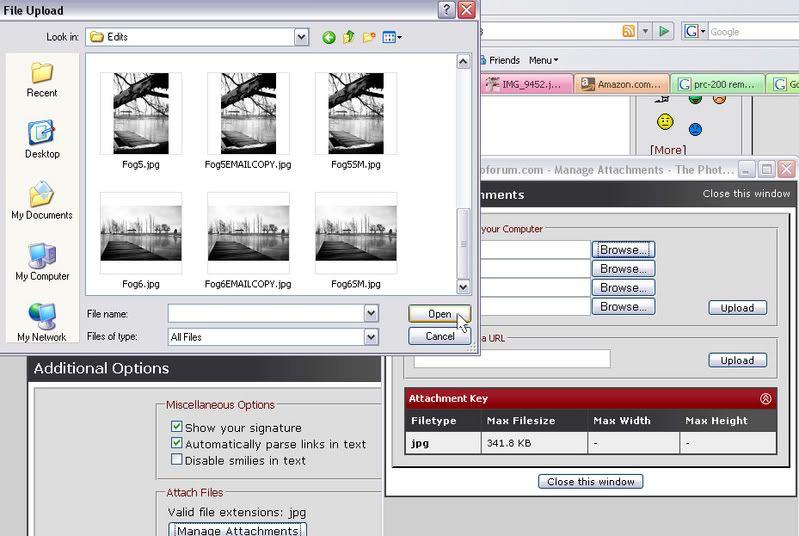
A 'manage attachments' box will then pop up. Click on 'Browse'. This will bring up a file browser box that will allow you to search through your computer files to find the photo you want. Again, the photo should already be sized down for forum viewing, no more than 600 pixels high, or 800 wide. Once you find the one you want, click on it, then click 'open'.

PPSStep2.jpg


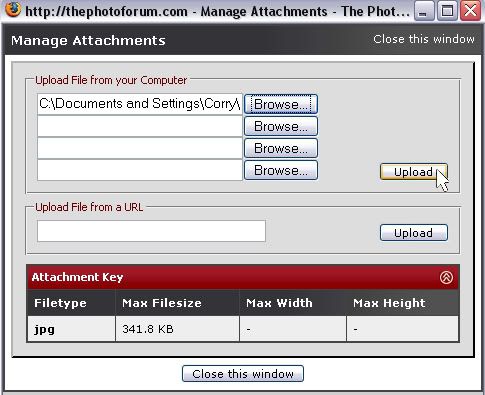
Once you have all the photos you want to upload, click "Upload". This will take a few moments.

PPSStep3.jpg


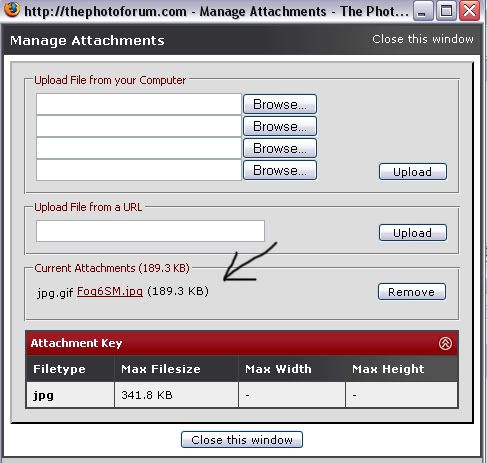
When it is done uploading, it will show up under 'current attachments'. You may then continue to upload if you have more. When you are done, click "close window".

PPSStep4.jpg


At this point, you are back at your 'new thread' or 'new post' edit box. Type in whatever description you wish to type in, then click 'submit thread'. You're pictures will show up as thumbnails that the viewer will click in order to see the full size.

PPSStep5.jpg


Congratulations! You just posted your photos using the direct upload system! :D
 
HOW TO UPLOAD AN AVATAR


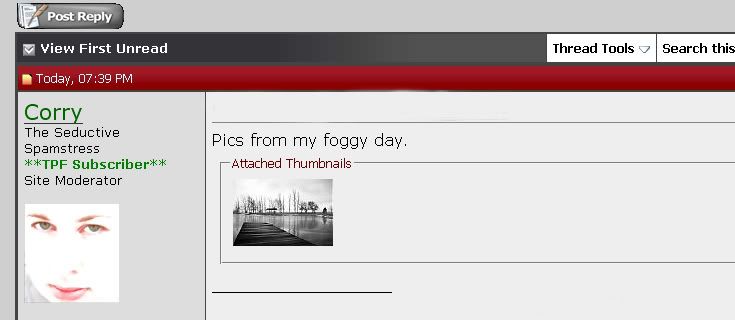
The first step in uploading an avatar is to go to your UserCP, located along the top of the screen in the navigation bar.

UAStep1.jpg


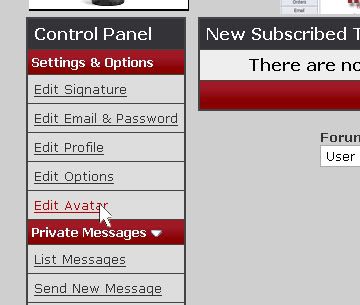
In your UserCP, you will see a link in the control panel on the side that says 'Edit Avatar'. Click on that.

UAStep2.jpg


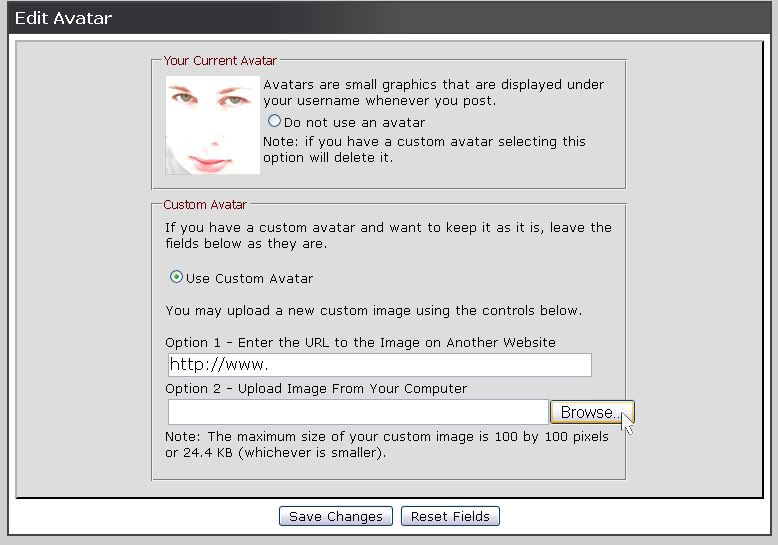
From here, you can upload an avatar from your computer. Next to 'option 2' click 'Browse'.

UAStep3.jpg


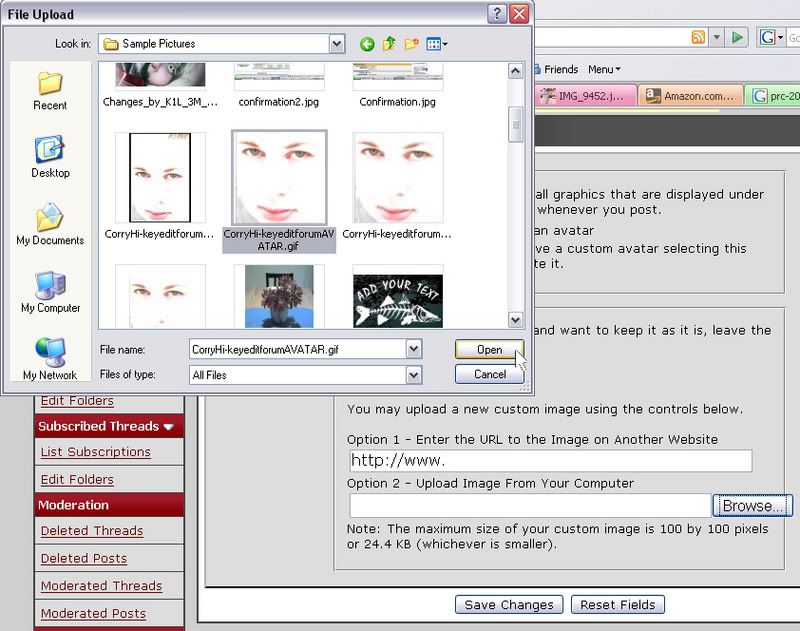
This will bring up a file browser box in which you can upload an avatar from your computer. You must already have the picture sized down to avatar size. The maximum size of your custom image is 100 by 100 pixels or 24.4 KB (whichever is smaller). Click on the picture you want, then click 'open'.

UAStep4.jpg


Next, click 'Save Changes'.

Congratulations! You've uploaded an avatar! :D
 
HOW TO EDIT A SIGNATURE

If you decide you want to have a signature attached to all of your posts, there are a few things you need to remember. The Photo Forum does have signature rules set in place in order to keep the site running quickly, and looking nice. The guidelines are as follows:

The maximum size for any images in signatures be no more than 468W X 60H pixels.

SigSize.jpg


Flash or animated signatures are not allowed.

We are also requesting that lengthy lists of equipment be put in your user profile, not in your signature.


Now, with that in mind, we're ready to learn to edit our signature.

First, click on your UserCP in the upper navigation bar.

UAStep1.jpg


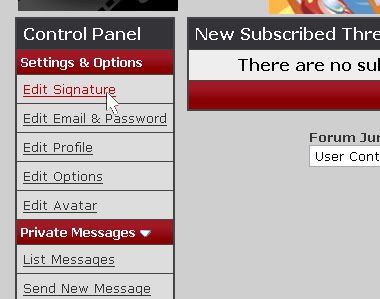
Next, in the control panel on the left side, click on 'Edit Signature'.

ESStep1.jpg


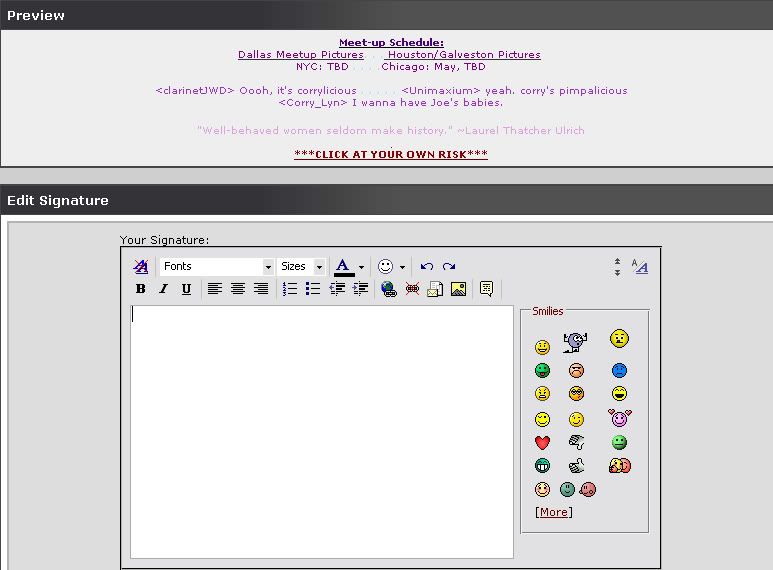
In here, you will be able to edit your signature in a text box that is the same format as when you create/edit a post.

And if you click 'Preview Signature' at the bottom, you will be able to see a preview of your signature above the text box.

ESStep2.jpg


And that's all there is to it!
 
Status
Not open for further replies.

Most reactions

Back
Top