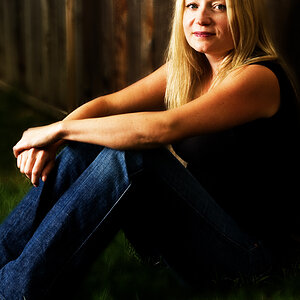
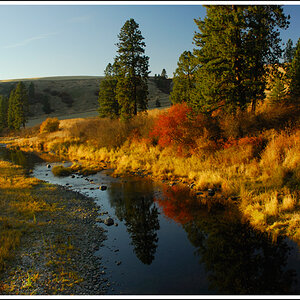
How do I take portraits with dark edges?

A levels adjustment layer & good selection/feathering also works. There are lots of kinds of vignette you can do in Photoshop, and lots of things to put in front of your lens if you want to experiment (do experiment).


You might find this thread interesting too: http://www.thephotoforum.com/forum/showthread.php?t=114478
 
Well, as mentioned, vignetting is difficult to do outside photoshop, and the technique mentioned above is not vignetting, but reverse vignetting. It is a highlight around a person, not a darkening of the edges around the frame of the picture.

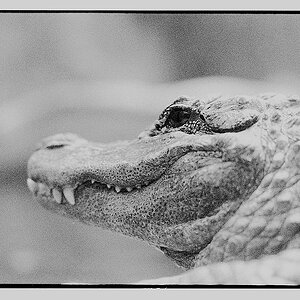
Whats the difference?... besides i think the above image has been darkened around the edges rather than dodged from the middle.
 
not a complete disagreement yet :p... just trying to understand what is ment by 'reverse vignetting' as iv never heard of that before.
 
not a complete disagreement yet :p... just trying to understand what is ment by 'reverse vignetting' as iv never heard of that before.


Lol.. no not a disagreement at all, just a request to know what the difference is, and that IS a fair question.

When you light from behind, it has to be very intense and very controlled (snooted)... it gives the appearance of highlighting the head of the person surrounded by the snooted light. The "vignette effect" will NOT go all the way around the picture, just around where the light fades.

A PS vignette surrounds the complete picture (like a frame perhaps, as your pic shows) and is way more easily controllable, but a little less realisttic looking IMHO. Both have their place.

Example of a PS vignette gone a little more aggressive:

2285811547_5d26909a4b.jpg


I wanted it to have that old 60's postcard look and I did not want the vignette to surround the pic but start low on the sides and round up around the buildings.

This is not what you are look for exactly... you are likely looking at adding a vignette and using it like a frame instead of having it as an element of the picture... but it does portray the idea.
 
Socrates- To be quite honest, I don't know a ton about Photoshop- mostly because I think that good photography shouldn't need Photoshop and I use it as little as possible. Thus the reason I said in my original post that I would be disappointed if the technique is done in Photoshop.

There are a few ways of doing it without Photoshop.

One classic way is to use a matte in front of the lens. This is a black card or heavy paper mask of the right shape, possibly with jagged edges to get the slow fade to black. The lens shades we use on motion picture cameras are still called 'matte boxes' even though they may never be used with mattes.

Doing the equivalent when enlarging traditionally gives a fade to white, but you could just as easily make a fade to black.

Best,
Helen
 
One classic way is to use a matte in front of the lens. This is a black card or heavy paper mask of the right shape, possibly with jagged edges to get the slow fade to black. The lens shades we use on motion picture cameras are still called 'matte boxes' even though they may never be used with mattes.

Thats very old school... and sometimes at times like this, it could very well be the best/simplest way to accomplish a simple task. :)
 
Thanks for the detailed explination... i can see how you might want to make a distinction between the two methods, thats cool, i can understand the difference, however i personally only use the word Vignette as it is discribed in the dictionary i.e. 'an engraving, drawing, photograph, or the like that is shaded off gradually at the edges so as to leave no definite line at the border'... so for me the above is simply vignetting regardless of how the darker edging is achieved. But no biggie, each to thier own ;)
 
This is frigteningly easy to do if you happen to own Nikon's Capture NX.

Here's how you do it.

Click on the Control point tool.

Click on the spot you want darker. Move the slider until it looks like you want it.

Done.
 
Socrates- To be quite honest, I don't know a ton about Photoshop- mostly because I think that good photography shouldn't need Photoshop and I use it as little as possible. Thus the reason I said in my original post that I would be disappointed if the technique is done in Photoshop.

I agree with you here. I responded to your description of PSE as being "lame" while you admitted that you don't know how to use it.

With a bit of an exaggeration, I consider PSE to be 90% of the full PS at 10% of the price. I also do not use it much for the same reason that you don't but I would never call it "lame."
 
This is frigteningly easy to do if you happen to own Nikon's Capture NX.

Here's how you do it.

Click on the Control point tool.

Click on the spot you want darker. Move the slider until it looks like you want it.

Not sure if a control point works the same way in capture NX, Sabbath... example... if the pic is an outdoor portrait, and the complete top 1/2 of the picture is sky, a control point anywhere in the area of the sky darkens all the sky and not the sides or bottom (unless more control points are inserted), but it has no way to define how far away from the subject you want the vignette to start, nor a way to define it only to vignette "X" number of pixels from the edge on all 4 corners in one easy manner.
 
Looks like I need a new version of Photoshop- I don't have a Lens Correct option. Any other suggestions?


Another way to get this effect in photoshop is to duplicate the layer, then darken it. Then use the rectangular marquee tool to select the center of the image, the delete it, feathering the edges quite a bit.

This will create a dark layer on the top with a feathered-edged hole in the middle that lets the normal layer underneath show through.
 
Not sure if a control point works the same way in capture NX, Sabbath... example... if the pic is an outdoor portrait, and the complete top 1/2 of the picture is sky, a control point anywhere in the area of the sky darkens all the sky and not the sides or bottom (unless more control points are inserted), but it has no way to define how far away from the subject you want the vignette to start, nor a way to define it only to vignette "X" number of pixels from the edge on all 4 corners in one easy manner.

It doesn't work the same way as photoshop, you are exactly right.

If you need to do more than one corner, you simply right click on the first control point, duplicate it and drag it to another spot.

Since the points are based on the color area that they are in, not the original, it has the same effect if not more so...

I have PS and Capture, and I have tried it both ways... takes about 1/10th of the time to do it in Capture (I have been using Photoshop at my job since version 2, I am actually pretty quick at it too), since you move one (or at the most) two sliders to make the effect.

It is also a lot easier to tweak in capture because you virtually never have the subject directly in the center of the photo, and you generally need more vignetting on one side than the other... with Capture, you simply move the control point size slider to larger on one side and smaller on the other.

There are a lot of things that Photoshop is the best tool for. This isn't one of them.
 

Most reactions

Back
Top