Bossy
No longer a newbie, moving up!
- Joined
- Nov 15, 2011
- Messages
- 1,372
- Reaction score
- 252
- Can others edit my Photos
- Photos NOT OK to edit
So I just thought I'd put this up, sorry there's no sound or text on the video, I need to figure out how to use iMovie. Anyway, here's the video, and I'll write the step by step following-
So you have your image, you can wb first using ACR, but this will fine-tune that even.
Set yourself up for success, have your workspace set up showing your Info Pallet, your Layers, and your adjustments.
Create a Threshold layer. What this is doing is finding your lightest and darkest range. It will also correct any color casts.
Slide the slider all the way to the left, basically until you see the last pixel/sometimes group of pixels.
Drop a Color Sample dropper on it, and it should show up in your Info pallet. You'll know if you hit it because it will say 0,0,0 on the *right* side of the RGB numbers.
Do the same for lights, going all the way to the left. You'll know you hit it if it says 255 on the *right* side of the RGB numbers.
Now you're going to delete or hide your threshold layer.
At this point you'll want to do global corrections. Density (exposure) and contrast. (Forgot todo this in thread, but change both blending modes to Luminance!) Most images don't actually need much contrast, but thats definitely up to the artist. Now that thats done, create another curves layer, and label it Color (blending -Normal)
Go into the box it says RGB, and select Red. Now look at your numbers. For the 1st dropper, since we did darks, we want all the numbers to match the lowest number, so you're going to grab the bottom corner and slide it either up or over along the edge to match that number. Then in my case I had to match Green, but you get the point, make them all match.
Sometimes it jumps between numbers, you can try putting in a number 1 above or 1 below in the output, but really 1 value isn't going to make a huge difference in most cases.
Do the same for highlights, bringing the top corner across of down to match the highest number.
Now you're going to create a New Layer, go to Edit, Fill, and select 50% gray and normal, press ok. Go to Blending Mode, select difference.
Create another threshold layer, and bring the slider all the way to the left. This is finding your neutral gray. Drop a marker, hide or delete both Gray and Threshold layers.
Go back into your colors and do the same as for the  dark and light, using the center line to follow, slide up or down to match the *middle* number. Your middle gray is usually going to be around 128, but it also depends on the density so it could differ. As long as they are the same R G and B you'll be good.
Tada I think thats it! It sounds/reads MUCH more complicated than it is!
1-When you print, you don't want to clip blacks, so you'll want to find the lowest # your printer is capable of rendering before it just starts seeing them all as black and match to that as well.
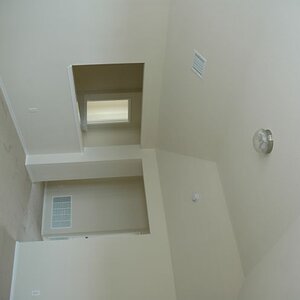
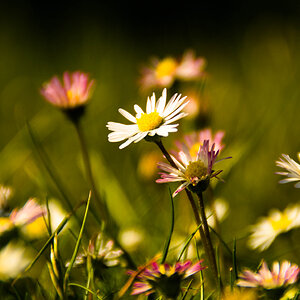
Alright, its been brought to my attention that this wont work for everything. (thanks Bazooka!) If your image looks like this-

It wont work. There needs to be more values than 110, I think is the problem there. I haven't had a personal image yet with ^ problem though.
So you have your image, you can wb first using ACR, but this will fine-tune that even.
Set yourself up for success, have your workspace set up showing your Info Pallet, your Layers, and your adjustments.
Create a Threshold layer. What this is doing is finding your lightest and darkest range. It will also correct any color casts.
Slide the slider all the way to the left, basically until you see the last pixel/sometimes group of pixels.
Drop a Color Sample dropper on it, and it should show up in your Info pallet. You'll know if you hit it because it will say 0,0,0 on the *right* side of the RGB numbers.
Do the same for lights, going all the way to the left. You'll know you hit it if it says 255 on the *right* side of the RGB numbers.
Now you're going to delete or hide your threshold layer.
At this point you'll want to do global corrections. Density (exposure) and contrast. (Forgot todo this in thread, but change both blending modes to Luminance!) Most images don't actually need much contrast, but thats definitely up to the artist. Now that thats done, create another curves layer, and label it Color (blending -Normal)
Go into the box it says RGB, and select Red. Now look at your numbers. For the 1st dropper, since we did darks, we want all the numbers to match the lowest number, so you're going to grab the bottom corner and slide it either up or over along the edge to match that number. Then in my case I had to match Green, but you get the point, make them all match.
Sometimes it jumps between numbers, you can try putting in a number 1 above or 1 below in the output, but really 1 value isn't going to make a huge difference in most cases.
Do the same for highlights, bringing the top corner across of down to match the highest number.
Now you're going to create a New Layer, go to Edit, Fill, and select 50% gray and normal, press ok. Go to Blending Mode, select difference.
Create another threshold layer, and bring the slider all the way to the left. This is finding your neutral gray. Drop a marker, hide or delete both Gray and Threshold layers.
Go back into your colors and do the same as for the  dark and light, using the center line to follow, slide up or down to match the *middle* number. Your middle gray is usually going to be around 128, but it also depends on the density so it could differ. As long as they are the same R G and B you'll be good.
Tada I think thats it! It sounds/reads MUCH more complicated than it is!
1-When you print, you don't want to clip blacks, so you'll want to find the lowest # your printer is capable of rendering before it just starts seeing them all as black and match to that as well.
Alright, its been brought to my attention that this wont work for everything. (thanks Bazooka!) If your image looks like this-

It wont work. There needs to be more values than 110, I think is the problem there. I haven't had a personal image yet with ^ problem though.
Last edited by a moderator:


![[No title]](/data/xfmg/thumbnail/36/36396-f8e84def7352af726df923054b86284f.jpg?1619737549)
