How would you edit these?

Stormchase

No longer a newbie, moving up!
Joined
Oct 6, 2009
Messages
1,191
Reaction score
108
Location
Phoenix Arizona
Can others edit my Photos
Photos OK to edit
I'm trying to get away from the heavy hand on the sliders in Lr. For the longest time I never even had a edit program. I believed it should be correct in camera coming from film. Since I got Lr and Ps I have picked up some bad habits. Help me start to see correctly again!

I have watched numerous tutorials online and it really seems that they even over do it.

I picked a couple shots that I would like to see how some of you might do an edit. Free will to do it how you would. Not sure if a thumb nail or full size will be best for this so im going to do full size.

If you can explain what you do and why it would help. I need to get better at this :)

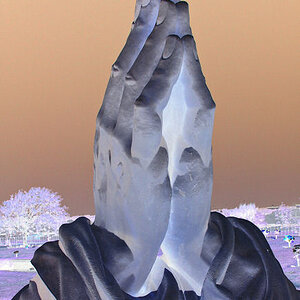
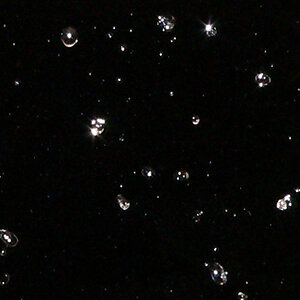
These are unedited from the raw files, I just hit reset.. sorry for the stamp.

1QS9A6523.jpg


1QS9A6526.jpg
 
The range of the scene has surpassed your camera's ability to capture it all.

So I would straighten them, then try to bring down the highlights and bring up the shadows. Also a quick check of the WB, the exposure, and colors. The frames are pretty good, with the first showing more sky, so that's probably going to look better than the second one.
 
There are just my own personal opinions...please treat them as such.

While I do feel that a person should do as good as they can with the camera, as I've often said - photography is a process...it's NOT just about what you do with the camera. The process begins before you even look thru the viewfinder by evaluating the subject and continues up to the final print (be it on photo paper, jpg or otherwise) and processing your images is VERY MUCH a part of that process. I still find some people's views about the use of image editing software to be rather mystifying...in the old days, even the ambitious hobbyist, let alone the avid enthusiast would setup his or her own darkroom to process their own images. No one questioned this and if anything, it was often expected. There were even retouching specialists would print a photo, air brush over any mistakes or imperfections and would then re-shoot the image...it was a VERY common practice that again no one ever really questioned. With the advent of digital imaging however, today people somehow see this same process as cheating, even though it's effectively the same thing. Dodging, burning, cropping, contrast, color correction and even more extreme image alterations...such things have LONG been part of the photographic process. It's not about "cheating", it's about the final print and taking control of your own work.

Since we're using a landscape as a reference here, consider the great Ansel Adams. Would you really consider his work some kind of "cheat"? Yet Adams created many of the post processing techniques many of us use today on a daily basis...the difference is simply that today we use a computer instead of farting with those nasty chemicals while squinting for endless hours in a darkroom.

On that issue alone, while I would always suggest that a person strive to do as well as they can with the camera, don't discount the use of image editing software - it IS part of "the process".


Now since there was an open invite here, I did a quick and dirty edit to the first shot and have included the original for comparison...


I first opened the image in Adobe Camera RAW...even though it's jpeg, I felt the use of ACR would be faster and easier to bring out some of the shadows and color. In short, I brought up the fill light a fair degree, knocked down the Recover Highlights a bit, monkeyed with the exposure and brightness a little, bumped up the clarity, vibrance and saturation, etc.. I then opened the image in Photoshop (I'm using CS 5.0, not that it matters), fixed the crooked horizon, re-cropped the image and did some quick tweaks to levels, saturation and contrast (via layers). I also added just a bit of sharpening as well. Finally I added just a hint of a vignette as an artistic choice to help "focus the eye" towards the center of the composition. Total time - about 3 minutes. Had I of been working with the original RAW image, I suspect I could have sucked even more detail out of the shadows, however even as a jpg, I think it made a fairly substantial difference for the minimal amount of effort I put into it.

Again I would reiterate here that your goal should be your final product...it's NOT strictly limited to what you do with the camera, nor should it be. It's about creating the best image you can and post processing SHOULD be a very large part of that.

Again just my own opinions...I hope they help!
 
How about a little bit of the end of the world??
View attachment 111196

I had resisted the urge to do that when I did my own edit, however it does very much illustrate another wonderful advantage of using a program like Photoshop...editing photos to create a unique piece of art BEYOND the original image. Not to hijack the OP's thread here, but to illustrate, here's a piece of "digital art" I did sometime back.....


The guitar used to create this piece is my Seagull S6 (wonderful acoustic for those of you who also play guitar!) and the original shot itself was initially taken as a reference shot for insurance/security purposes (in case the guitar is ever stolen). Photoshop is of course a GREAT tool for editing and post processing your own work, but it's equally a very powerful creative tool as well, that goes WELL beyond basic image processing.

Just something to consider....again sorry for hijacking the thread!
 
No worry about the hijack lol. That's cool and a nice guitar.

Jim, thanks for the detailed explanation on what you did and your thoughts on post work. I agree it's been used almost since the beginning. I got my start shooting film with a dark room. It was a lot of fun and miss the smell of developer. I think you did a nice edit. There is still full detail in the shadows and I know it's tuff on a jpeg.

How do you link RAW files? I haven't heard of anyone doing that before. I'm very interested in the process.

Thank for the replies, sorry for the delayed responce back.
 
Jim does have a very good point here.

What is your goal? - To reduce the amount of editing you do and so produce a more natural shot. This is a great objective as you will learn some of the editing fundamentals such as; how to separate colour and luminosity, how to preserve and enhance colour, and how contrast, clarity, and saturation reduce the colour in your images.

What have you done? - A quick analysis on the images: Both are shot directly into the sun and fairly harsh light, so the centre of interest and where your eye will be drawn in both will be a featureless white blob. The foreground of both is predominantly under-exposed with virtually no colour information or separation in values. The only parts that are correctly exposed in both are predominantly grey. In jpeg form they surpass your camera's DR and even in raw format will require a lot of heavy-handed slider work to try and recover what you haven't captured in the camera, and so will only ever look over-processed.

In short in order to reduce the amount of editing you've provided two shots where you've no choice but to over-edit. And here lies the valuable lesson.
 
FWIW, this is my edit. I took to the second image more than the first; maybe personal preference? The only thing I didn't really like was the blown out sky to the top right.

Anyways, I edited pretty heavily, so sorry for that.

Global changes: Kept WB as shot. Increased exposure, contrast, shadows, clarity. Decreased highlights, whites, blacks. Straightened it out a bit, cropped it differently. Played around with the B&W mix until I got the colors where I wanted them--mostly changed orange, yellow, green, and aqua. I believe I left the others as is. Did some split toning of the highlights to a yellow, and a blue shadow. Increased the balance. Increased sharpness, applied noise reduction. Profile corrections. Added some grain.

Local changes for the land: increased exposure and shadows. Local changes for the top right of the sky: decreased exposure, highlights, and shadows.

That's how I saw the shot. Some may see it or edit it differently. I wanted to crop out the blown out sky, but it didn't work cropped out, IMO. YMMV. :smile:

Edit-2.jpg
 
Last edited:
For both I performed the following in Lightroom in the following order:
- Cropped and corrected lens distortion (the horizon was slightly bowed and crooked)
- Tweaked slightly the white balance (first photo was slightly warm in my opinion)
- Lowered the highlights and raised the shadow detail areas
- Increased the saturation
- Increased the clarity for the foreground (decreased clarity for background)
- Increased contrast (second photo only)
- Corrected colour hue selectively (first photo had artificial looking blues in my opinion)
- Increased sharpening
- Exported as JPEG

1QS9A6523.jpg
1QS9A6526.jpg
1QS9A6526.jpg
 

Most reactions

New Topics

Back
Top