It's edited why does it still look dull

This was taken by the window but it is cloudy.
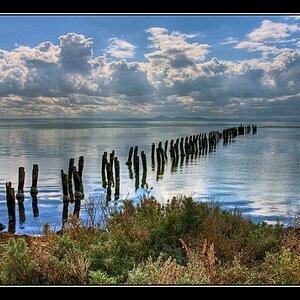
Been there. Done that. Got the tee-shirt to prove it.

Any thing I can purchase that's not expensive for lighting at home ?
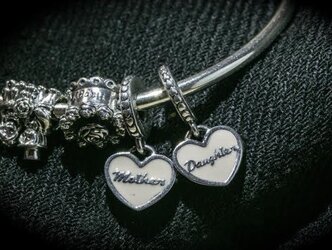
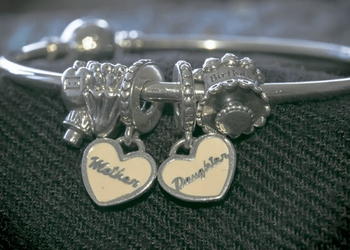
I have much the same problem, but for a different type of photography: Macros.

I may have an "inexpensive" answer. There are these lights I just discovered, regarded as expen$ive in muggles' terms, but not so much in terms of what photographers are used to paying: OttLite. They're alleged to emit light that emulates daylight.

And they're on sale for 50% off right now at JoAnne Fabrics stores.

I just picked up an LED one that looked like it had good dispersion built-in, rated at 445 lumens (probably at the bezel), which is not too shabby, for $30. Initially it looks pretty good. I'm going to have to take a representative collection of objects, photograph them under sunlight (supposed to get some Monday), then this thing, to see how they compare.

But these are not big lights. I'm photographing small stuff, so small lights suffice, but bigger objects... not so much. I think they may work for some forms of product photography, which is what you're doing, too. Might need more than one.
 
For what it's worth, Lightroom (Lr) is one word and being the name of a product is a proper noun and gets capitalized.

Using Lr's Develop model, and it's Basic panel, the Clarity slider adjusts mid-tone contrast.
The Clarity, Vibrance, and Saturation sliders are collectively known as Presence controls, which is why they are together.
The Digital Negative: Raw Image Processing in Lightroom, Camera Raw, and Photoshop (2nd Edition)

Martin Evening describes every feature & function Lr has.
The Adobe Photoshop Lightroom Classic CC Book: Plus an introduction to the new Adobe Photoshop Lightroom CC across desktop, web, and mobile
 
As an Amazon Associate we earn from qualifying purchases.
View attachment 153595 I will get the white paper soon to make this work and also read up on my lighting. For now I tried the not so much junk in the back ground but this was all I had with not so much junk. This time I focused on the little heart. I used flash but diffused it with paper. Probably not much different.

This time is overexposed and the lighting is quite harsh.


Sent from my iPhone using Tapatalk
 
IMG_2132.JPG
I'm going to order my little ottlite in the mean time I've found a dark background and my ISO was more than 1000. Is this picture a little better ?
 
Ooo ... Is there a possible way for someone to edit my pic on their end so that I can see how someone else would have taken this pic ?
 
Is there a possible way for someone to edit my pic on their end so that I can see how someone else would have taken this pic ?

That wont tell you how someone else would take the photo all it would do it tell you how someone else would edit your photo.

to know how someone else would take the photo someone else would have to set up the lighting, stage the item and take the photo.

Having someone edit a poorly lit etc image wont teach you what you need to learn.
 
If nothing else, I've sometimes opened blinds, turned lamp shades, etc. to get as much light on the subject as possible.

The depth of field affects it too. I think it would be better to have the name of the product sharp too so there isn't lettering out of focus that your eyes and brain are trying to read. Look how much of the image is out of focus in the first composition. That to me makes a difference, to have a large part of the image out of focus, and I think it's noticeable here because you see thru the bracelet (if you know what I mean).
 
View attachment 153740 I'm going to order my little ottlite in the mean time I've found a dark background and my ISO was more than 1000. Is this picture a little better ?

If you have a tripod, or can keep the camera steady with a firm support, there is absolutely no need to go to ISO 1,000; using a tripod and the self-timer delay, it's possible to keep the ISO low, where the dynamic range is widest on the sensor of almost any d-slr camera, and then you can stop the lens down to f/11 or f/13 or f/16 and get pretty much everything into focus, and use a sloooow shutter speed, somewhere between 3/4 second and 3 seconds, depending on the brightness of the lights you have.
 
Thank you all for your much needed feedback. I will keep trying to achieve my goal on trying to get this Picture that I'm trying to capture. Hopefully the next photo will be an improvement.
 
In the ones you've posted, I would agree with Vintage snaps on DOF. On my camera for example with a 50mm lens, set f/8 with a distance to subject of 12 inches, only 3/8" total depth would be in focus. Drop to f/1.8 and you only 3/32" in focus, while f/16 that Darell suggested would give you 3/4" . Here's a good online calculator that will help you Online Depth of Field Calculator . Try playing with the numbers and you'll find that the DOF is a function of the lens and the distance from the subject which can also be used to gain DOF.

Darrel gave you some great advice above though he didn't explain why not to use a higher ISO. The higher the ISO the more noise you have in the image, which is not something that's appealing on a product shot.
 
Some selective sharpening, a mid-tone correction and a square crop does wonders for this image. I might suggest you change your editing preferences to it is OK to edit. Lots can be learned from others.
 
Sighh!! Okay , I still don't have my ottlite( in the mail ) I did use led light from my cell phone . I did however use 1/10 shutter speed , no flash ,
F 10 and table top tripod one of these photos were self timer. I know that it's still not near what it's suppose to be but I think I'm kinda getting the concept . I can see how lighting effects photo I did try to edit the photo however im not not in the editing stages yet because I have to do some studying on that. I do see now from the original picture I posted and now these , I see the difference between f 2.8 and f 10 little progress on my end with that but still a little blurry . If on a tripod is this the sharpest it would get ?
 

Attachments

  • IMG_2142.jpg
    IMG_2142.jpg
    77.7 KB · Views: 61
  • IMG_2172.PNG
    IMG_2172.PNG
    182.7 KB · Views: 75

Most reactions

Back
Top