Merging photos

LaFoto

Just Corinna in real life
Staff member
Supporting Member
Joined
Feb 1, 2004
Messages
34,813
Reaction score
822
Location
Lower Saxony, Germany
Can others edit my Photos
Photos NOT OK to edit
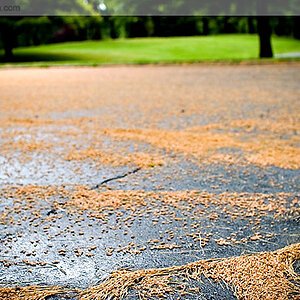
Is there anyone there who can tell me in a few short (and easy!) steps how I can merge two photos of the same scene, one metering the ground (good exposure there but no sky), one metering the sky (good exposure there and almost black ground)? That would be HIGHLY appreciated! (But use extremely simple wording for a dummy like me........... :er: )
 
Do you have photoshop?

If so try this first, it might save you having to fiddle about merging or stitching two photos together...

Go to image>Adjustments>Shadows/Highlights... and play about with the sliders. Tick the more options box if you want more control.

im working with CS2 and cant remember if this option is available on earlier editions

There are a few ways you can merge your photos if this doesnt work. One way would be to draw a marque over the good exposed sky and copy/paste it on to your photo with the good ground exposure then use your eraser (set to brush mode) to rub out the over laying bits on the horizon. This mite not be the best way but it is the easiest for me to explain and quite easy to do

hope that helps
 
It is the Adjustment-Shadows/Highlights-"trick" that I work with in getting those photos into some decent shape that were exposed in the sky to bring that one out, but with some the results are unsatisfactory. I'll show you an example of two photos that I would like to merge, or stitch together (in my case the "good sky" pic is a bit larger on the sky side than its "good ground" counterpart). Have a look:

Good-Sky-Example.jpg


Good-Ground-Example.jpg


(I would work on the sky in the "good-sky-example" a bit more, these are the two "right-from-the-camera-pics"). (Plus these are downsized versions...)
 
Yes lafoto, the Shad/highlight adjustment does work better on some things more than others, just thought it might be worth a try first.

I hope you dont mind me doing this but i had a mess around with your photo and used the copy and paste technique i described above. But this time once i had pasted the good sky onto the good ground i changed that layer to 'Multiply' in the layer pallette options, then once i had erased the the bits with the barn and horizon overlap I change the opacity on the eraser to about 35 and started going over the trees. Its took about 5-10 mins but i think it looks ok. Im sure if you use the original larger pictures and take your time over it, your result would be much better.

goodg.jpg
 
Heya! :D 
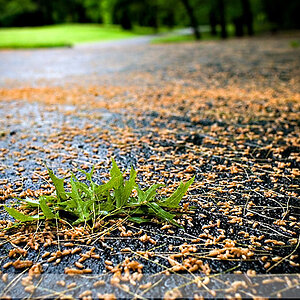
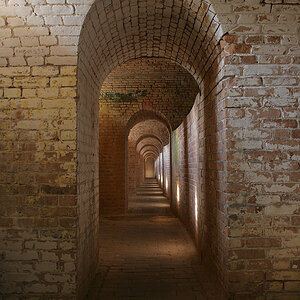
Thank you. This is how I wanted it to look like.
Now I must study your description and try it out myself... I hope I can do it with the larger versions...! :shock:

But, you see, THIS result would not be possible with the highlight/shadow function only. The grass would never come out as green as it really was in yesterday's late afternoon sun! (No sun today. Fog from morning till night).

Oh. One more question: does "draw a marquee over" mean to use the lasso tool, or which tool would I use for that? For that is how I started out and when I copied the "good sky" into the "good ground pic", the sky was in the middle of the picture and not at the top :(
 
What I do to replace the sky in a picture with a better one is this:
Select the "bad" sky that you want to replace, I use the lasso tool, or sometimes the magic wand tool.
Then in the photo with the good sky I use the marquee to select the good sky I want to use and copy it.
Go back to the photo with the bad sky selected do "paste into" (not just paste).
Right click the mouse on the sky that gets inserted and select free transform.
Resize the new sky to fit the area of the old sky.
I'll run the blur tool over the area where the two meet.
I'm no PS expert but this works pretty well for me.
 
I think the best way to do this is to paste one layer on top of the other, give the top one a layer mask, and erase all unwanted parts. Layer masks are your friend.
 
Matt's way works very well unless you have a lot of detail (like small tree limbs etc) that are tough to mask (because you're lazy like me).

This method seems to work pretty well, though I find that I use much higher blur values (I usually start at around 100) than he does.

Actually, I usually combine both methods and sometimes throw a grad layer in there for good measure.

Whatever works, right? :)
 
Just a suggestion. One of the primary rules in working with high contrast, such as your bright sky and your very dark barn is this: Expose for shadows develop for highlights. In other words, when I have this type of situation, which is quite common to photographers, I do one of two things; I meter for the darkest value, ie. the shadows, in your instance, and then expose the photo. (there are other things I do which is to consider, in my case, the films latitudes, or, light sensitivities from the darkest to the whitest, and stop down 1/2 stop from my meters reading, in your case, your cameras.)

You can meter for shadows with your camera if you have an exposure lock. Just take your cameras meter close to the darkest element in your composition take your reading there and then shoot away. This may ease the amount of time spent in Photoshop as you then have a nicely exposed dark and have to adjust only for the skies highlites.

Another item you should place in your camera bag, available at most photo shops, is an 18% gray card. This is what your camera is reading, 18% average of the total light value in your composition. You adjust the gray card to reflect the light that falls on your subject, expose for that reading and you have it.
 

Most reactions

New Topics

Back
Top