Navigation
Install the app
How to install the app on iOS
Follow along with the video below to see how to install our site as a web app on your home screen.

Note: This feature currently requires accessing the site using the built-in Safari browser.
More options
You are using an out of date browser. It may not display this or other websites correctly.
You should upgrade or use an alternative browser.
You should upgrade or use an alternative browser.
NY Institute of photography??
- Thread starter sheyene29
- Start date
sheyene29
TPF Noob!
- Joined
- Apr 26, 2008
- Messages
- 56
- Reaction score
- 2
- Location
- Beautiful British Columbia
- Can others edit my Photos
- Photos OK to edit
Wow, the price is right for proud photography!! From what I can remember NYIP was around 900 bucks. I just might sign up for the proud photography one.
christopher walrath
No longer a newbie, moving up!
- Joined
- Mar 19, 2008
- Messages
- 1,265
- Reaction score
- 25
- Location
- In a darkroom far, far away...
- Website
- home.comcast.net
- Can others edit my Photos
- Photos NOT OK to edit
I looked at the site and I gotta tell you. You get what you pay for. Between this and NYIP, it seems to me like it's comparing apples to raisins. And still the same information can be gained from a couple of good books, an open and quizzical mind and the desire to better your craft.
sheyene29
TPF Noob!
- Joined
- Apr 26, 2008
- Messages
- 56
- Reaction score
- 2
- Location
- Beautiful British Columbia
- Can others edit my Photos
- Photos OK to edit
I looked at the site and I gotta tell you. You get what you pay for. Between this and NYIP, it seems to me like it's comparing apples to raisins. And still the same information can be gained from a couple of good books, an open and quizzical mind and the desire to better your craft.
I do agree, there is a whole lot more with NYIP (they sent me brochures for a couple of years) than PP, however, I just wanted a quick guide for now to get me started to understand my camera a bit more. In order to get to a book store I have to travel over 2 hrs, and I'm too impatient to wait for a book to come from Amazon (I still plan on buying the couple or few that were recommended) to get me going right now. The price of the PP is right around the cost of about 3 or 4 books. LOL, I'm the type of person that wants something right now, and the PP course will satiate that need for the time being until I can get out of town.
I really appreciate all your guys imput!:mrgreen:
spystyle
TPF Noob!
- Joined
- Jan 23, 2009
- Messages
- 7
- Reaction score
- 0
- Can others edit my Photos
- Photos OK to edit
Hello from frozen Maine ")
I stumbled onto this thread via Google. I am so fond of my NYIP course that I was Googling the term "better than NYIP" - curious if there was a better photography course.
I have the sets 1955, 1977, 1987, and 2003 of the NYIP photography course, I am goo goo for them. I also have "understanding exposure" and a few other books, I'd like to get the Ansel Adam's book mention here too, that guy is so cool
So .. let's see .. let's talk about "outdated"
Outdated?
A photography book that's outdated? Is it possible? While my NYIP 1955 is still en route, I can tell you photography hasn't changed since 1977 (that's my oldest photography course)
"Hasn't changed since 1977?" Yes, I said that.
Photography, mechanically speaking, is :
ISO, aperture, and shutter speed.
Then comes all the other stuff like composition and all that.
So if photography is those three things, then why do you need a book that was written in 2009 ? Photography has been those three things since 1977 (I can confirm this) and probably even longer.
So .. let's see .. let's talk about "$900"
Well that's a lot of green I'd rather spend on an AF-S lens (I love Nikon glass)
So how can we get this NYIP thing for less? Well like all things in this world NYIP courses come from eBay ! That's how I got 1955, 1977, 1987, and 2003 sets
Here is how NYIP works :
1. You pay a lot of green
2. They give you the course books, along with some videos and audio.
3. You get assigned a teacher - Here is what you miss by bootlegging the course.
The teacher is a real photographer and he will critique your photos.
"How can I get a real photographer to critique my photos?"
Well that's easy, post your images in a photography forum and you'll get a whole slew of critique from real photographers and n00bs alike. It's like having 100 teachers! I've been doing it with PhotoCamel.com but who knows? Maybe I'll defect to this forum?
So, you've got your NYIP course, 100 "teachers", what else ?
Homework!
I have the book sequence and homework assignments I'll list them in the next post.
Cool huh?
"so what's the difference between the 1977, 1987, and 2003 sets?"
Well there isn't much difference. What if I took a great photography book from 1960 and updated the words a little bit : "Groovy" is removed. "Digital camera" is added, do you see?
Aperture, shutter speed, and ISO (or film speed) in relation to focal length is almost timeless.
So really any set is good. I like my 1987 set best I think. It's retro from childhood (I'm 32 years young)
Cheers,
Craig
I stumbled onto this thread via Google. I am so fond of my NYIP course that I was Googling the term "better than NYIP" - curious if there was a better photography course.
I have the sets 1955, 1977, 1987, and 2003 of the NYIP photography course, I am goo goo for them. I also have "understanding exposure" and a few other books, I'd like to get the Ansel Adam's book mention here too, that guy is so cool
So .. let's see .. let's talk about "outdated"
Outdated?
A photography book that's outdated? Is it possible? While my NYIP 1955 is still en route, I can tell you photography hasn't changed since 1977 (that's my oldest photography course)
"Hasn't changed since 1977?" Yes, I said that.
Photography, mechanically speaking, is :
ISO, aperture, and shutter speed.
Then comes all the other stuff like composition and all that.
So if photography is those three things, then why do you need a book that was written in 2009 ? Photography has been those three things since 1977 (I can confirm this) and probably even longer.
So .. let's see .. let's talk about "$900"
Well that's a lot of green I'd rather spend on an AF-S lens (I love Nikon glass)
So how can we get this NYIP thing for less? Well like all things in this world NYIP courses come from eBay ! That's how I got 1955, 1977, 1987, and 2003 sets
Here is how NYIP works :
1. You pay a lot of green
2. They give you the course books, along with some videos and audio.
3. You get assigned a teacher - Here is what you miss by bootlegging the course.
The teacher is a real photographer and he will critique your photos.
"How can I get a real photographer to critique my photos?"
Well that's easy, post your images in a photography forum and you'll get a whole slew of critique from real photographers and n00bs alike. It's like having 100 teachers! I've been doing it with PhotoCamel.com but who knows? Maybe I'll defect to this forum?
So, you've got your NYIP course, 100 "teachers", what else ?
Homework!
I have the book sequence and homework assignments
I'll list them in the next post.Cool huh?
"so what's the difference between the 1977, 1987, and 2003 sets?"
Well there isn't much difference. What if I took a great photography book from 1960 and updated the words a little bit : "Groovy" is removed. "Digital camera" is added, do you see?
Aperture, shutter speed, and ISO (or film speed) in relation to focal length is almost timeless.
So really any set is good. I like my 1987 set best I think. It's retro
from childhood (I'm 32 years young)Cheers,
Craig
Last edited:
spystyle
TPF Noob!
- Joined
- Jan 23, 2009
- Messages
- 7
- Reaction score
- 0
- Can others edit my Photos
- Photos OK to edit
Here are all 30 lessons, in order, from the course in 2003:
1. Eye of the Photographer
2. Camera and Lens
3. Using Your Camera
4. Film
5. Exposure
6. Developing B&W Film
7. Filters
8. Developing Your Eye
9. Natural Light
10. Available Light
11. Artificial Light
12. Strobe
13. The Perfect Print
14. The Darkroom
15. Basic Portraiture
16. Studio Portraiture
17. Location Portraiture
18. Child and Pet Portraiture
19. Weddings
20. Color Film Processing
21. Photojournalism 1
22. Photojournalism 2
23. Fashion Photography
24. Finishing Touches (Zone System, Darkroom)
25. Copying and Macro Photography
26. Color Printing
27. Glamour and Nude Photography
28. View Camera
29. Advertising and Still Life
30. Architecture
Lessons 1-3 -- Unit 1
Lessons 4-8 -- Unit 2
Lessons 9-14 -- Unit 3
Lessons 15-20 -- Unit 4
Lessons 21-26 -- Unit 5
Lessons 27-30 -- Unit 6
spystyle
TPF Noob!
- Joined
- Jan 23, 2009
- Messages
- 7
- Reaction score
- 0
- Can others edit my Photos
- Photos OK to edit
Unit One Photo Assignment
Photograph #1:
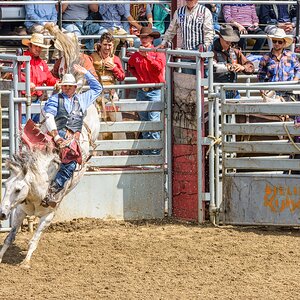
Photograph one or more persons or things in motion. The objective of this picture should be to express a sense of speed. In effect, the subject of this picture should be "action"- that is, the motion itself should be the center of interest.
You have learned three basic techniques to achieve this result:
You can use a very slow shutter speed to blur the image of the moving subject while the background remains sharp.
You can pan the camera to keep the moving subject in sharp focus while blurring the background.
You can use a high shutter-speed to stop the action at its highest point of intensity. (This works best only if the fact of the action is apparent- for example, the ski jumper suspended in midair.)
Photograph #2:
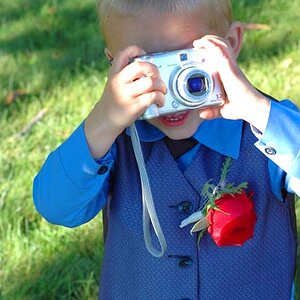
Photograph a subject close up, using selective focus to make your subject stand out. Your subject can be a person, animal, or object. Whatever you choose as your subject, it should fill most of the frame, but some of the background should also be visible.
In this picture we want you to use selective focus to achieve a narrow depth of field so that the subject is in sharp focus and the background is thrown out of focus. Try to choose a location in which the background is busy and would be distracting if it were in focus.
Photograph #3:
Photograph a beautiful outdoor vista. Your location can be in the city or country, at sea, in a forest or the mountains- any outdoor scene you choose. Your objective is to produce a picture that gives a feeling of distance- a feeling of near or far. The subject of this picture is the wonderful view that stretches as far as the eye can see. To achieve this effect, we want you to use the greatest depth of field you can. (Hyperfocal distance)
Unit Two Photo Assignment
Photograph #1:
Photograph any object or person using placement and large size to focus attention on your subject.
In this picture we want you to do two things to make your subject stand out:
First, place your subject up front so that it is larger than everything else in the frame. (See pages 6 and 7 for examples.)
Second, position your subject so that it is off-center in the frame, following the rule of thirds. (See pages 4 and 5 for examples.)
Photograph #2:
Photograph any object, person, or scene using framing to focus attention on your subject. (See pages 8 thru 15 for examples.)
Photograph #3:
Photograph any object, person, or scene using converging lines to focus attention on your subject. (See pages 18 and 19 for examples.)
Unit Three Photo Assignment
Photograph #1:
Photograph an outdoor object- not a person- that you think looks good when lit by direct sun coming at a 45° angle.
Photograph #2:
Photograph an outdoor object- not a person- that you think is enhanced by light coming from the side (either left or right)- that is, 90° side-lighting. The best type of object for this type of side-lighting, as you know, is one in which you want to bring out surface texture or writing.
Photograph #3:
Photograph an outdoor object- not a person- that you think is enhanced by the dramatic effect of the sun coming toward the camera and backlighting the object. Photograph the object in this light.
Photograph #4:
Photograph a person outdoors lit by open shade. If the weather is overcast, you can shoot this almost anywhere since the clouds produce the effect of open shade. If the day is sunny, you will find open shade in outdoor shadow areas- for example, in the shade of a tree or a building.
FILL FLASH: Jerry Rice (via email) said that as long as the fill flash is used to open up the shadows just a bit, with the open shade being the "dominating" light, it is ok. He did "emphasize" that the fill flash has to be very weak and "just enough" to open up shadows under eyes and on face.
Photograph #5A and 5b (Optional):
Set up a simple still-life indoors or outdoors on the floor, the ground, or a table. Your subject might be a vase of flowers or bowl of fruit or any similar grouping of small objects.
Picture 5A:
Shoot this still-life in 45° front-light. Outdoors, this can be sunlight. Indoors, you can use a single incandescent bulb or strobe light. A common mistake indoors is to place the still-life so close to the background wall that a harsh shadow is seen outlining it. Rather, position your subject far enough from the background to either eliminate the wall shadow or soften it.
Picture 5B: Add reflected light to the setup in Picture 5A. Outdoors or indoors, use a reflector board to "open up" the shadows.
Unit Four Photo Assignment
Portraiture
Specific Objectives:
Just because the subject is portraiture, don't ignore all the other skills you've already learned. In particular, when you shoot each of the portraits for this assignment, pay attention to the following basics:
The image should be razor sharp. Focus on the eyes.
The exposure should be absolutely perfect, especially, the exposure of the face.
The lighting should be flattering to the subject's face. Unless you have a good reason to want them, generally avoid deep shadows on the face.
Photograph #1:
On page 7 in Studio Portraiture you are shown how to take successful indoor portraits using only available light from a window. We want you to take a head-and-shoulders portrait this way, using a reflector board to open up the shadow side of the face.
Photograph #2:
On page 13 in Studio Portraiture you are shown how to take professional indoor portraits using a single umbrella light. On [age 18 you are shown how to use a two-light setup. We want you to take a head-and-shoulders portrait using at least one light. If you use just one light, use a reflector board as your fill, as described on page 16.
Photograph #3:
Shoot an indoor location portrait showing a three-quarter or full-length view. Try to express the personality of your subject through the objects in the home or work environment that you choose to include in the picture. Make use of fill light or a reflector board, if needed.
Photograph #4:
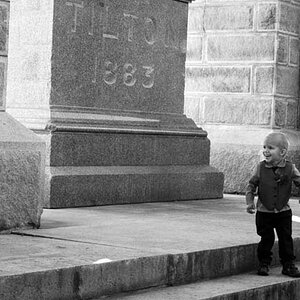
Shoot an outdoor location portrait showing a three-quarter or full-length view. Try to include some "framing" device and avoid excessive distraction in the background.
Photograph #5 (Optional):
Photograph a baby or child or pet using any technique you think appropriate to express the personality of your subject.
Photograph #6 (Optional):
shoot a portrait of a group of people. The people should be posing as a group- that is, they should have some relationship to one another (for example: a family group; a kindergarten class; a Little League team; a group of sales clerks; the winners in a beauty contest.) Try to arrange the individuals in a pattern that gives the picture some visual interest. Avoid lining them up like soldiers.
Unit Five Photo Assignment
You only have to submit three photographs from the following five choices.
You are welcome to submit more!
Photograph #1:
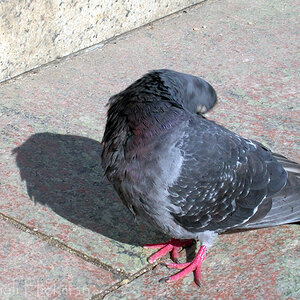
Photograph an animal- a pet, a wild animal, a squirrel in the park, a gnu in the zoo. Try to capture its expression in a way that shows something of its personality. Remember to focus sharply, and aim for an exposure that reproduces all the important highlights and shadows.
Photograph #2:
Submit a picture that you think could be used as a news picture by a newspaper or magazine. If you need inspiration, you might tie it to the next major holiday. Or consider local "news" situations such as fires, accidents, ribbon cuttings, award presentations. Be sure to stress people in this picture. That's what newspaper and magazine editors want to see. Your photograph may either be "straight news" or it can be "human interest."
When submitting this picture to NYI attach a caption as if you were submitting it to a newspaper or magazine.
Photograph #3:
Shoot a sports photograph that would be appropriate for a newspaper or magazine. Consider Little League or local school games. Don't forget what you learned in Unit One about expressing motion. Use the technique that you think will work best- a fast shutter speed or panning. (But in this case avoid using a slow shutter speed without panning because most publications are reluctant to publish news photographs that show blurring of the main subject.)
Submit a caption along with the photograph, using the format described for Photograph #2.
Photograph #4:
Select a fashion picture from a magazine, and then try to re-create it as closely as possible. The picture you select should be one you find appealing, and should be simple enought with respect to garment, location, and props for you to reproduce its mood without major expense to you.
You don't have to reproduce the exact garment- just use something that is similar in general appearance.
Use this assignment as an opportunity to see how well your expert direction can turn your friend into a fashion model.
Use your imagination and ingenuity.
Submit the original magazine picture (or Xerox copy) along with your photograph.
Photograph #5:
Make a close-up or macro picture of a flower, insect, or any other tiny object. Fill the frame with your subject... and be sure to focus precisely!
Unit Six Photo Assignment
You only have to submit four photographs from the following six choices.
You are welcome to submit more!
Photograph #1:
Look through consumer magazines and select an advertisement containing a product photograph that appeals to you. It should contain items and/or products that are easy for you to obtain. We want you to try to make an exact duplicate of the photograph in the ad. Do not simply photograph the picture in the ad. Duplicate the setup and shoot it as best you can.
Submit your photo without any of the words or type that are in the ad. Also, enclose the page from the magazine (or a Xerox copy) so that your instructor can compare your picture with the original.
Photograph #2:
Photograph the exterior of a building so that it is clear, sharp, and distortion-free. The walls should all be straight. Try to wait for natural lighting that you think best shows the character and texture of the building.
Photograph #3:
Photograph the interior of a home, apartment, or office. Avoid linear distortion. If possible, try to combine added lighting with the existing illumination. Move or position objects so that the interior looks interesting.
Photograph #4:
Photograph the exterior of a lit-up house, building, or city skyline at night using the techniques you learned in Lesson Five- Exposure.
Photograph #5:
Photograph a model (male or female) either clothed or unclothed. The object is to make a picture that says glamour.
Photograph #6:
Submit a head-and-shoulders portrait of a person whose portrait you have not submitted previously. Concentrate not only on the pose and lighting, but also on the "camouflage" techniques you learned to minimize the prominence of any facial defects. Try to bring out the personality of your subject.
Photograph #1:
Photograph one or more persons or things in motion. The objective of this picture should be to express a sense of speed. In effect, the subject of this picture should be "action"- that is, the motion itself should be the center of interest.
You have learned three basic techniques to achieve this result:
You can use a very slow shutter speed to blur the image of the moving subject while the background remains sharp.
You can pan the camera to keep the moving subject in sharp focus while blurring the background.
You can use a high shutter-speed to stop the action at its highest point of intensity. (This works best only if the fact of the action is apparent- for example, the ski jumper suspended in midair.)
Photograph #2:
Photograph a subject close up, using selective focus to make your subject stand out. Your subject can be a person, animal, or object. Whatever you choose as your subject, it should fill most of the frame, but some of the background should also be visible.
In this picture we want you to use selective focus to achieve a narrow depth of field so that the subject is in sharp focus and the background is thrown out of focus. Try to choose a location in which the background is busy and would be distracting if it were in focus.
Photograph #3:
Photograph a beautiful outdoor vista. Your location can be in the city or country, at sea, in a forest or the mountains- any outdoor scene you choose. Your objective is to produce a picture that gives a feeling of distance- a feeling of near or far. The subject of this picture is the wonderful view that stretches as far as the eye can see. To achieve this effect, we want you to use the greatest depth of field you can. (Hyperfocal distance)
Unit Two Photo Assignment
Photograph #1:
Photograph any object or person using placement and large size to focus attention on your subject.
In this picture we want you to do two things to make your subject stand out:
First, place your subject up front so that it is larger than everything else in the frame. (See pages 6 and 7 for examples.)
Second, position your subject so that it is off-center in the frame, following the rule of thirds. (See pages 4 and 5 for examples.)
Photograph #2:
Photograph any object, person, or scene using framing to focus attention on your subject. (See pages 8 thru 15 for examples.)
Photograph #3:
Photograph any object, person, or scene using converging lines to focus attention on your subject. (See pages 18 and 19 for examples.)
Unit Three Photo Assignment
Photograph #1:
Photograph an outdoor object- not a person- that you think looks good when lit by direct sun coming at a 45° angle.
Photograph #2:
Photograph an outdoor object- not a person- that you think is enhanced by light coming from the side (either left or right)- that is, 90° side-lighting. The best type of object for this type of side-lighting, as you know, is one in which you want to bring out surface texture or writing.
Photograph #3:
Photograph an outdoor object- not a person- that you think is enhanced by the dramatic effect of the sun coming toward the camera and backlighting the object. Photograph the object in this light.
Photograph #4:
Photograph a person outdoors lit by open shade. If the weather is overcast, you can shoot this almost anywhere since the clouds produce the effect of open shade. If the day is sunny, you will find open shade in outdoor shadow areas- for example, in the shade of a tree or a building.
FILL FLASH: Jerry Rice (via email) said that as long as the fill flash is used to open up the shadows just a bit, with the open shade being the "dominating" light, it is ok. He did "emphasize" that the fill flash has to be very weak and "just enough" to open up shadows under eyes and on face.
Photograph #5A and 5b (Optional):
Set up a simple still-life indoors or outdoors on the floor, the ground, or a table. Your subject might be a vase of flowers or bowl of fruit or any similar grouping of small objects.
Picture 5A:
Shoot this still-life in 45° front-light. Outdoors, this can be sunlight. Indoors, you can use a single incandescent bulb or strobe light. A common mistake indoors is to place the still-life so close to the background wall that a harsh shadow is seen outlining it. Rather, position your subject far enough from the background to either eliminate the wall shadow or soften it.
Picture 5B: Add reflected light to the setup in Picture 5A. Outdoors or indoors, use a reflector board to "open up" the shadows.
Unit Four Photo Assignment
Portraiture
Specific Objectives:
Just because the subject is portraiture, don't ignore all the other skills you've already learned. In particular, when you shoot each of the portraits for this assignment, pay attention to the following basics:
The image should be razor sharp. Focus on the eyes.
The exposure should be absolutely perfect, especially, the exposure of the face.
The lighting should be flattering to the subject's face. Unless you have a good reason to want them, generally avoid deep shadows on the face.
Photograph #1:
On page 7 in Studio Portraiture you are shown how to take successful indoor portraits using only available light from a window. We want you to take a head-and-shoulders portrait this way, using a reflector board to open up the shadow side of the face.
Photograph #2:
On page 13 in Studio Portraiture you are shown how to take professional indoor portraits using a single umbrella light. On [age 18 you are shown how to use a two-light setup. We want you to take a head-and-shoulders portrait using at least one light. If you use just one light, use a reflector board as your fill, as described on page 16.
Photograph #3:
Shoot an indoor location portrait showing a three-quarter or full-length view. Try to express the personality of your subject through the objects in the home or work environment that you choose to include in the picture. Make use of fill light or a reflector board, if needed.
Photograph #4:
Shoot an outdoor location portrait showing a three-quarter or full-length view. Try to include some "framing" device and avoid excessive distraction in the background.
Photograph #5 (Optional):
Photograph a baby or child or pet using any technique you think appropriate to express the personality of your subject.
Photograph #6 (Optional):
shoot a portrait of a group of people. The people should be posing as a group- that is, they should have some relationship to one another (for example: a family group; a kindergarten class; a Little League team; a group of sales clerks; the winners in a beauty contest.) Try to arrange the individuals in a pattern that gives the picture some visual interest. Avoid lining them up like soldiers.
Unit Five Photo Assignment
You only have to submit three photographs from the following five choices.
You are welcome to submit more!
Photograph #1:
Photograph an animal- a pet, a wild animal, a squirrel in the park, a gnu in the zoo. Try to capture its expression in a way that shows something of its personality. Remember to focus sharply, and aim for an exposure that reproduces all the important highlights and shadows.
Photograph #2:
Submit a picture that you think could be used as a news picture by a newspaper or magazine. If you need inspiration, you might tie it to the next major holiday. Or consider local "news" situations such as fires, accidents, ribbon cuttings, award presentations. Be sure to stress people in this picture. That's what newspaper and magazine editors want to see. Your photograph may either be "straight news" or it can be "human interest."
When submitting this picture to NYI attach a caption as if you were submitting it to a newspaper or magazine.
Photograph #3:
Shoot a sports photograph that would be appropriate for a newspaper or magazine. Consider Little League or local school games. Don't forget what you learned in Unit One about expressing motion. Use the technique that you think will work best- a fast shutter speed or panning. (But in this case avoid using a slow shutter speed without panning because most publications are reluctant to publish news photographs that show blurring of the main subject.)
Submit a caption along with the photograph, using the format described for Photograph #2.
Photograph #4:
Select a fashion picture from a magazine, and then try to re-create it as closely as possible. The picture you select should be one you find appealing, and should be simple enought with respect to garment, location, and props for you to reproduce its mood without major expense to you.
You don't have to reproduce the exact garment- just use something that is similar in general appearance.
Use this assignment as an opportunity to see how well your expert direction can turn your friend into a fashion model.
Use your imagination and ingenuity.
Submit the original magazine picture (or Xerox copy) along with your photograph.
Photograph #5:
Make a close-up or macro picture of a flower, insect, or any other tiny object. Fill the frame with your subject... and be sure to focus precisely!
Unit Six Photo Assignment
You only have to submit four photographs from the following six choices.
You are welcome to submit more!
Photograph #1:
Look through consumer magazines and select an advertisement containing a product photograph that appeals to you. It should contain items and/or products that are easy for you to obtain. We want you to try to make an exact duplicate of the photograph in the ad. Do not simply photograph the picture in the ad. Duplicate the setup and shoot it as best you can.
Submit your photo without any of the words or type that are in the ad. Also, enclose the page from the magazine (or a Xerox copy) so that your instructor can compare your picture with the original.
Photograph #2:
Photograph the exterior of a building so that it is clear, sharp, and distortion-free. The walls should all be straight. Try to wait for natural lighting that you think best shows the character and texture of the building.
Photograph #3:
Photograph the interior of a home, apartment, or office. Avoid linear distortion. If possible, try to combine added lighting with the existing illumination. Move or position objects so that the interior looks interesting.
Photograph #4:
Photograph the exterior of a lit-up house, building, or city skyline at night using the techniques you learned in Lesson Five- Exposure.
Photograph #5:
Photograph a model (male or female) either clothed or unclothed. The object is to make a picture that says glamour.
Photograph #6:
Submit a head-and-shoulders portrait of a person whose portrait you have not submitted previously. Concentrate not only on the pose and lighting, but also on the "camouflage" techniques you learned to minimize the prominence of any facial defects. Try to bring out the personality of your subject.
spystyle
TPF Noob!
- Joined
- Jan 23, 2009
- Messages
- 7
- Reaction score
- 0
- Can others edit my Photos
- Photos OK to edit
Over the years some of the book's titles changed.
18. Child and Pet Portraiture
(1987 this is called Child photography)
21. Photojournalism 1
(1987 instead called Press Photography)
22. Photojournalism 2
(1987 called news feature and photojournalism)
extra : shooting in color (1987) ?
18. Child and Pet Portraiture
(1987 this is called Child photography)
21. Photojournalism 1
(1987 instead called Press Photography)
22. Photojournalism 2
(1987 called news feature and photojournalism)
extra : shooting in color (1987) ?
spystyle
TPF Noob!
- Joined
- Jan 23, 2009
- Messages
- 7
- Reaction score
- 0
- Can others edit my Photos
- Photos OK to edit
Well that's that. I hope someone finds it useful. I really like my NYIP courses
The reason I bought so many was because I had incomplete courses. Eventually I had 2.5 complete sets and I gave one set to my buddy.
I look forward to receiving the 1955 course, that'll be really retro
Have fun!
Craig
The reason I bought so many was because I had incomplete courses. Eventually I had 2.5 complete sets and I gave one set to my buddy.
I look forward to receiving the 1955 course, that'll be really retro
Have fun!
Craig
sheyene29
TPF Noob!
- Joined
- Apr 26, 2008
- Messages
- 56
- Reaction score
- 2
- Location
- Beautiful British Columbia
- Can others edit my Photos
- Photos OK to edit
Thanks spystyle for the info, and the tips!!
spystyle
TPF Noob!
- Joined
- Jan 23, 2009
- Messages
- 7
- Reaction score
- 0
- Can others edit my Photos
- Photos OK to edit
Thanks spystyle for the info, and the tips!!
You're welcome
I have a new tip as well !
Kodak put out a series of books that is kinda similar to the NYIP course, retro goodness from the 80's - later they rolled up all the books into one gigantic mega-tome called "Kodak's complete book of photography" - weighing in at 480 pages (478 for the 1994 version) it is a complete course in one giant book.
Here are some purchasing links :
Amazon :
Amazon.com: Kodak Complete Book of Photography
eBay (notice the 'stores' below the auctions, they are easy to miss)
complete book photography kodak, Books items on eBay.com
I got mine off eBay for like $12. I recommend it along with the NYIP course (versions post 1979) and the book for your specific camera can be very helpful. I just recently switched to a Nikon D40 and AF-S lenses and got the "Nikon D40 field guide" by David Busch. I think buying a printed guide specific to your camera can be helpful for getting to know it's various foibles.
I did finally get the 1955 NYIP course I mentioned in a previous post - WOW that was weird. It may as well be from a different planet as far as educational material is concerned. The cameras of 1955 did not operate the same ours do today. While the books were entertaining to look at, they were not very useful in getting "photo-smart".
But from 1979 onward we have been shooting the same, basically, we have:
1. Shutter speed
2. ISO (also known as "film speed")
3. Aperture
dictating the exposure, though modern cameras automate most of that, those three elements are still at work for each photo we make.
Happy shooting!
Craig
PJ5000
TPF Noob!
- Joined
- Apr 25, 2009
- Messages
- 14
- Reaction score
- 0
- Location
- Southeast
- Can others edit my Photos
- Photos NOT OK to edit
I have been taking their course for a few weeks. They are accredited by the Distance Education Training Council (DETC). www.detc.org, not sure if they have tution assistant but their course is covered by the GI Bill, so if you are overseas because you are military you can check to see if you quailify. I also live in a remote area and would have to travel too far for traditional classes. The course is all in book form, CD and DVD. It does seem to be updated to me, more digital than film, although both are discussed. I can't tell you yet if it is worth the money yet, but so far I am satisfied. The CD's are a little boring, the instructors are a long winded. I have learned a few things I didn't know though. Mostly I just want some technical training in lighting, how to run a buisness and so on. Mostly I use natural light and don't have a studio, but someday I hope too. Hope this helps.
Most reactions
-
 427
427 -
 287
287 -
 281
281 -
 265
265 -
 222
222 -
 198
198 -
 182
182 -
 179
179 -
 164
164 -
 164
164 -
 150
150 -
 131
131 -
 119
119 -
 95
95 -
I
94
Similar threads
- Replies
- 10
- Views
- 473
- Replies
- 1
- Views
- 370
![[No title]](/data/xfmg/thumbnail/42/42467-e93a2a1ecfbab434ac7d27c9d0dd0a02.jpg?1619740193)
![[No title]](/data/xfmg/thumbnail/41/41781-7dcfd2ee71d4a453b4ad9fb5c7e723f1.jpg?1619739890)